Master Bath – Wiring Update

Before I start priming the walls in the master bath, I need to take care of a little problem I discovered a while ago.  When the previous owners put in a pool, they wired the pool light switch into the master bathroom.  However, the contractor cut some corners on that install.

See for yourself.

wp_20170429_17_46_07_pro

I’m not entirely sure how an inspector would have dealt with something like this other than maybe freaking out.  If it isn’t obvious, this is a two-gang box (with the side cut out of it for some reason) and a third switch is attached directly to the wall plate.

I purchased a “old work” three-gang box (and also a new AC filter which would be employed soon after).  I made sure to document the wiring of all the three way switches.  I’m not going through that crap again.

wp_20170429_18_02_45_prowp_20170429_18_01_57_prowp_20170429_18_02_28_pro

Then I used a hand saw and cut out the old box.  I broke it apart with a pry bar and it’s lost to the inside of the wall now.

wp_20170429_18_10_38_pro

wp_20170429_18_12_09_pro

I disconnected the switches, ran the cables through the new work box, then fitted the box and reattached the switches.

wp_20170430_09_12_48_pro

Like all the other rooms in the house, these will be replaced with Adorne switches.  It’s good to have a nice, new, deep box to install into.

Weekend Project – Bed Repair

So, waking on up Sunday, I had a house with no AC.  That wasn’t the only problem.  My mattress has been developing a pit.  I was sorely disappointed in this, because I had a new Purple mattress and surely, this modern marvel could not have developed a pit in six months.  Some part of me thought maybe I had broken a slat or two in the bed frame.  I have heard it cracking, so it seemed likely.

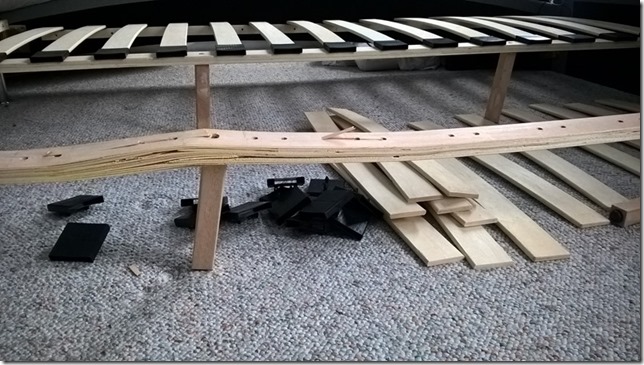
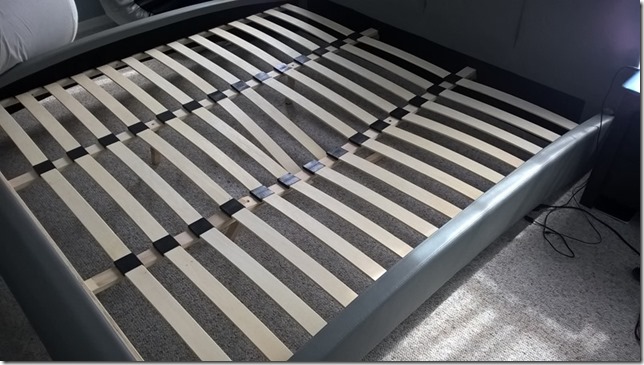
I pulled the 140 lb mattress off and was amazed at the damage underneath.
wp_20170430_10_12_38_prowp_20170430_10_12_48_prowp_20170430_10_22_41_pro

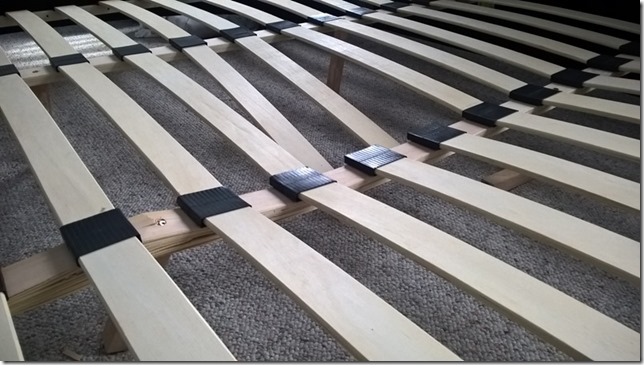
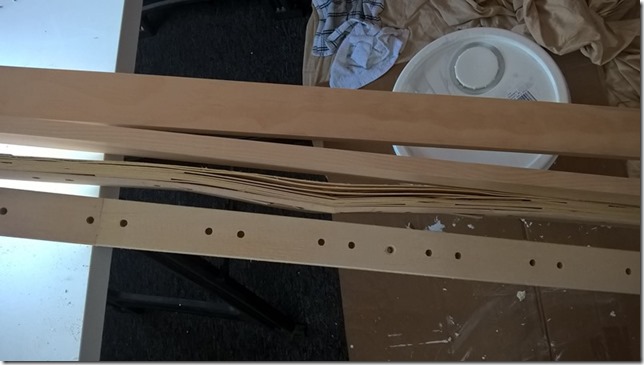
After a brief consideration, I realized how this happened.  While the quality of the support beams for the slats is clearly inferior, the real damage happened when the GF and I moved the bed closer to the wall.  The vertical support legs were dragged on the carpet (weighted down with 140 lbs of mattress.) and were thus bent at a sharp angle.  Getting on the bed after that just finished the job and they collapsed sideways.

So, then, upgrade time!  The quality of the bed frame has been 2nd-rate at best.  I recall the day after the frame was installed, I upgraded the screws on the front wood strip because they barely got into the wood of the frame.  I did some shopping for mattress foundations.  I could get one for under $200.  But I didn’t like the idea of having this box on the floor, preventing anything from being put under the bed.  Other foundations were all too tall, with each bragging how much higher they would hold the mattress.  I didn’t need 14 inches.  I needed something like 8.

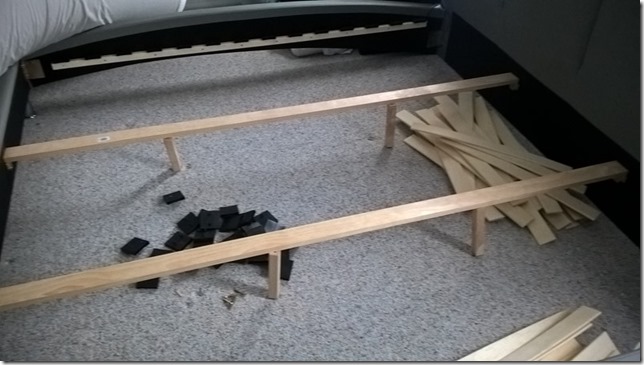
The more DIY plan would be to replace the support beams.  I could do that, I think.  I went to Lowes and picked up two 2×8 premium pine boards for $15.  The quality difference is substantial.
wp_20170430_13_02_47_pro

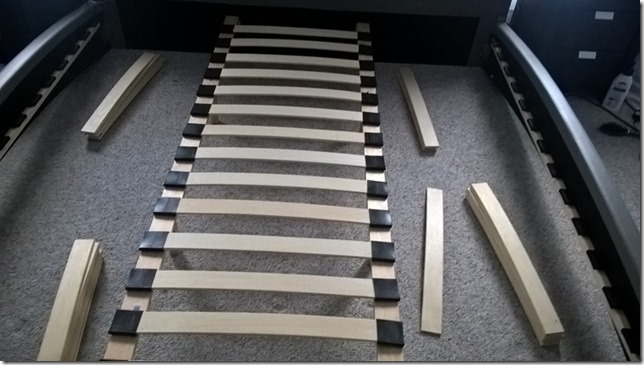
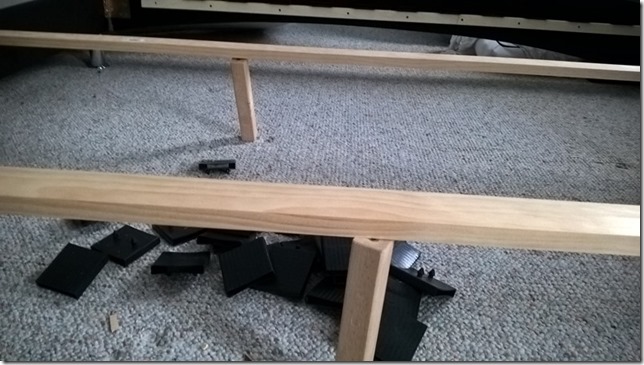
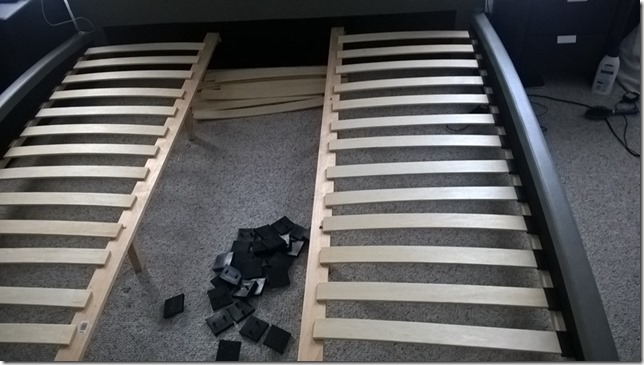
After cutting them to length and mounting the end brackets and midway supports, I did a test fit of the slats.
wp_20170430_13_15_25_prowp_20170430_13_29_56_prowp_20170430_13_15_19_pro

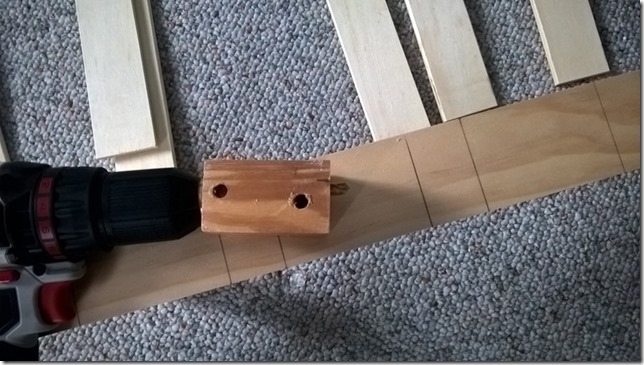
There wasn’t really any way around it.  I had to drill all the holes for the plastic mounting brackets.  I lined up the old support beam with the new one and marked lines for each hole.  Because I just wanted to drill part way into the support and not all the way through, I learned a trick to use a spacer block to keep your drill bit at a consistent depth.  You can see the tip of the bit coming out the bottom of the block.  You can also see all the lines I need to drill holes in.
wp_20170430_14_24_34_pro

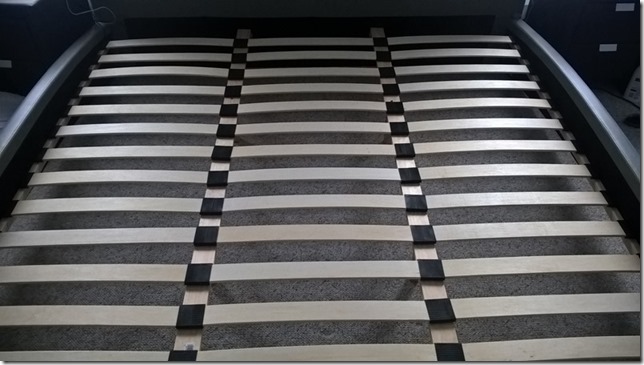
Although tedious, it worked as well as I could have hoped.  I mounted the middle slats with the brackets in all the drilled holes, then finished up with the outer slats.  The testing of the bed afterwards was much needed and the mattress had no sag at all.  And spending $15 instead of $200?  Excellent.  I’m going to need that money for the AC repair.
wp_20170430_14_49_20_prowp_20170430_14_43_44_pro

Weekend Project – Clean AC Unit

Sunday morning, I woke up and the house was 77 degrees.  I pretty much knew what happened.  Every once in a while, my AC unit “freezes up”, not literally, but  it just stops running.  The thermostat says the unit is running, the interior fans are running, but the compressor is not.  Solution?  Yank the thermostat off the wall, wait a few seconds, then pop it back on.  In a  minute or so, the compressor runs again and everything goes back to normal.

I figured I’d take the downtime opportunity first thing in the morning to clean everything up.  It just happens I bought a new AC filter the previous evening.  I installed that, then went out to the compressor.

You are supposed to clean the compressor fins on a regular basis.  I never have in the decade I’ve owned the house.  So it’s time now.

First I shut off the breaker to the unit

wp_20170430_07_24_58_pro

The I unscrewed the top of the unit

wp_20170430_07_24_33_pro

Had to take the access panels off to get the fan off and on the ground.

wp_20170430_07_32_34_pro

I used the hose to spray from the inside out, noting the dirt that was coming through.  I also cleaned all the leaves from the inside of the unit while it was open.  I buttoned it all up and started it up again.

Unfortunately, it seems that the compressor freeze-up is chronic.  In the heat of the day now, it’s stopped three times and resets are only temporary fixes.  Looks like I’ll be calling an AC shop tomorrow.  Wonderful.

Master Bath Progress

Let’s see, where was I?  It’s been a few months, so it’s hard to tell.  The master bath has been in a paused state.  There’s a couple of ways to go with it.  Both involved new lighting fixtures, which was impossible to decide on.  Going with a single light fixture would be extremely expensive for the size I needed.  Going with two fixtures would involve extra wiring and replacement of the huge mirror.

I finally put forth the extra shopping effort and found a 48” LED light fixture that would compliment the other square LED lighting in the room.  The light was $300, which is not bad considering the $700 lights I had been shopping.

wp_20170418_17_10_40_pro

wp_20170418_17_11_33_pro

With that decision complete, I now had to install an electrical box for the light.  I used a “pancake” shallow box.  I cut the hole for the box.

wp_20170423_19_10_21_pro

Fortunately my placement let me screw the box into existing furring strips.

wp_20170423_19_12_06_pro

Then it was a matter of patching up the holes I made.

wp_20170426_20_22_51_pro

I expected to get the patching, sanding and priming done by the end of the weekend.  Yeah, right.