Wiring Project – Attempt 1

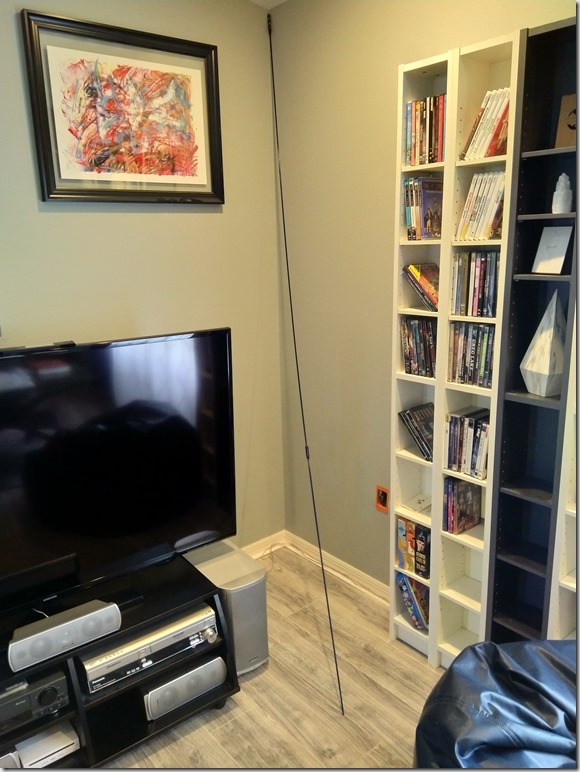
This weekend, all the tools have arrived and it’s time to go.  The fiberglass poles were broken out and I taped the endoscope to the tip and stuffed it up the wall.  To my surprise, at the top, I can see there are multiple holes available for running wires.  With some jostling, I am pretty sure I found myself looking into the attic.  Well, that was fucking easy.

I left the pole and camera in place and climbed into the attic.  Ok, this is not as fucking easy.  I could not see the pole sticking up from below, so that wasn’t promising.  I gave a quick inspection as to where I would need to go and it was not a cool trip.  Before I headed in blindly, I wanted to know how far I would have to go in, so I made a mental note of where the AC duct was and then I would find out where in relation to that duct the outlet was.

When I went back down, I found the AC duct was right in line with the outlet.  So that was an excellent marker for finding the pole.  As long as I was going up again, I figured I’d try snagging the pole.  I tied some pull cord to the head of the pole and shot it back up the wall and into the attic.

I headed back up and took with me a flat board to lay across the rafters so I could lie flat and worm my way forward, and I took a few sections of pole with a hook attachment on it to catch the pull cord and drag it to me.

Crawling on my stomach across beams was not a lot of fun.  When I made it near the AC duct marking my place, I was a little crestfallen.  There was mounds of insulation blocking any view down to the edge of the house.  You couldn’t see the pole, you couldn’t see anything.

I tried using the pole I brought up to spread the insulation around and clear a path, but the pole was too flexible.  While up there, I wracked my brain trying to think of what I could use to clear away that insulation.  I just didn’t have a pole long enough to get down there (and not flex like a noodle).

I came back down and stopped for the day to analyze the situation.  After some thought, I came up with a few ideas.  Fist, I could try the magnetic pole tip and try to catch a metal ring tied to the pull cord.  I might be able to do that without seeing anything.  Next, I could join all of my kayak paddle poles together and that might be long enough to reach down there and move the insulation out of the way.  A combination of the two ideas would be to put the Magnapull bullet on the end of the kayak poles to grab the ring, since it’s a much stronger magnet.  Finally, if I can clear the insulation enough, I could try dropping a chain with a pull cord down through the top, since I know there are holes available.  So, plenty of options available to me.  But this has to be done early in the morning before the sun comes up and turns the attic into an oven.  So, tomorrow…

So while waiting for the next day, I figured I could investigate the locations for two more runs.  Both are on the east wall of the house, with a plant shelf high up.  My plan was to see if there is a gap between the back wall of the shelf and the block exterior.

I hammered out the outlet box that had an existing coax cable in it and was immediately confused.  I was in the cinder block.  I began what I expected to do.  I start fishing the rod and camera up the wall between the drywall and block.  The realization came to me slowly.  The first clue was when I checked the routing of the coax cable.  It didn’t go straight up.  It went off to the left.

I took a step back and looked at the wall.

IMG_20200530_164714

It’s not that the shelf extends out from the block wall.  The shelf is the block wall – the top of it.  There is no way to go behind the shelf because the back wall of the shelf is literally outside the house.  Well, that explains the coax cable that ran into the outlet box from outside the block.  Prior to painting the house, I pulled that cable out and patched up the hole.

While this information is sort of a deal-breaker for running that cable, it comes at a very important time.  One item on my short list is to install a weather station on the house.  One of the plans I was considering was mounting a pole on that side of the house.  Had I gone ahead with that plan, I would have drilled lag bolts right into that area and they might have penetrated right into the interior of the living room or bedroom in the shelf area.

Ok, so two runs are completely off the list.  There’s no way I can navigate around the plant shelf.  That leaves two runs I can attempt.  The first continues tomorrow.
Wiring Project – Exploration

I made the decision to attempt this myself and ordered what tools I figured I’d need: An endoscope to see what I was doing before I actually did it.  A mega long drill bit to do it.  And fiberglass fishing poles to push the wire up and catch it in the attic.

The scope came first and I immediately attempted to get a look up in the wall.  While the camera is advertised as semi-rigid, and it is, it’s still not rigid enough to climb more than a couple feet without bending out of direction.  So I have to wait for the poles to come in so I have something firm to attach the camera to.

The next thing to come in was the drill bit.  And what an impressive piece of tool this is.

IMG_20200526_174857

Like the camera, I immediately tried stuffing it up the wall.  Unfortunately, I was unsuccessful getting the drill head up the wall.  I might have overestimated the amount of depth available to me between the sheetrock and cinder block.

As a sanity check, I flipped the drill over and fished the back end up.  Initially, i hit a snag right at the connection of the extension, making me think the extension couldn’t fit between the wall either.  I got out the endoscope and had a closer look.  No, there’s enough clearance.  I just determined the end of the bit was hitting a staple holding the former phone lines.  A bit of wiggling and the bit was free.  I pushed onward and upward.

Finally, I hit something solid.  Form the countless videos I’d watched, I learned to mark the bit to make sure you don’t drill too far and go through the roof.  So I taped the bit and pulled back out.  Measuring the bit showed I made it probably 4 inches past the ceiling.  What the hell?  I can’t take the chance of drilling if I don’t know exactly where the bit is, so I have to wait for the poles so I can run the scope up the wall and see exactly how far we go.

As it’s been told to me by two people, there should be a horizontal furring strip where the drywall is secured to at the ceiling.  The bit, as I’ve inserted it, is going past the ceiling.  Maybe I got super lucky and hit the hole where the phone lines came down.  If so, then with the scope, I should be able to find that hole again and no drill needed (for this run anyway)..

Wiring Project Continuance

It was a while ago I said some people were coming to run network wiring in places I could not get to.  Well, that day came and went.  They had other, more important work to do.  We rescheduled for Thursday.  Again, more work.  They said they’d let me know.

A week went by and I decided to just call an electrician to get a quote.  The tech came out and was looking at the places I wanted and was pretty blunt and direct: they will need to cut the drywall.  And they don’t do drywall repair.  So basically, we’re going to fuck up your walls and you’ll have to pay someone else to fix it.

I brought up the concept of using a flex bit to snake up the wall and drill into the header.  They said they don’t have that.  So anyway, they said they’d get me a quote in a couple of days.

Ironically, a few hours later I get a text from the cabling people.  Do you want it done tomorrow morning?  Well, I have an electrician who says they will definitely be cutting my walls and a guy who hasn’t said anything yet.  What do I have to lose?

So they came out the next morning and immediately went to work on one of the exterior walls.  They ran the fishing poles up the wall and one climbed into the attic to try and find the location.  After about an hour, they gave up.  Again, I asked about the flex drill bit.  They didn’t have one that long.  Only a 4ft bit.  Sigh.

So, they ended up doing the “easy” ones in the interior walls and had a look at the other locations and declined to try them.  I ended up paying them for 2 drops and they said they’d give me a contact for a security installer who might have more tools for getting in tight walls.

I go back online and look some stuff up.  Should I just fucking do this myself?  The pros don’t seem to be able to do it.  So then, I would need poles.  I would need a set to push up through the wall and a set to hook the wire once it’s poking up into the attic.  Maybe $30 for those.  Then I would need a flex bit.  Those run around $50. And probably an extension piece, too – $30.  So far, a little over a hundred bucks in tools.  My expectation for the electrician quote is $1k.  Plus I would have to hire someone to fix the drywall.  Turns out my expectation was damn spot on.  The quote came in at $1080 the next day.

So is this something I’m willing to attempt on my own?  To accomplish something two professionals won’t or can’t do, yet multiple videos online demonstrate how to do it successfully?  What’s the worst that can happen?  I have to call the professionals to fix it anyway.

Let’s do this.

Crafting Project – Rain Barrel

It’s not really a rain barrel.  Its purpose is not to store any water.  It’s supposed to be a decorative object to stop erosion and reduce dirt splatter on my house’s new paint job.  It’s more like a rain diffuser.

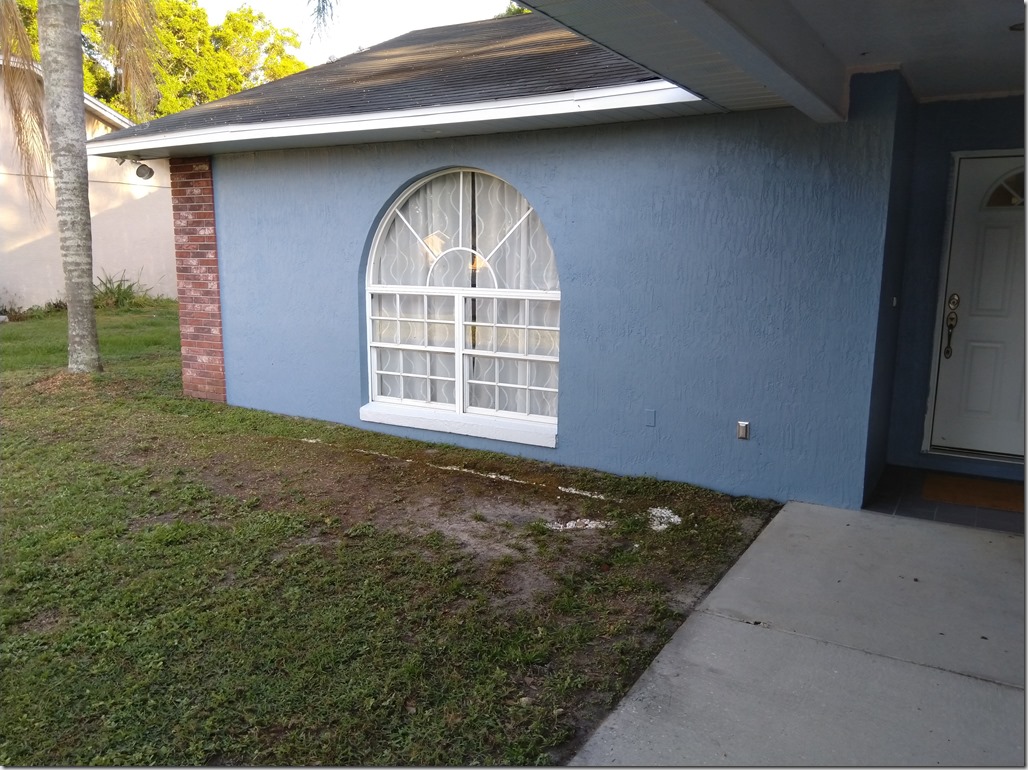
In the front of the house, there is no gutter (yet).  So the heavy rain will roll off the roof and beat down right in front of the house and ever since the early days when I removed the shrubs along the front of the house, I have had to deal with erosion and splatter.  Right now, there is a line of rock where the water lands, that was the original bed of the shrubs.  In the corner of two roof sections, there is an especially heavy torrent of water that has exposed a lot more stone.  That is where I plan to put the barrel.

I can’t put a large planter with a plant in it because the plant and soil would just be washed out, so it’s going to be planter filled with rocks to diffuse the downpour.  It won’t be completely filled because that would be way too heavy, too expensive, and somewhat pointless.  There will be a fake floor a portion of the way up and the stones will go there to near the top.

This idea came to me when I was researching those flexible gutter downspout extenders. I need a couple for the two downspouts I have that are seriously eroding the area where they exit.  After I had barrel idea, I immediately researched tall planters.  Well, shit.  36″ planters are not cheap.  And I’m not interested in spending $300 on an idea that I may scrap soon, and will scrap once I get gutters installed (after the roofing project).

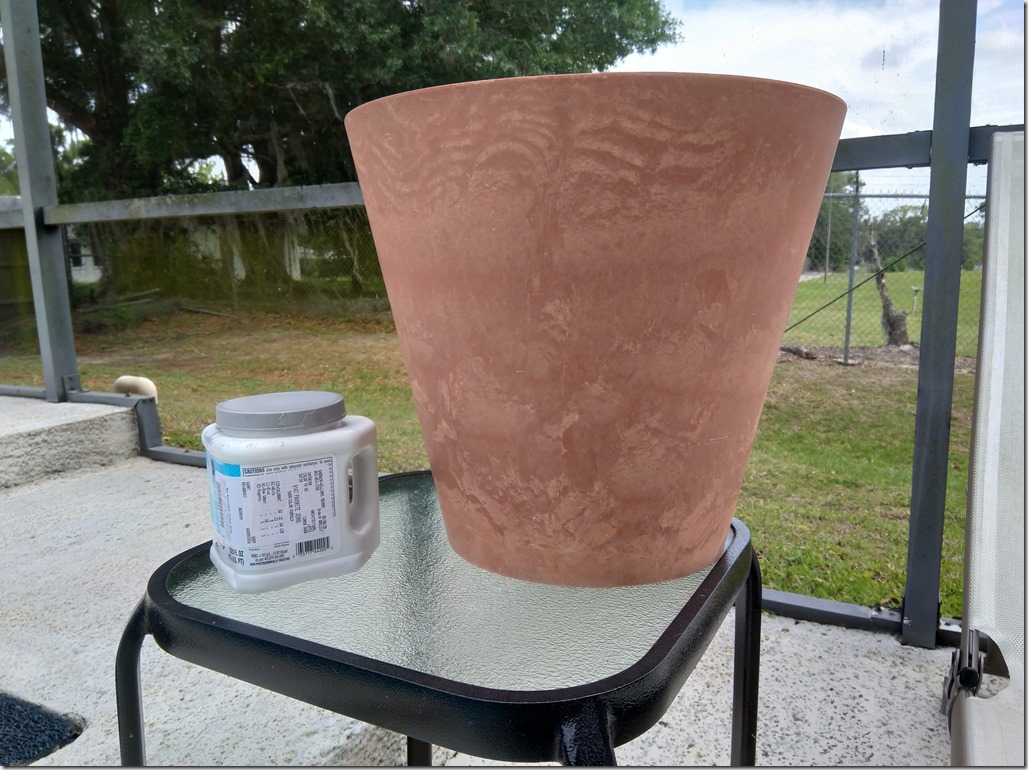
As it happens, I have some very large planters from a long time ago that were samples from a manufacturer.  I’ve never found a real use for them.  They are extremely durable, but unfortunately, they are the wrong color.  So, maybe I can paint one?  I considered buying some exterior paint from the store in a grey shade, but then I remembered:  I had just thrown away a quart sampler of the other color option for the house – the lighter shade of blue.  Well, I can’t argue with free, and it’s Sherwin Williams, so it’s a good quality paint.  And it’s in the color tone of the house, to boot.  Not exact, just one shade lighter.  That’s supposed to be how you coordinate, right?

As far as a timeline, it was supposed to rain today.  It’s not going to.  The next prediction is next Tuesday, so I have 4 days to complete this.  Not a problem.

I started by cleaning up the planter and leaving it outside to dry before the painting.

IMG_20200515_152327

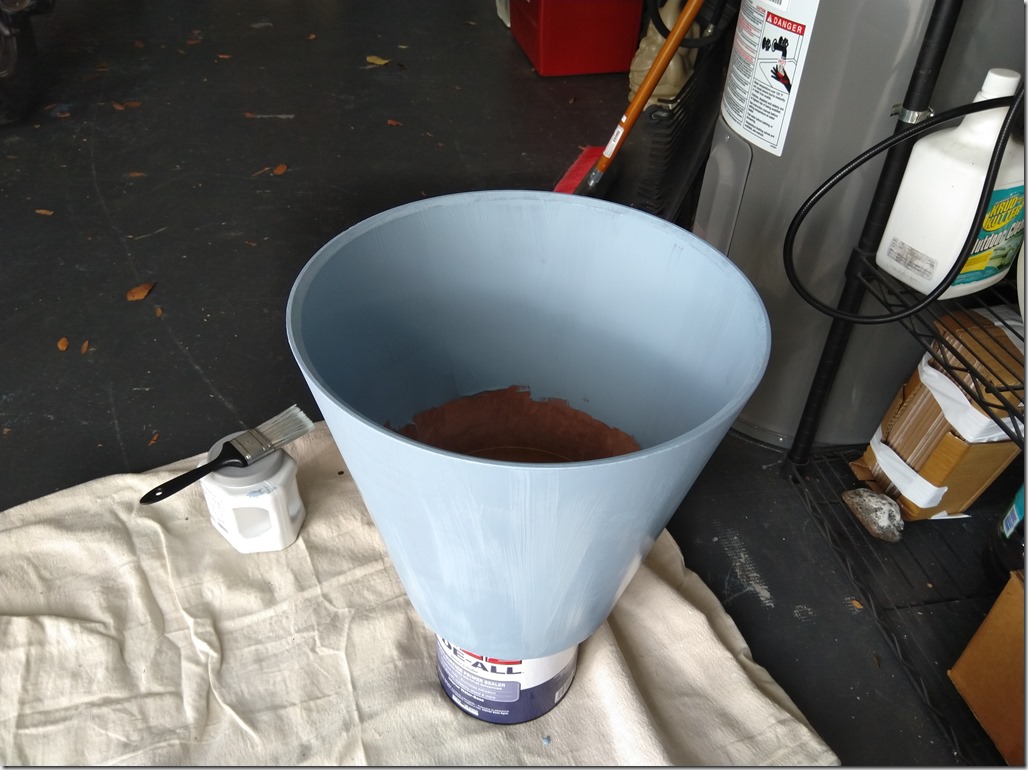
First coat went on easily enough.

IMG_20200515_161342

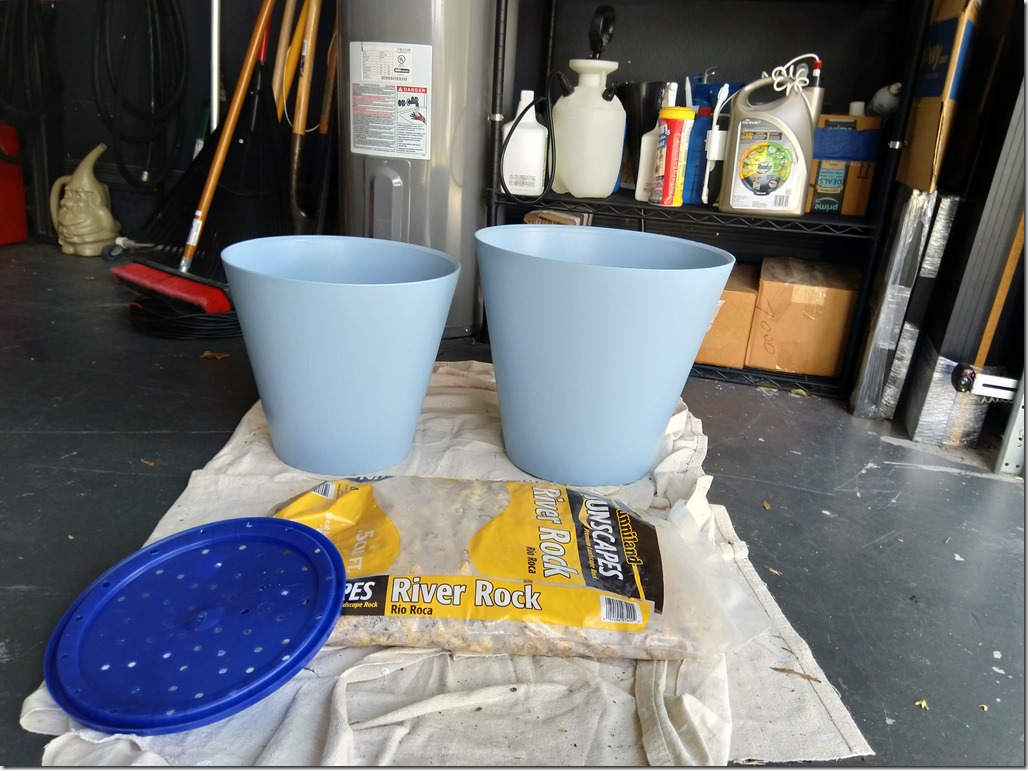
While it dried, I gave some consideration as to what I would use as the floor.  The best option I came up with was a 5-gallon bucket lid.  It would be sturdy and would sit low enough that a layer of rocks wouldn’t be at the top or over the top.  Even with the rocks in there, it’s going to splash, so trying to keep the water in the container would be a good thing.  I picked up a lid at Lowes.  The cashier said they just changed suppliers for these lids and the UPC had to be keyed in instead of scanned.  The only thing I noticed was the lid was damn flimsy now.

After the second coat dried, I took it to its designated location.  It was… ok.  The erosion on the ground indicated something was a little off about my plan.  During normal rain, the water would fall straight down and would wear away at the ground in one place.  During heavy rains, though, the water would shoot out further and wear away a different location.  One container wouldn’t cover both areas.  Well, I do have another, larger version of the planter that’s not being used either…

Of course, this now takes the project to a whole new level.  Painting the second container is nothing.  I need something to make a floor in this massive container.  I need about a 14″ disc.  I find one on Ebay of 1/8″ plexiglass for $25 including shipping.  That’s part one. 

But I also need drainage holes in the disc.  Drilling plexiglass usually ends up in cracking, so I get some education from YouTube.  Ok.  My options are to buy a special plexiglass drill bit or use a step drill bit.  And while drilling, use the slowest speed possible, lubricate the bit with dish soap, and drill through the plexiglass into a wood block.  Lowe’s and Home Depot don’t carry the plexiglass bits.  I can get one on amazon for $10, or I can get a step bit from Harbor Freight for $7.  I will probably have more use for a step bit in future projects, so there’s my answer.

Still though, this project cost just went up by almost $35.  Let’s get the big container painted (that’s still free and it currently looks like shit anyway) and we’ll leave the other stuff on hold until I think I’m going to like what I already have for cheap.  If the little one doesn’t work out, the big one will just be a bigger disappointment.

Now – filling the thing.  I bought a bag of river rock for about $4. I have no idea how much I’ll need, but I don’t want a lot, because that will collapse the floor.  It just needs to be a solid layer on top.  For support, I can cut up a piece of PVC pipe and stick it under the floor, but I’m not sure that will be needed yet.

IMG_20200517_093423

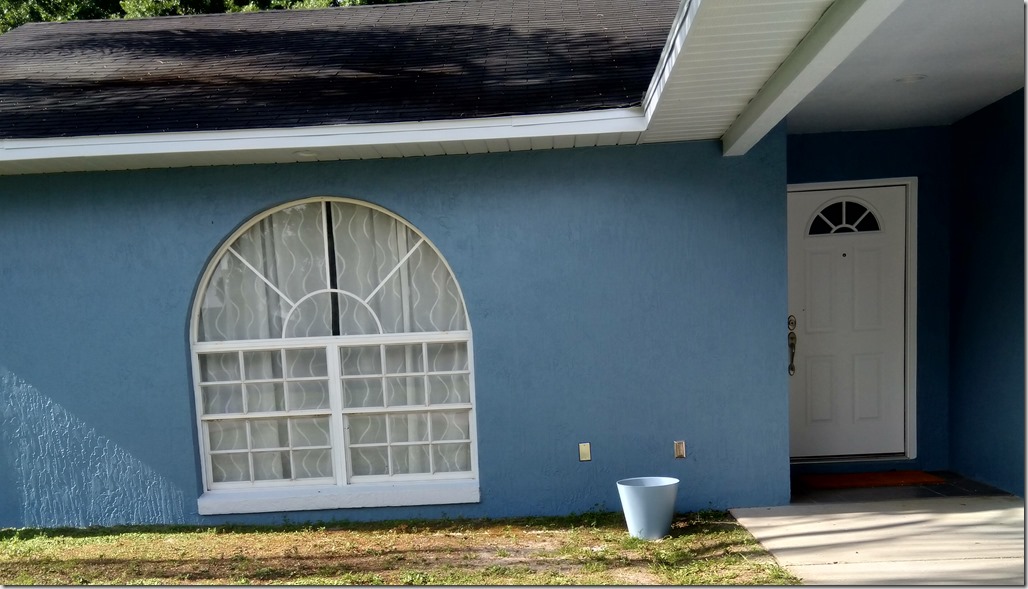
Situated out front, it’s a little out of place all by itself.  I’ll have to figure out something else to liven up that area.

IMG_20200517_094030

House Repainting – Day 3

Today, I got thinking about the guys working on the house and whether anyone was making any money from this.  Apparently, I can’t math very good (this is well-proven), but I’m even worse at abstract math.

So, the initial quote to do the house was $2400.  The revised quote was $3100.  It was still fine for me, especially since everyone’s hurting right now and they’re doing so much.  When I said, “paint the house”, I was generally expecting the main areas to be painted.  But a full house painting was so much more:

  • pressure-wash house and sidewalk and driveway
  • fill cracks in stucco
  • caulk and seal windows and roof caps
  • repaint soffit
  • repaint trim
  • repair entryway ceiling seams and texture
  • repaint entryway
  • repaint front door

As with any job, there’s two costs: labor and materials.  Let’s start with the labor costs.  I’ve had two workers onsite for 3 days and they expect to finish up tomorrow.  Additionally, I’ll have an additional worker repairing my entryway ceiling.  I figure that’s about 64 hours of general labor and 4 hours of specialized labor.  Actually, we’ll exclude the specialist since he’s probably subcontracted at a flat rate for the repair.
Let’s assume the workers are paid fairly (idk?) at $15/hr.  That’s round about $1000 in labor there.  Maybe the specialist is doing the job for $250 (idk?).  So far, the job is well under budget.  The owner commented about the amount of paint he was buying and that it was about $35/gallon.  I’ve seen two 5-gallon buckets so far, but I can’t imagine that covers the whole house twice.  So let’s double it.  20 gallons of paint is $700.  We’re still not even at 50% of the project cost.  Business guy’s doing good business.

Then there’s materials: tape, plastic sheeting, tarps, brush rollers, brushes, cleaning materials, buckets, paint screens, gas for pressure washer, etc.  Even if all that stuff is $300, which it’s probably closer to $150, we’re still at a 30% profit margin on the job.  Had the original quote been executed, that would be more like 17%.  We’re not taking into any account the overall business expenses for the company: taxes, insurance, marketing, operational (vehicles, building) and benefits.  If I were the business type, which I certainly am not, I would actually be a little nervous taking on jobs with less than 20% profit to cover everything else, including screwups.  So overall, I think the deal was fair and healthy for his business.

In other news, the peephole has come in, so it’s ready to be installed after the door is painted.  I also made a random purchase of a outdoor spigot handle, since the ones I have now all have the paint flaked off.  It’s not expensive.  In fact, it’s really, really dumb that buying a 2-pack is so much more expensive than buying 2 single packs.

I was going to get a screenshot of this from Amazon, but in typical Amazon fashion, the price jumped up from $3.89 to $5.15.  So now, the 2-pack is the cheaper option.  Well, at least I bought one at the low.

I installed the spigot handle and and generally disappointed.  It is a universal handle, so there is a reversible shaft that fits two different faucets.  The shaft mating with the handle is not a tight fit, so there is a little play when you turn the handle on and off.  I don’t think I’ll be keeping it long-term.

Today, while walking around the house, I noticed they had painted the dryer vent to match the house.  I don’t understand painting everything to match.  There’s a wall plate on the front of the house that’s been painted and is going to be replaced with accenting stainless steel, too.  The dryer vent is pretty old and was due for replacement, so I did a search for stainless steel replacements to match everything else.  Found and ordered. Not Prime, so it will be delivered on foot like my house numbers.  Estimated delivery, 6-10 weeks.

Anyway, on with the updates.

IMG_20200512_191408IMG_20200512_191426

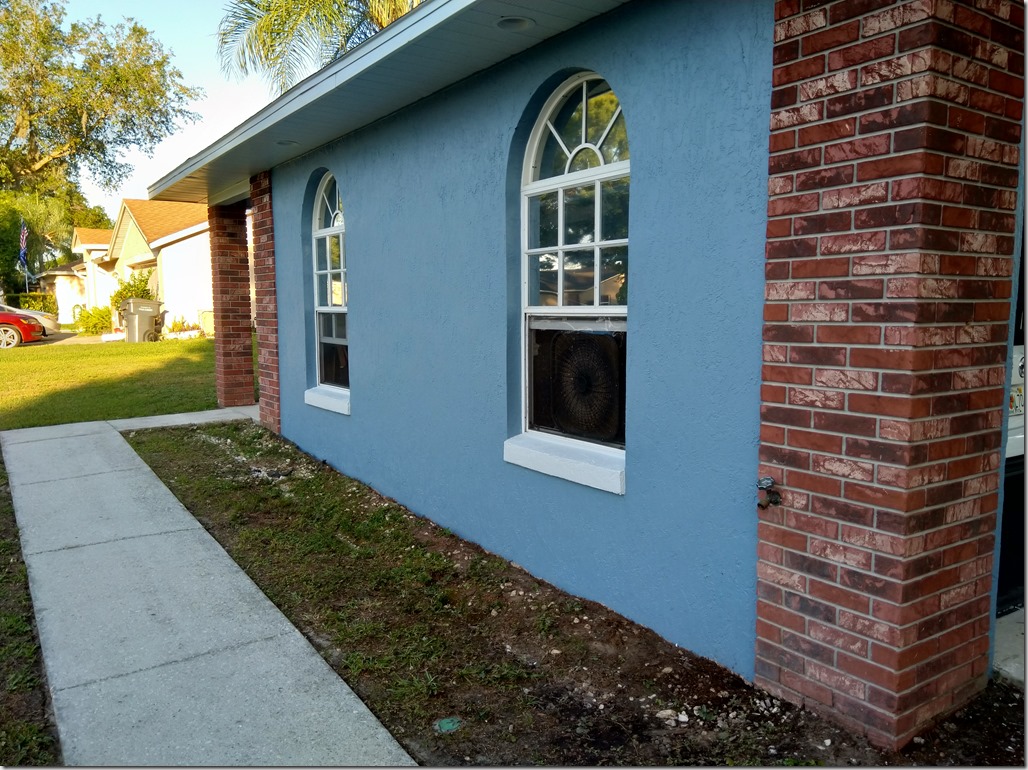
Window sills are painted, breaking up the large color blocks.

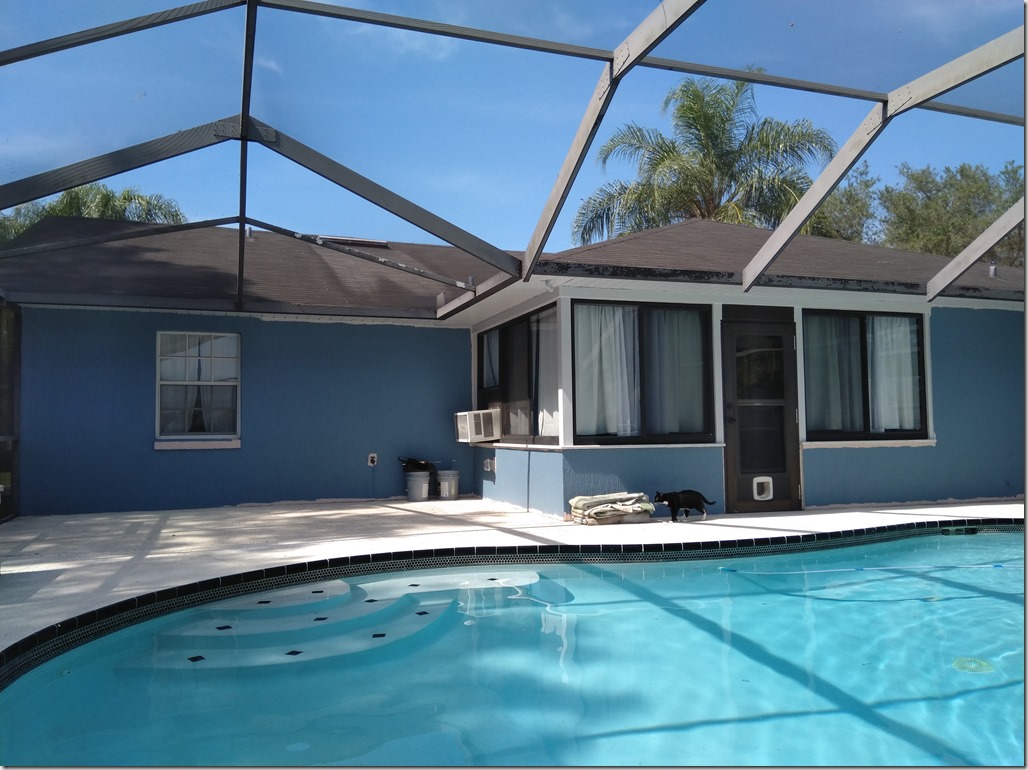
The back of the house got some treatment today.  Not yet done, but coming along.  Three shades of blue here: sky, house, and pool.

IMG_20200512_154654

As I was sitting on the patio, I was surprised at how calming the color was.  I had never noticed how I didn’t get that with the old color.  The blue is just the color I always wanted and never knew it.

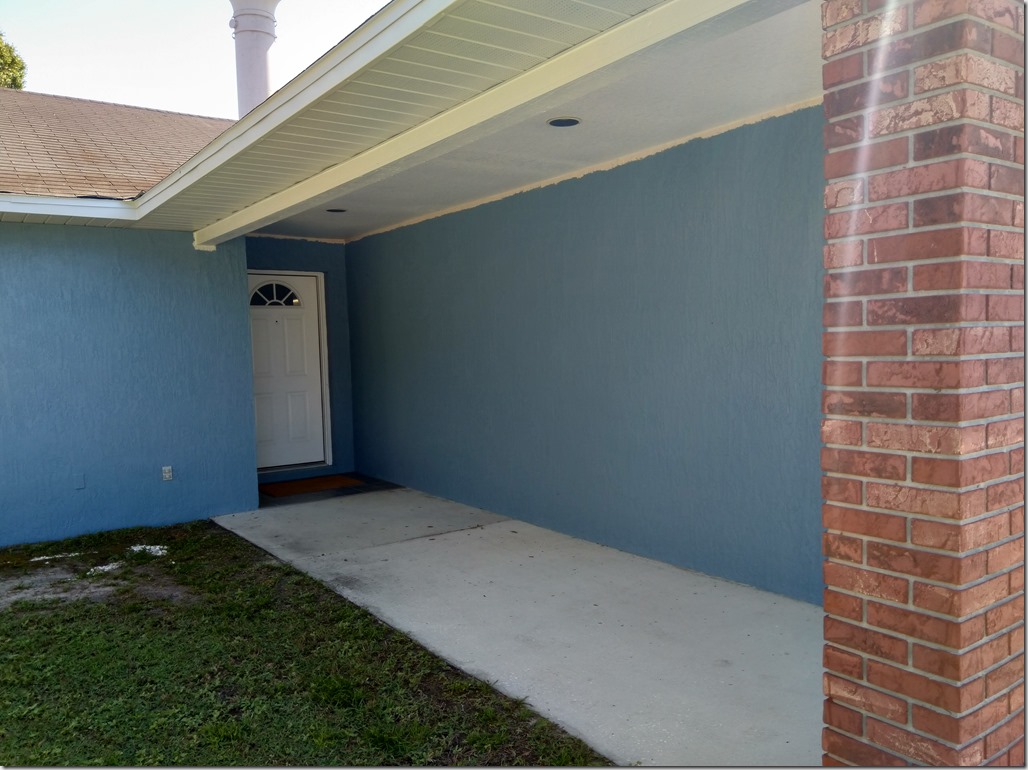
Tomorrow, it’s the front door and the repair of the entryway.  I pulled down the trim of the canister lights to clean them (wasp nests EVERYWHERE) and allow for the repair to get in there.

House Repainting – Day 2

Today the painters showed up to do the painting for real.  They started out with cutting in on the edges, then masking everything off and spraying the soffits and trim, then filling in the first coat of the primary color. 

So far, looks nice.

IMG_20200511_155333

IMG_20200511_155344

IMG_20200511_155354

Still need to paint the window sills white, which was seemingly lost in communication.  But the whole house still needs its first coat and then the second coat.

I learned that I’m also getting the front door painted, so I had to pick a color.  Uhhh… white.  Pure white, not the off white being used elsewhere.  I clarified that the hardware would be taken off and the door would be sanded first, otherwise I would do that myself.  I also made a quick purchase of a satin nickel peephole to replace the faded brass one currently on the door.  That will match with the other trim pieces, including new stainless steel cover plates on the front of the house and the house numbers being shipped by foot.  Seriously.  You can buy the numbers from Amazon for $50 each and get them with Prime shipping, or buy them for $15 from WayFair and get them in… 8-10 weeks!  Yeah, I’ll save the $100+, I can wait.  But, I can’t really wait.  They are going to look fucking awesome.

Container Garden

I’m going to start calling my motivation Cotton-eye Joe.  Where does it come from, where does it go?  I don’t have a clue, I don’t fucking know.  But anyway, when the painters were doing their pressure washing, they included the small patio off the pool deck.  That’s where all the pots were for my failed container garden.  In order to wash the patio, they had to move the pots and I felt really guilty about that.  I decided right then I would finish this job.

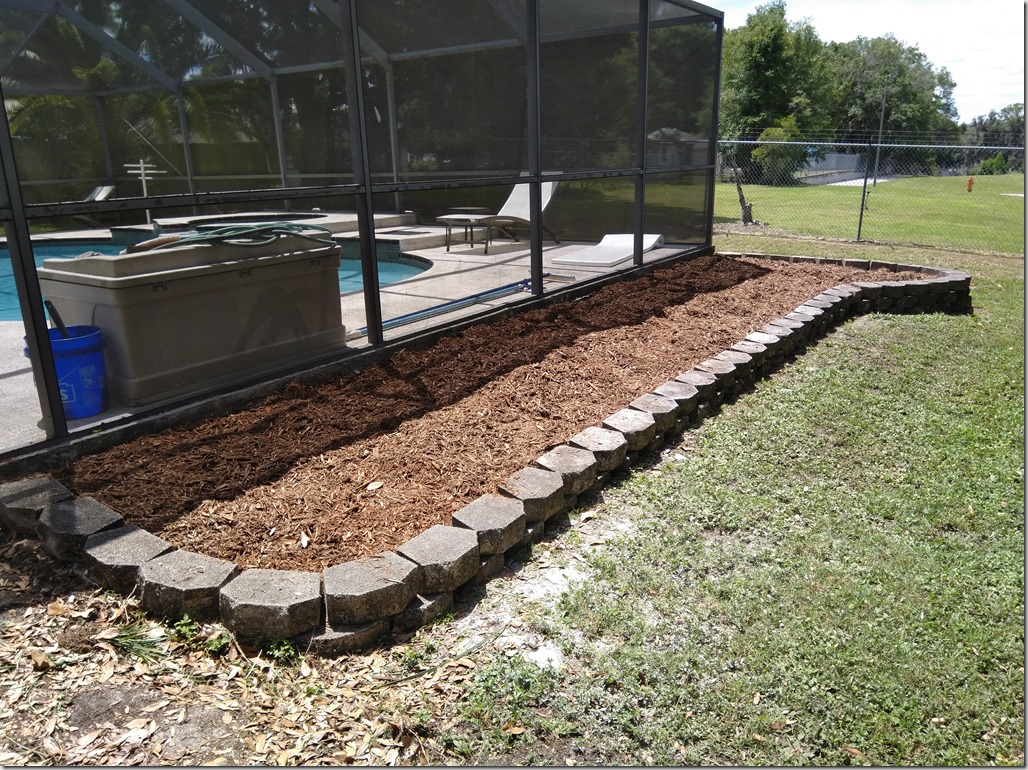
The main reason why the garden was never really completed was because the garden bed needed cleared out.  It was a mess of vines and weeds and there was a remnant stump from a tree I took out a while back.  I would regularly kill the weeds with roundup (and they always came back), but the stump I was having trouble with.  Every week or two, I would spend one physical expenditure trying to dig it out.  That was usually about 15-20 mins of effort.  Yesterday, I finally broke the tap root and got it pulled out.  The primary obstacle has been removed.  I then raked up the bed and laid down another coat of Roundup.  Time to move on this.

Next step is mulching.  I checked online for calculating how many bags of mulch you need and the formula made everything more complex than it needed to be.  In the end, I estimated about 150 sq ft of area to cover.  If each bag covers 2 cubic feet that’s uhhh… I’ll just buy a bunch of bags and if I don’t have enough, I’ll just buy more.  My suspicion is that mulch is like the opposite of spaghetti.  If you’re cooking spaghetti, you grab a bunch and cook it and end up with enough to feed an army.  On the other hand, you buy a bunch of mulch and it only covers a fraction of what you needed.

The garden project has been going on for well over a year.  One thing I have now that I didn’t have back then is a vehicle to haul stuff, like mulch.  With the new station wagon, I was now unstoppable.  I went to Lowes and bought 15 bags of mulch.  I wasn’t sure it would fit, but I could have easily fit 20 or more.  I got the bags home and unloaded the mulch.  I laid down two layers of weed barrier over most of the garden, only skipping the lower extension by a couple feet.  Then I poured out the mulch.  The 15 bags covered the area quite well.  Almost perfect.

IMG_20200509_121215

I guessed I could probably use a few more bags to thicken it up and fill in some weak areas, so I got 3 more bags after lunch and dropped them in, too.

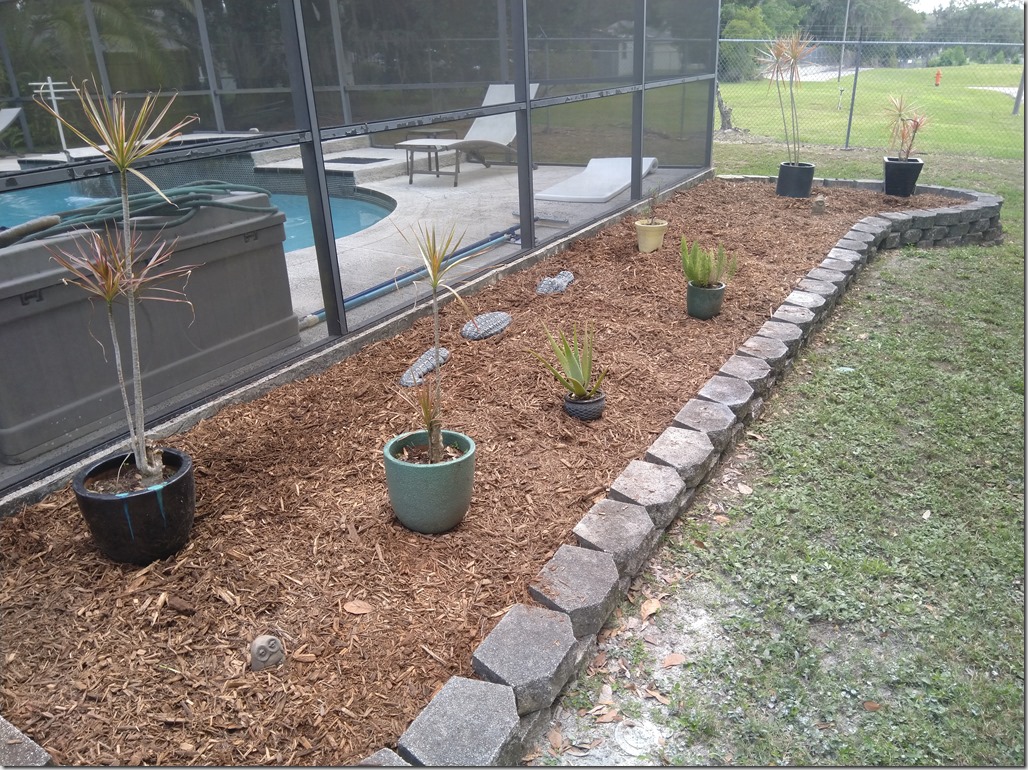
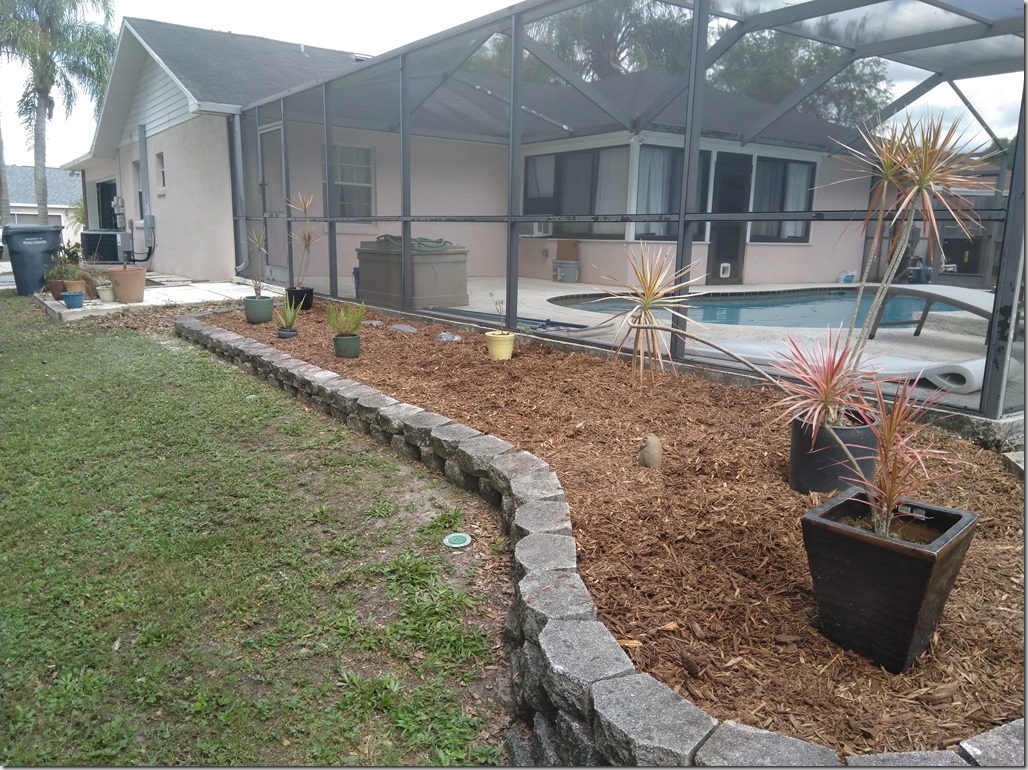
Now, for the decorating.  Unfortunately, most everything I had purchased and planted in the previous Cotton-eye Joe moment had died, so I was left with only a few elements to place.  I’ll have to buy up some more plants now.  But, this is a start.

IMG_20200509_135806IMG_20200509_135825

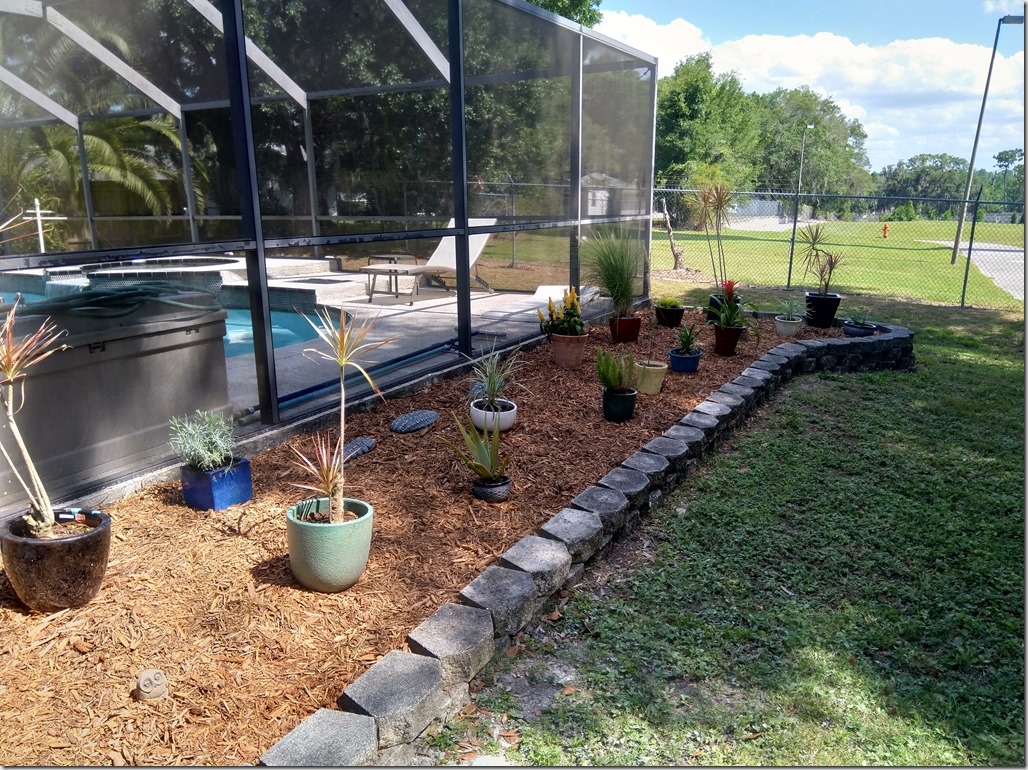
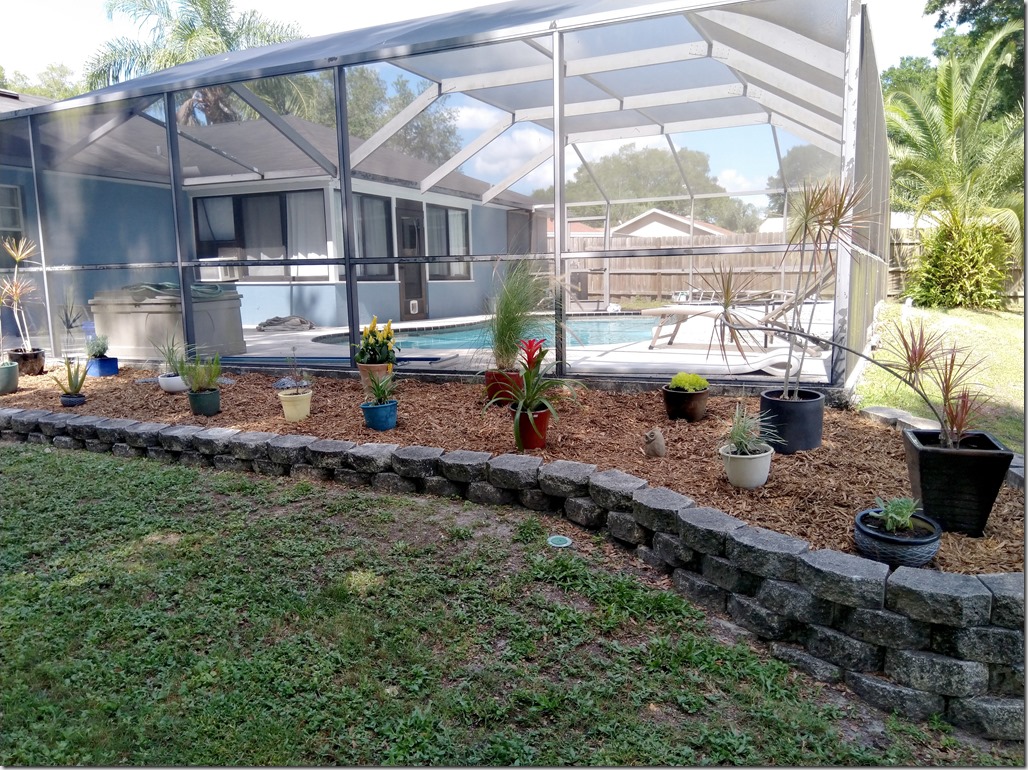
A couple of days later, I bought some more plants, some more expensive options.  I potted them up with some extra soil and filled in the garden bed.

IMG_20200513_155534IMG_20200513_155548

The pots have more color than the plants, but that’s ok.  There’s only a few flowers in the bunch, the majority are grasses.

House Repainting – Day 1

Oh boy, one of the biggest changes to the house is coming.  It’s changing color from pink to blue.  The house is 28 years old and still its original color.  I’ve been in the house 15 of those years and have had to live with the thought of Mellencamp’s “little pink houses for you and me” all that time.

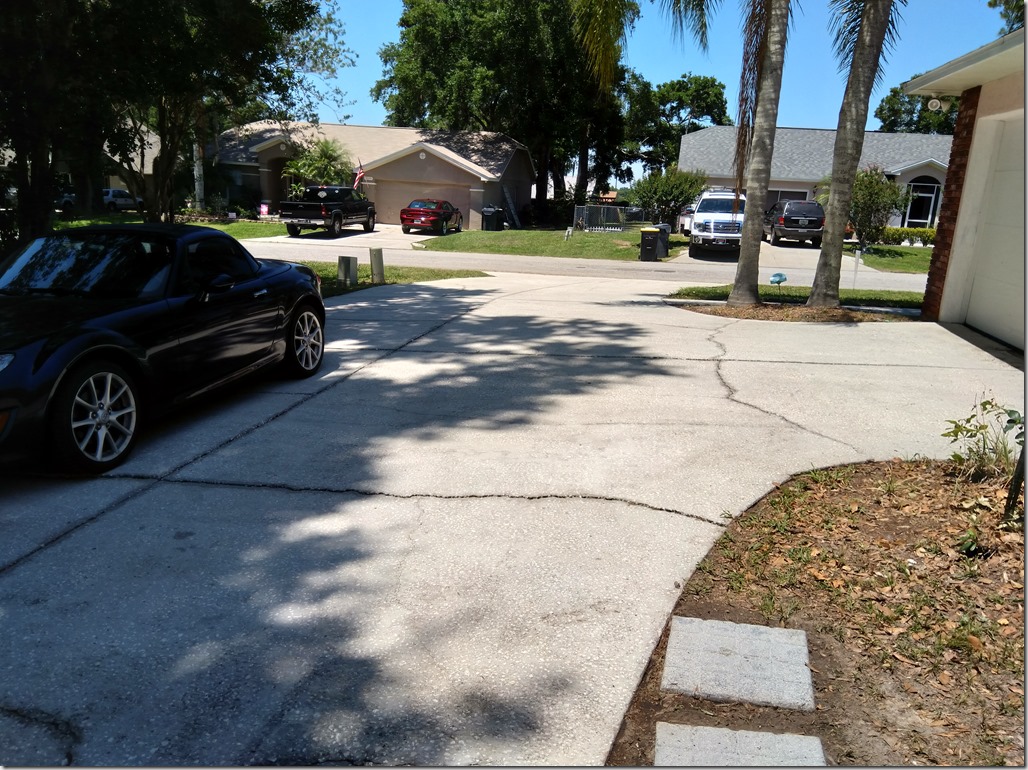
The first thing the painters will do is pressure wash the entire thing:  building, soffits, driveway, patio, windows and pathway.  A day before they started, I took the opportunity to pull out some cable tacks and screws and a TV cable running into the side of the house.  I filled up all the holes and divots with stucco patch.  After they pressure washed, they filled up all the cracks in the stucco with a special caulk.  The driveway had never been so clean before.  They used a disc-type washer which made a huge difference.

IMG_20200508_140839

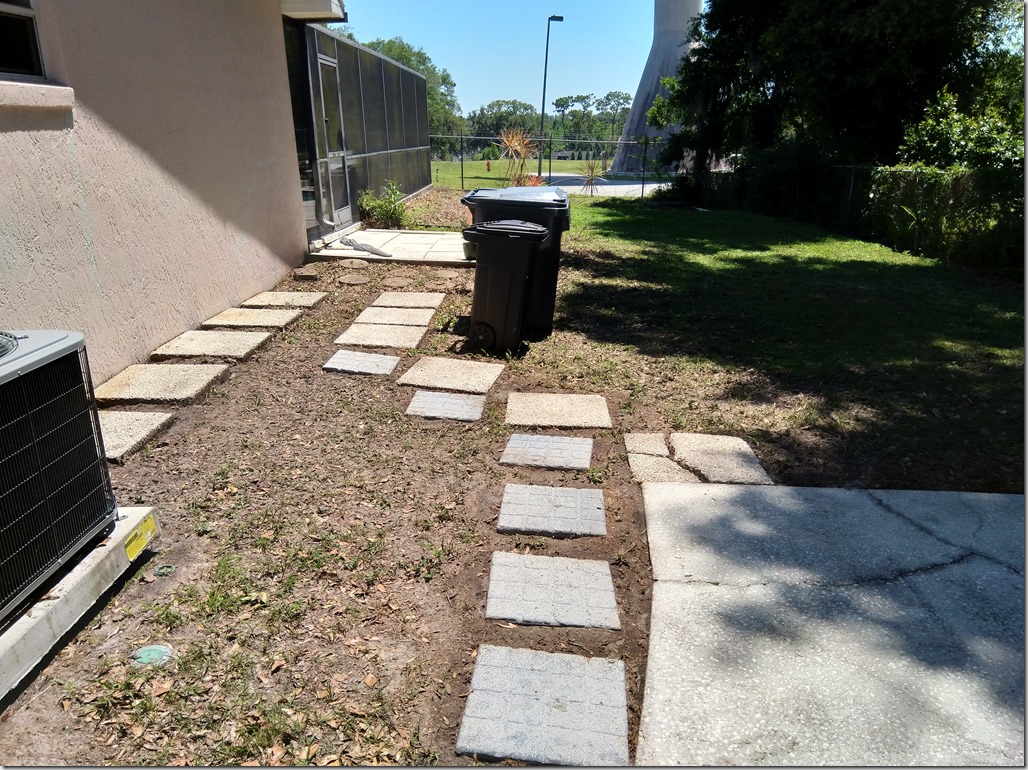
And all the walkway stones were cleaned, which is something I could never do well myself.

IMG_20200508_140829

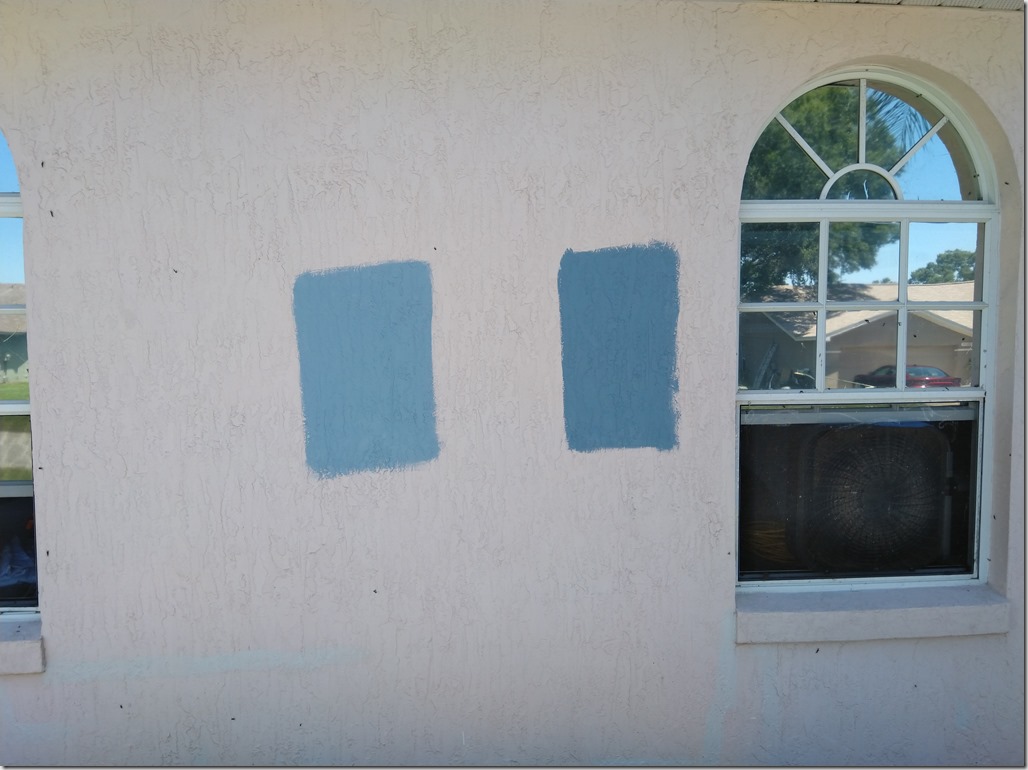
I had my color chosen, Smoky Azurite, so the painter brought a tester of that color and also of the shade next lighter.  I guess lots of people are surprised when they see how dark their chosen color is.  The two colors were painted on and I stuck with my original, darker, shade.

IMG_20200508_140814

The blue should contrast with the brick nicely.  However, to keep the house from seeming too monochromatic, and also to make the windows appear larger, I’m having the window sills painted white.  Not a pure, blinding white, but a faint off-white in the grey spectrum called Misty.

Another thing happening is the repair of the entryway.  This area got damaged from mud wasps building nests, which required pressure washing to take off.  the pressure washing damaged the sheetrock and when I went to repair it, it just got worse.  The professionals need to handle it now.  So that will all get repainted.

One thing that is not getting done is the front door.  I think I will be able to handle that in the wintertime when everything has cooled down. It will give me time to consider a color.

The Lanai Window Sill Replacement

I mentioned a week ago that I had moved my office out into the guest bedroom because of some upcoming construction.  That construction is wrapping up and I would consider it a success.

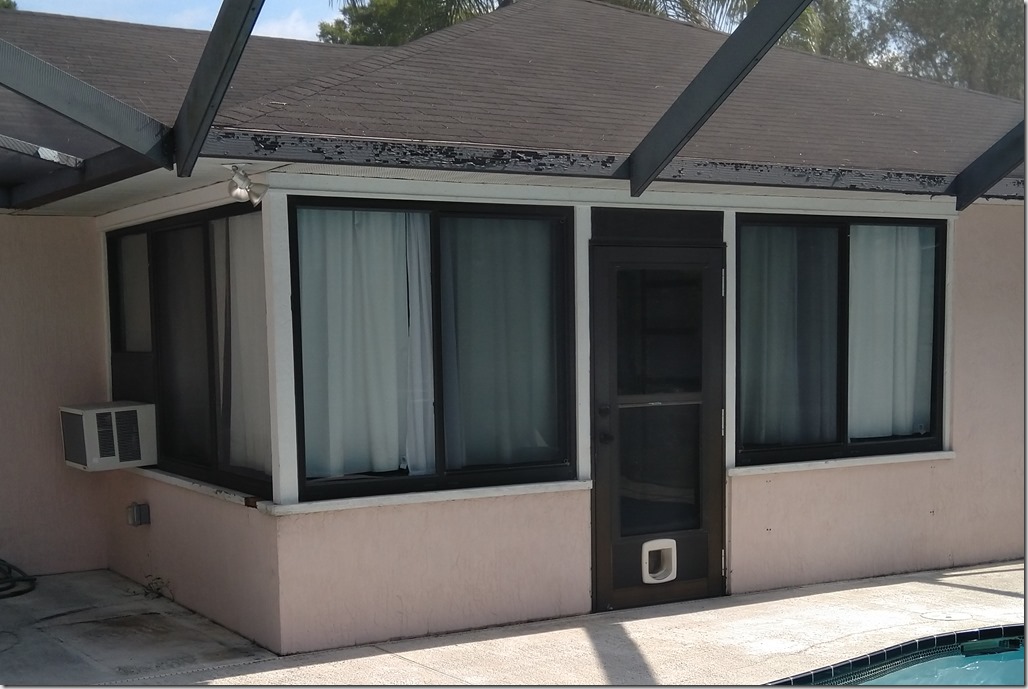
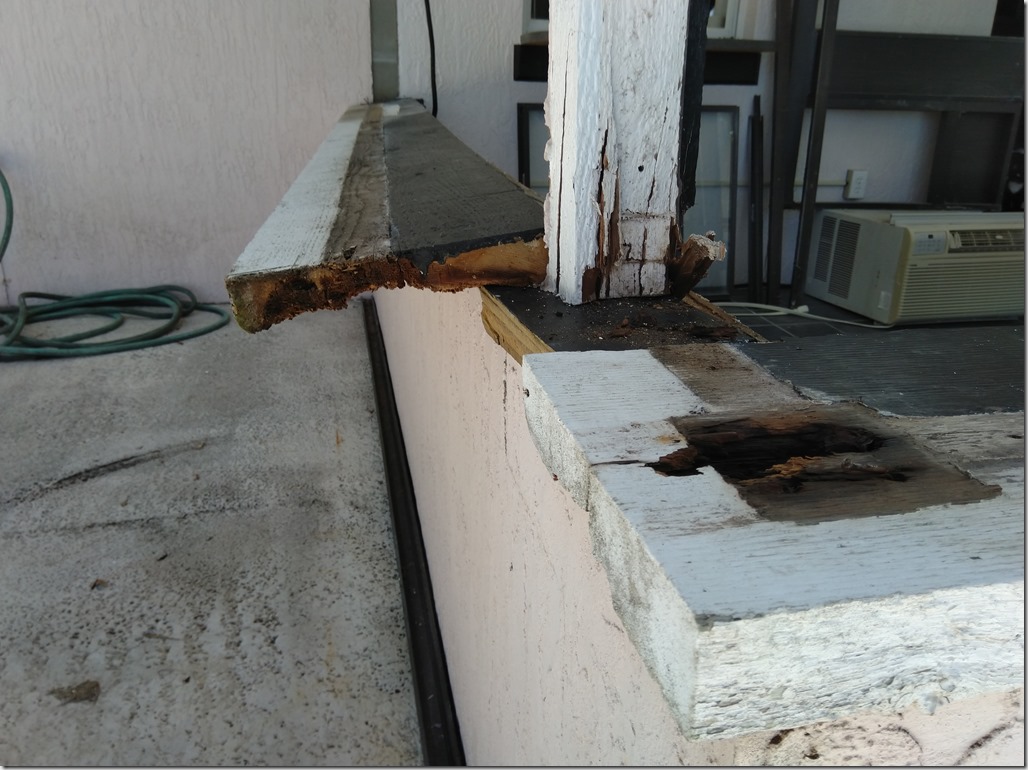
When I first took over the house fully, I had a checklist item to repair the rotting window sill.  I purchased a wood repair kit and when I got into the project, I discovered the rot was significant.  So I cut out a large chunk of wood and replaced with an ill-fitting patch of wood.  That patch was in place for a long time.  Well, five years or so.  I had people come and look at the patch and ask if they could fix it.  Most said yes, but for one reason or another, it never happened.

Then, I asked the contractor who installed my flooring about the situation.  He suggested I get rid of all the wood and replace it with granite.  That was a totally different idea and I was impressed with his suggestion, as much for its durability aspect as its audacity.  This would involve tearing the room apart and rebuilding it.  So I asked him to quote me on the job.  He came out and got measurements and said he’d have something soon.  It never came.  Just like everyone else.

Over a year later, I really want to get this project done.  I call the big guys, some home contractors.  They say the job is too small for them and give me their contact for a handyman.  He comes out and discusses changing the wood out for some plastic wood that won’t rot.  He says he’ll look up some product and get back to me.  He doesn’t.  Story of my life.

In desperation, I contact the original flooring contractor and ask if he’s willing to take on the job again.  He agrees, comes out, and gives me a quote the next day.  His explanation for flaking out last time was that he didn’t really know how it could be done without replacing the windows.  It is likely they would be broken during the removal.  So, we agreed to quote the job with window replacement and if the windows were preserved, they would be reused and would lower the total cost. 

Let’s do this.

Before demo starts, I have to go to a granite fabricator and choose the stone.  I choose a simple white, unpatterned stone.  I was told I could choose anything in a “Level 1” category, which is a pricing tier, and I think I got a Level 2 finish on a deal from the owner.  Good for me.

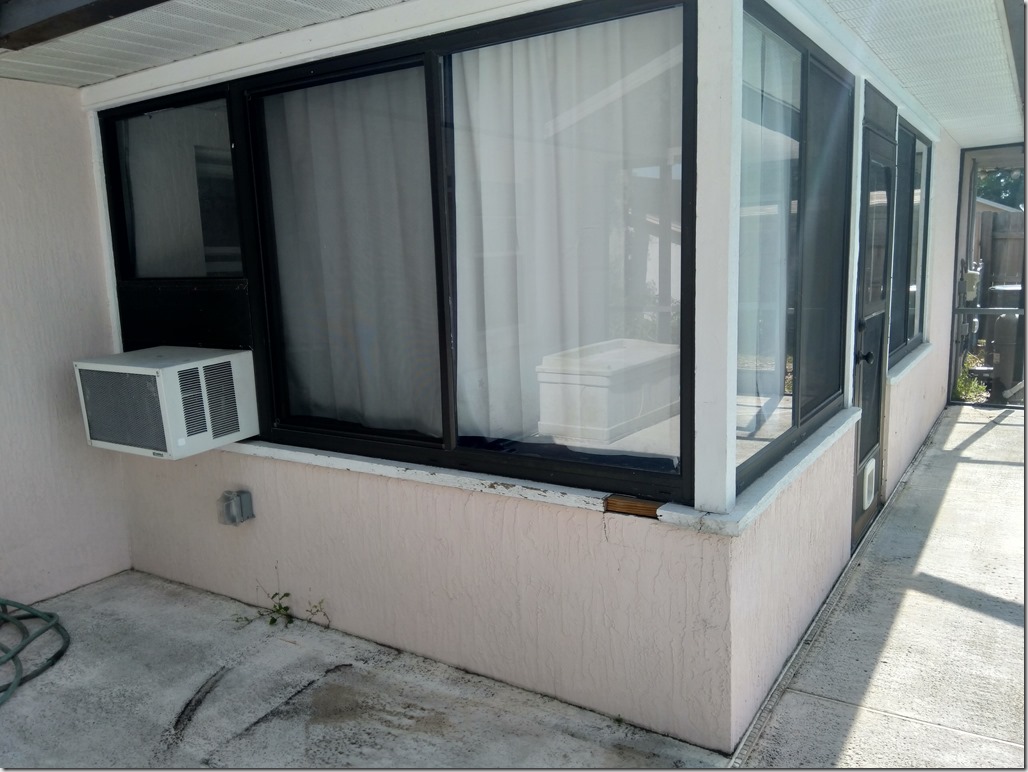
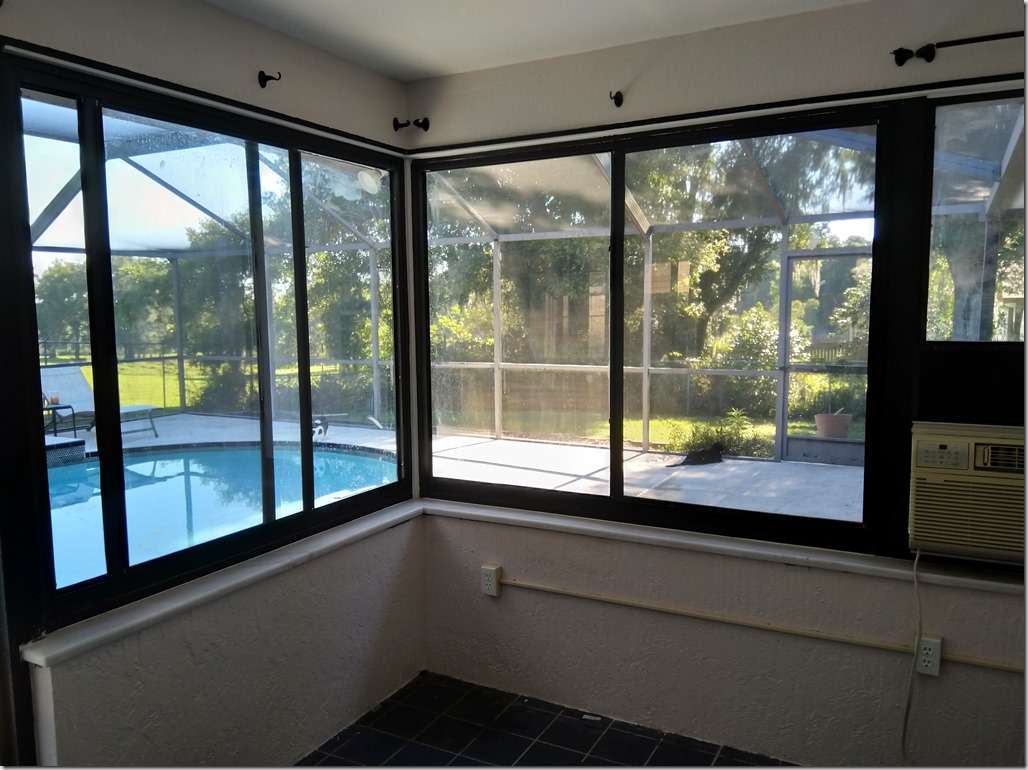
One chance to take pictures before this begins, to compare how it was.

IMG_20200426_102422

You can see the wood patch on the left side.

IMG_20200426_102259

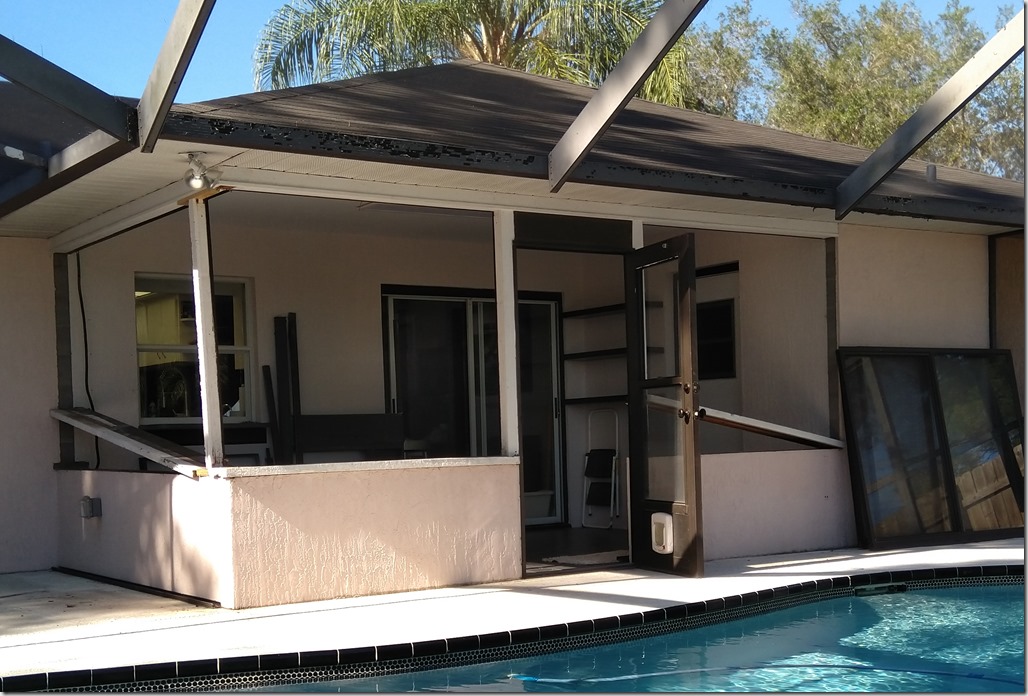
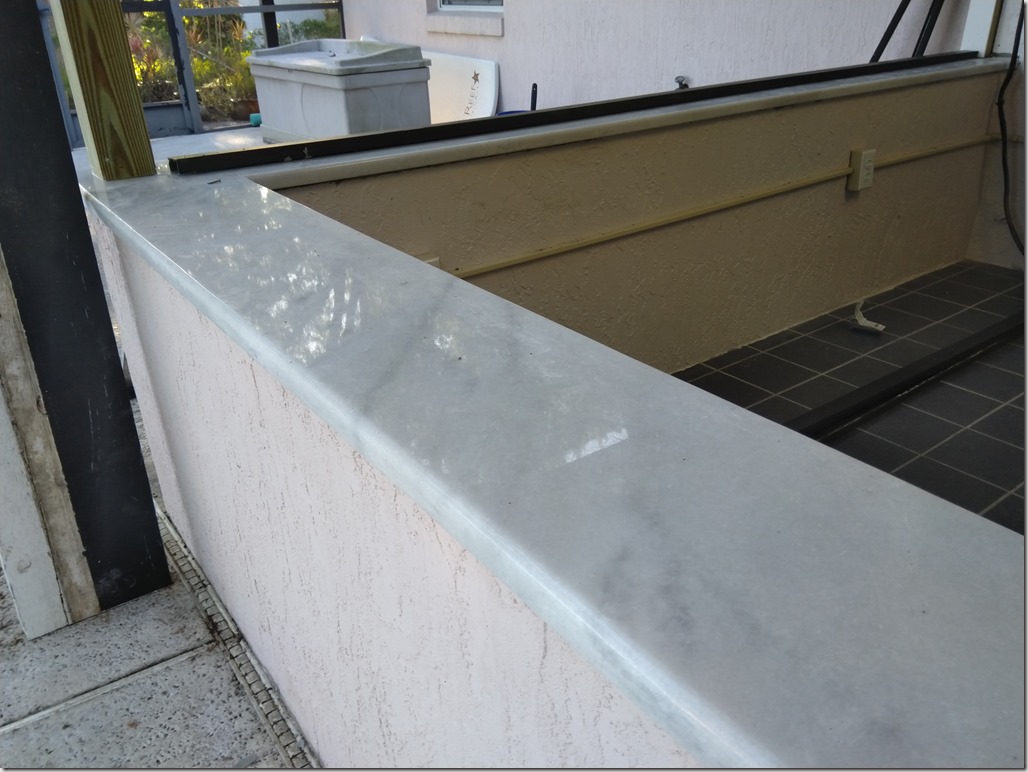
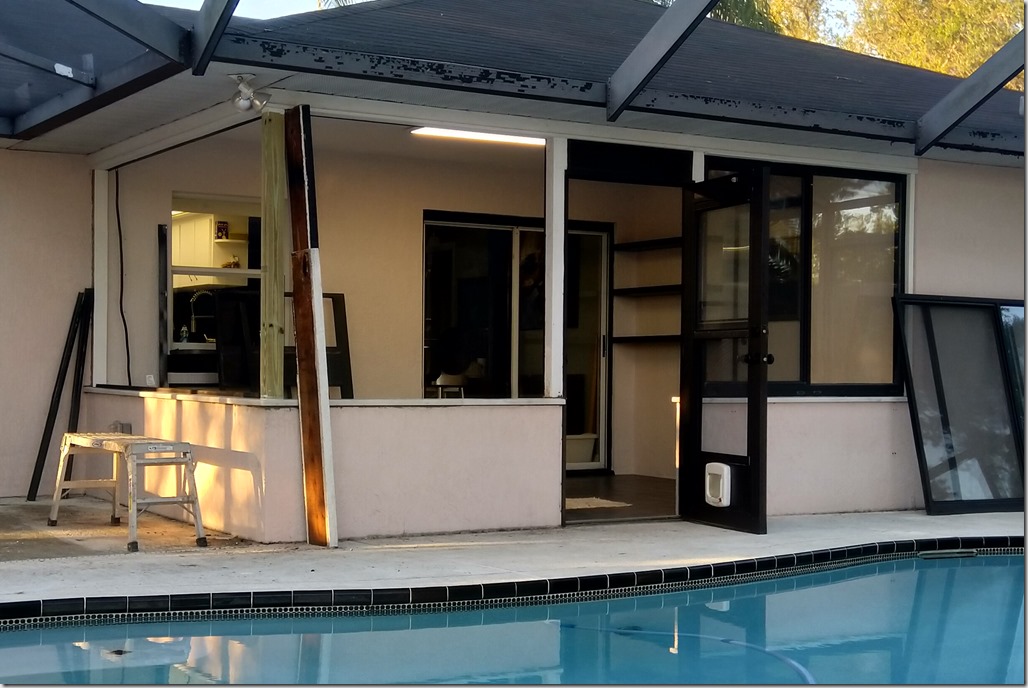
On day one, the room was demoed.  The windows were removed and the sills were removed from the walls.  Someone from the granite shop comes by shortly afterwards to take the measurements.  He explains that the notches for the door frame will be cut here on-site because transporting them with notches would be too fragile.  That’s fine.  Now we have to wait for the stone to be cut.  In the meantime, my lanai looks like some run down beach bar in the Bahamas.

IMG_20200427_170929

You can see just how bad the rot was.

IMG_20200427_104818

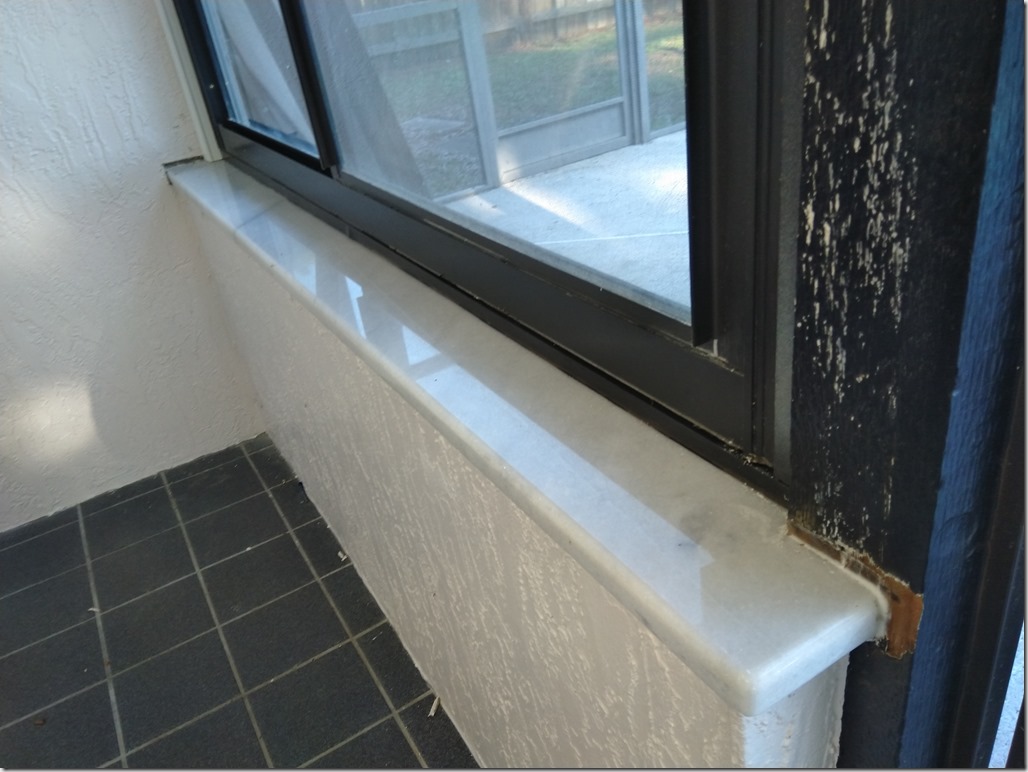
In a couple days, the granite is ready and once a storm clears out, everyone converges on my house.  Half a dozen granite workers and four contractor workers all measuring, cutting, fitting, levelling, and adhering the stone to the walls. And in the middle of it all, the pool guy shows up to add more chaos to the patio.  At the end of the day, the stone was set and one window was installed..IMG_20200430_185220IMG_20200430_185148IMG_20200430_191502

The next day, the rest of the windows were installed and caulking was done.  At this point it’s pretty much complete.

IMG_20200501_174313IMG_20200501_174418IMG_20200501_174517

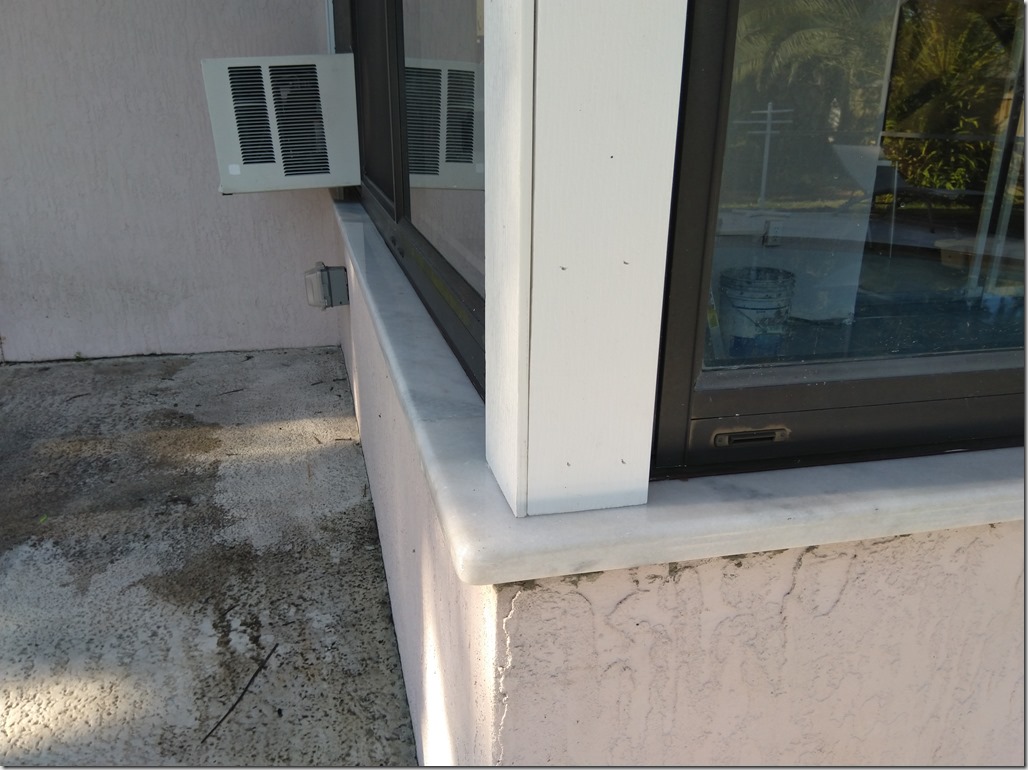
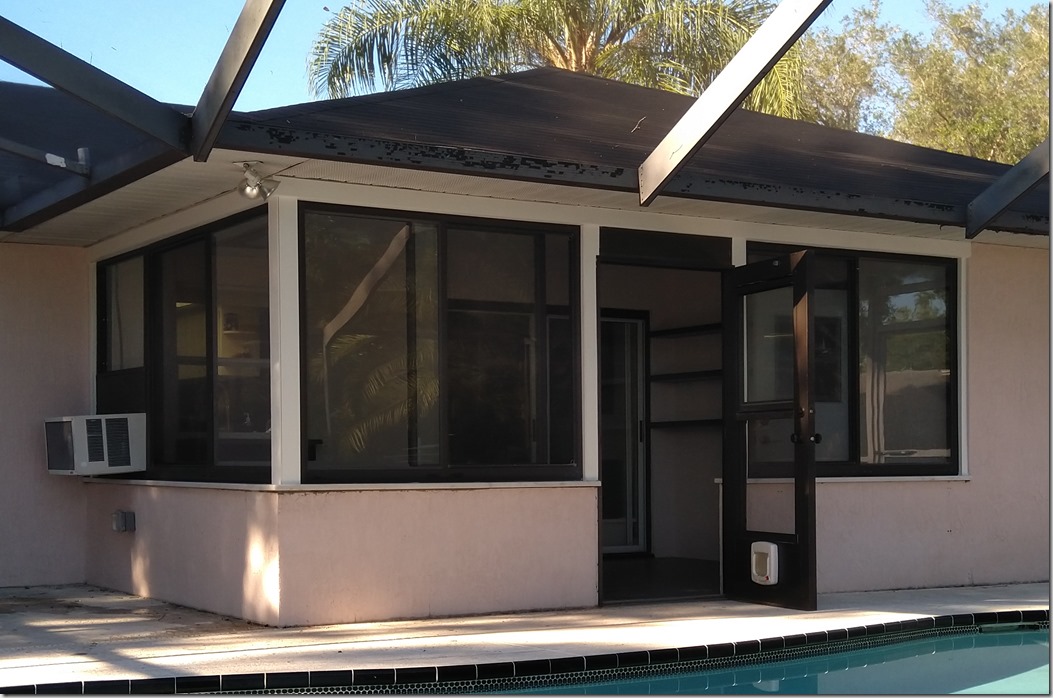
It looks pretty much exactly like it used to, but everything is new and durable.All lumber is pressure treated and faced with plastic wood.  The difference in height between the old wood and the granite was maybe 1/4″ and it was filled in at the top of the windows with plastic wood.  You can’t even tell it’s been filled.

IMG_20200501_174410

A great success.  Now that that’s done, what’s next on the list?  Next Tuesday is network wiring.  Then the next phase is repainting the house, then re-roofing.  I expect that will finish off my savings, but the phase after that will be retiling the bathrooms and resurfacing the pool patio and replacing the patio drain.

And after that?  The only thing I could think of left to do would be replace the kitchen countertops.  And replace the windows, but that one’s like 30k and I don’t think I’d realize any return on investment for that.