Wiring – Day 2+3, Plus Relocation

My work yesterday freed up some dependencies so I’m able to move on those while I also continue with my wiring project. 

First, though, one of the wiring subprojects is electrical.  I want to install a power outlet in the attic to feed the UV light in my HVAC system.  The UV light hasn’t worked as long as I’ve ever lived here, but that’s only part of the problem.  The previous homeowners had the light connected to the attic light socket, which turned off with the switch mounted near the access hole.  So if you wanted the UV light on, you had to leave the light switch on all the time and use the pull cord on the light socket.  And although I didn’t test it because that situation was dumb enough.I’m not sure if the pull cord controlled the outlets on the base anyway.

So, I mounted a new box on a rafter and ran some Romex wire down to the outlet that feeds my garage door opener.  Tomorrow AM when there’s light and coolness, I’ll cut the power and finish the wiring.

But, the relocation part.  Yes, the wiring project was motivated by my desire to move on the lanai window sill project.  So now I have a working network jack in the guest bedroom (the tester did its job perfectly).  So I have to move everything out of the lanai into other places temporarily and move my desk and computers to the guest bedroom.  So that’s going to be a blast.  In a way, it’s returning home, since the guest bedroom was my original office.

Back to the wiring.  Saturday morning I cut the breaker to the garage and wired up the new attic outlet.  I didn’t test it because the UV light doesn’t have a working bulb.  I will probably test it tomorrow if I choose to do some cable cleanup after today.

The next outlet in my list is the kitchen.  it replaces the phone line with a cat5 phone line cable and a network cable.  The test today is to see if I can pull cable back up into the attic using the existing cable.  Spoiler: no.

First, up in the attic to clear the insulation around the hole and get measurements.  pulling on the cable yields no movement.  Back down, I measure where the existing hole is.  It’s not even close to the outlet.  However, I got a new tool today to help me with cases like this.  It’s a massive magnet that will drag wires behind walls.  Let’s try it.

Back up in the attic, I drill a new large hole for my new wires.  I tie a pull string to a chain that was supplied with my new tool.  In theory, I drop the chain down, grab it with the magnet, and drag it to the outlet.  Easy.  But nothing is easy.  What I should have done as a first step is used the stud finder to see if there were any blocking studs.  And there were.  I could not drag the chain past the blocking stud.  I had no other choice.  I had the go into the wall.

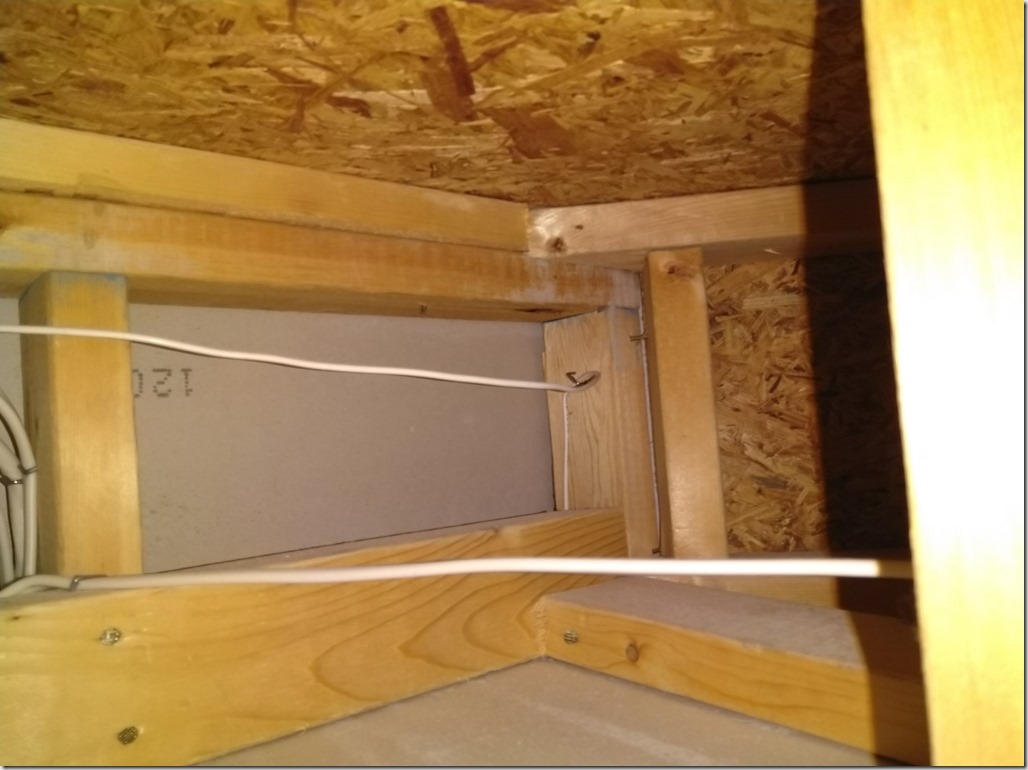
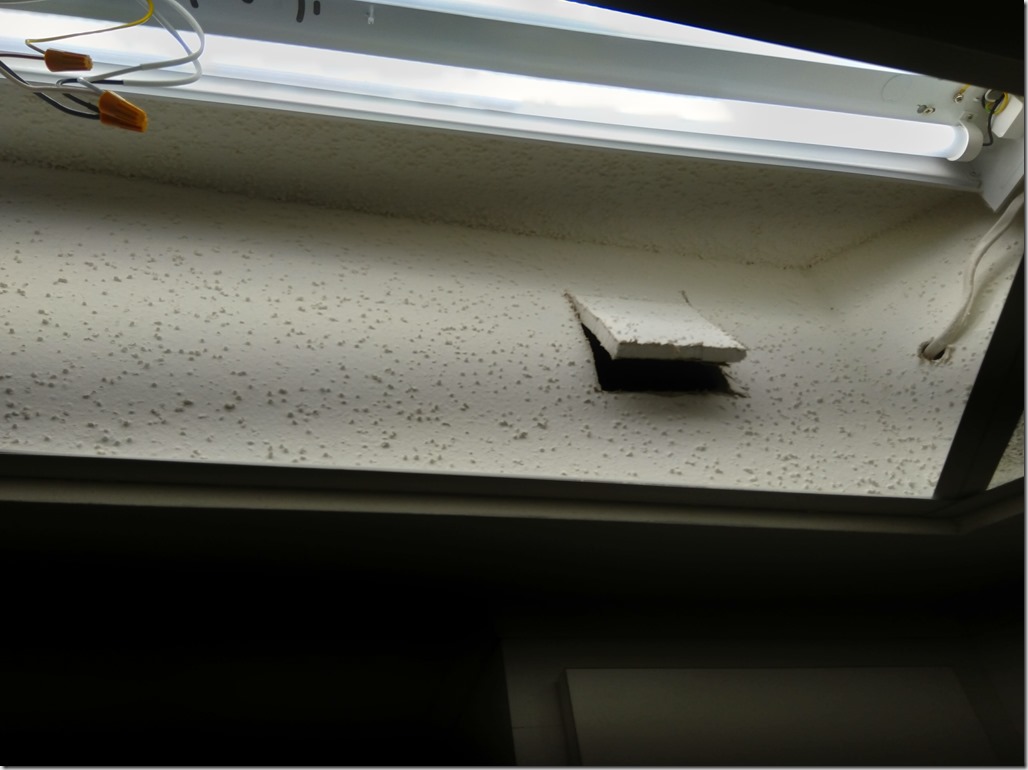
Fortunately, there is a place I can cut that isn’t readily visible – inside the lighting soffit in the kitchen.  So, I cut a hole big enough for full access:

IMG_20200418_141416

IMG_20200418_141711IMG_20200418_141706

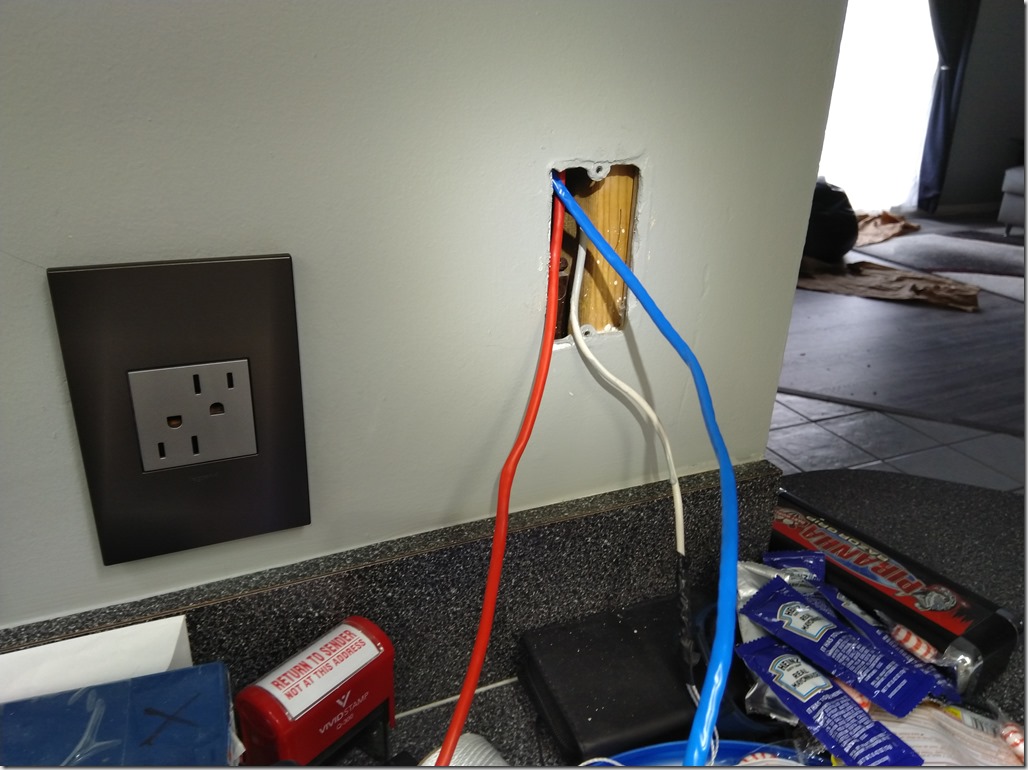
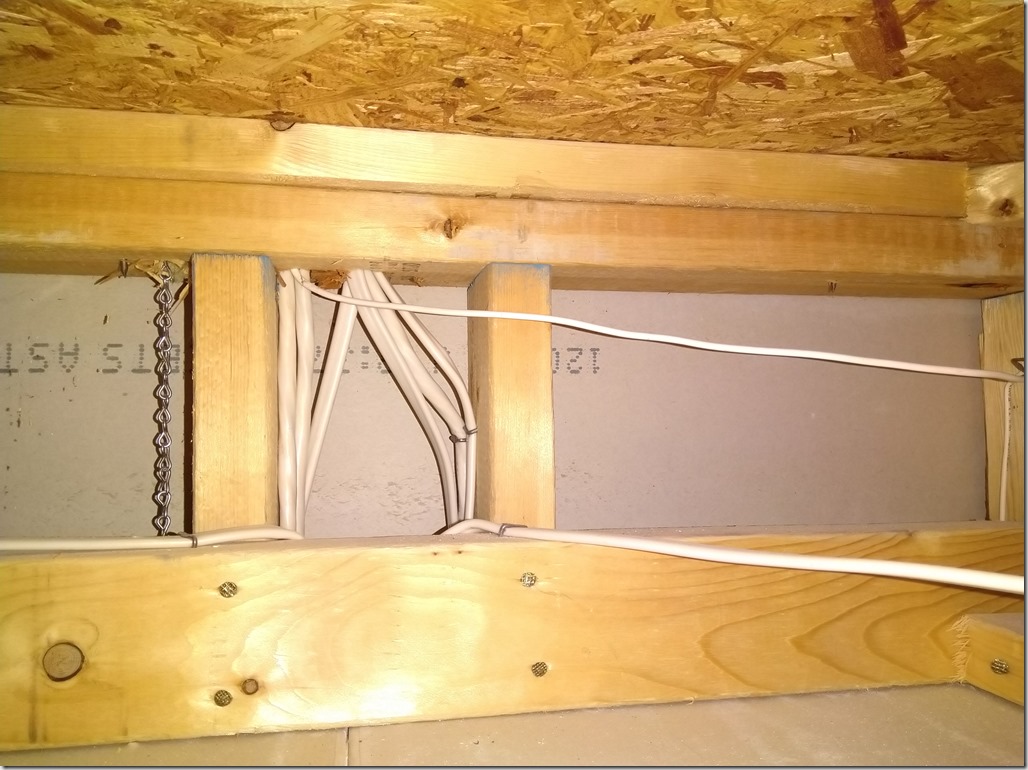
Inside, I spied the phone jack running over and down.  I reached in and pulled on it.  Still no budging.  It was stapled further down in the wall.  I had no choice but to run a new line.  In a rare bit of luck, there was no hole drilled down to where the outlet was.  It was just an open gap.  So I pulled the chain from my ingress hole, dragged it over to where the outlet needed and dropped it there.  In short order I had my chain coming out of the outlet.  I tied my cables to my pull string and fed them back into the outlet.

IMG_20200418_144740

It wasn’t exactly easy to fish the two cables back up and I made the mistake of thinking I could pull the cables into the attic using the string.  That was a wasted trip up and back down.  The better thing to do was push the cable up into the attic from below.  Then it was a matter of terminating the ends and testing them (successfully!) and cleanup.

I make no apologies for choosing to do the easiest drops first.  It’s to build up some techniques and experience that maybe I can use on the harder drops.  and this run gives me a sinking feeling for the rest of my plan.  I didn’t want to have to get into cutting into walls, but look at me now.  The knowledge that the existing phone cables are stapled into place really changes the game plan.  One drop in the bedroom seems like it’s going to be near impossible since it is located under a plant shelf.  I can’t see how I can drop from above it.  But we’ll see what happens in future posts.

House Wiring – Day 1

Today I made the split decision to begin my wiring, primarily because it’s cold and rainy out and having a day where the attic can be cool(er) is something that must be exploited.  Today I received my spool of CAT5 cable, so there wasn’t anything holding me back.  Previously, I had received my wiring tool kit, and still to come are extra keystone jacks and wall plates.  But the wiring can be done in advance and the wire is here.

Like I’ve said, it’s been a year since I’ve been in the attic, and I do remember what a bunch of bullshit it was.  I’m not young anymore and I don’t have the flexibility I used to.  So climbing around like a monkey between joists is not a fun project.  But I consoled myself saying there was no rush and I could take months to complete the project if I wanted to.  The more important thing was to do it well and not give up part way through like every other time, saying “Fuck this!  Good enough!”

One of the goals of the wiring project was to clean up the bullshit.  First of all, all the phone lines except one are coming out.  Second, what cable runs that are there are going to be cleaned up.  The network wire is just laying on the joists and I want to have it elevated, suspended from the rafters.  I bought a bag of cable clips that nail to wood beams to accommodate this.

The first thing I chose to do was to pull the new line from the guest bedroom.  That room already had 3 wires run already, but they were too short after the switch relocation.  I tied my new cable to one of the old cables, went in the attic and pulled myself a fresh line of cable.  Now to drop it.

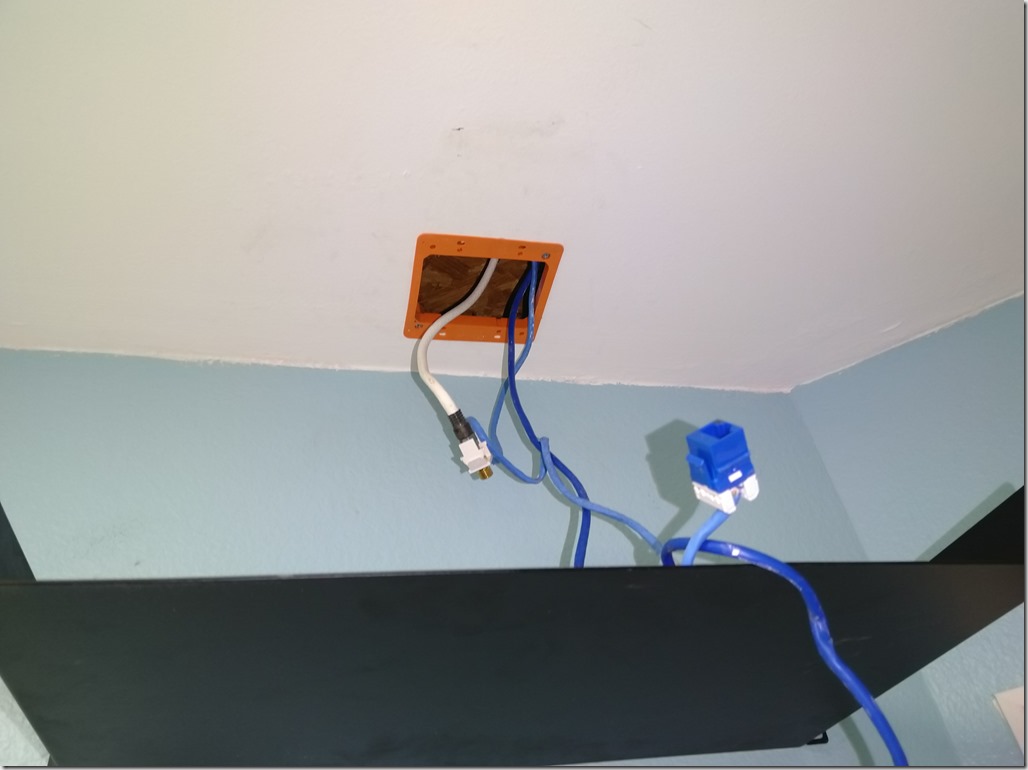
My network jacks are mounted in the ceiling and to support my expanded configuration, the hole needs to be bigger.  So that was the next thing I did: cut a bigger hole and installed the mounting plate.

IMG_20200416_174459

With the bigger hole, I was able to put my whole hand in there, so fishing cables out was going to be a breeze.  And for the new drop, it absolutely was.  Now that the cable was run and dropped, I had to neaten it up.

I don’t have a small hammer to bring up with me, so I took my small sledge hammer..  I don’t know the name of the tool, but it is like a hand-size sledge hammer.  It turned out to be a terrible decision.  Too heavy and the head was sort of rounded, so the nails kept bending.  I went back down and got my real hammer.  Although big, it did a much better job.  I just want to comment that the trivial statement “going down” is anything but.  It’s almost 5 minutes of stretching and squatting.

With the network cables secured to the rafters, I wanted to clean up the coax cable as well.  I only needed one wire right now, for the internet, so I disconnected everything else from the splitter and started organizing. 

Holy shit.  Two runs that were shot far down the house probably had 30 feet of slack each!  So now, my project grows a little bit because I want to trim and re-terminate these excessive cable to the proper length.  More tools.  What sucks is I had all the tools to do that and threw them out when I cleared out the shed thinking I’d never need them again.  Lesson learned.  Hoarding begins.  And the coax wasn’t the only thing excessive.  The phone line, which didn’t seem to go anywhere, was probably 50 feet itself.  Just piles of slack cable.

I’m going to be sore AF tomorrow, but my goal for that day is to see if I can pull a network cable up using one of the existing phone cables.  And tonight I’m going to terminate my new cable run and try out my cable tester in my new tool kit.

Wiring (Again)

Like 15 years ago, when I first bought the house, I was very keen on modernizing it.  I was going to have a network closet and a server to run all the automation stuff throughout the house, and network wiring everywhere.  It was ambitious and very much of-the-time.

Well, times have changed and for better or worse, I didn’t get very far with my plans.  What did happen was the absolute necessities.  I had network wiring and phone lines run for the two offices used in the house.  I had set up a nasty wiring closet in a bedroom closet to house the network devices and wiring… but this story has been told already.

It’s been almost a year and a half since I moved my network wiring to its current location.  And now, there is an impetus to make some improvements.

Projects have dependencies, and also, projects cause dependencies.  One of the projects on my immediate list is fixing the lanai.  The window sill needs replaced and it’s going to be upgraded to granite so it’ll never rot again.  I have the quote for the work now, but I can’t start it.  That’s going to put me out of my office for an extended period, and with me working from home as is everyone now, that’s not an option.

So, move to another room!  I can’t.  No other room has network wiring set up.  So that’s the new priority: to get wiring set up in all the other rooms so I can relocate and free up the lanai for construction.  Piece of cake, except for the unknowns.

I mentioned before that I had two offices wired up for networking, but now I only seem to have one.  That is because when I relocated the wiring to the laundry room, one room’s cables didn’t reach anymore.  So those need re-run.  Those will be the easy ones.

While I am expending the effort, I had it in my mind that when the weather cools back down, I would delete all the phone jacks from the house.  Land lines are now an antiquated concept and their presence actually lowers the impression of the house.  So I will convert all the phone jacks to network jacks and leave a single phone line in the kitchen, in case someone really wants a physical phone and sets up a wireless base station.

So the re-wiring is going to be an unknown.  I don’t know if the existing phone wire is stapled to any studs or if the hole in the framing is large enough for a cat5 cable.  Since they are mostly installed on the outside walls, that’s going to be hard to access.  While I’m at it, I may try and run a couple of ethernet lines from the FIOS ONT module inside, so I can eventually convert to ethernet completely for the internet access.

Then, after I have all my cables run, I have to upgrade the ceiling jacks by my router.  I currently have a single jack with 6 ports.  I’ll have to replace that with a 2-gang plate with 12 outlets.  Eventually, I’ll need a larger switch, but for now, I can just patch whatever jacks I’m currently using to the router.

So at this point, I’ve committed the money.  The CAT5 cable is ordered as is a cabling tool kit.  It doesn’t seem there’s going to be any end to the home quarantine anytime soon, so this is the time for home improvement, isn’t it?

CD Shelving Units – Mitigating Disappointment

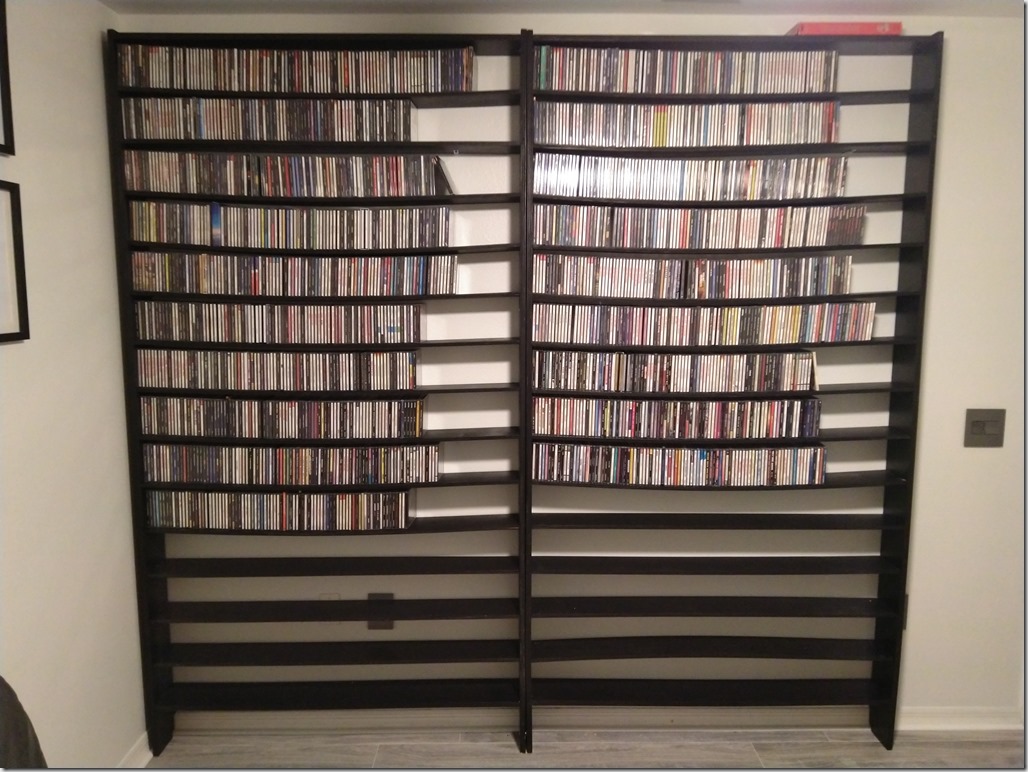
Well, I’ve learned a lot about building shelving, but the harshest lesson came at the end.  I learned two things:  100 CDs are very heavy and 1/2″ plywood will not hold such weight at a 4′ span.  Not entirely sure why I expected that anything would be rigid at a 4 foot length, but I guess I figured 1/2″ is definitely better than 1/4″, and there’s no way I’m making shelves out of 3/4″, so that should be solid.  It wasn’t.  This was the result of loading my 1,700 CDs in my shelves:

IMG_20200206_210433

Every shelf is bowed, some dramatically and worrisomely.  In the unit’s predecessor, the MegaBenno, I had bowing also, but that was due more to the unevenness of the center support blocks.  So then, what are my options for resolving this?

  1. I can fit 5.5″ supports in the middle of each span.  I have two lengths of 3/4″ that I can cut down to make this happen.  I’m not in favor of this because it will break up the long spans of shelf, which is why I made two 4′ units to begin with.
  2. I can secure each shelf to the wall with an L bracket.  This will certainly be secure, but man, that’s 26 holes in the wall.  And if I ever want to relocate the units, that’s a lot of patching.  Plus, I would have to buy 26 brackets.  However, no painting, so it could be done quickly, especially since I wouldn’t have to unload the entire unit.
  3. I can install a back on the unit and secure the shelves to the back, which is similar to securing it to the wall.  The problem with that solution is that is a lot of wood: 8’x8′.  Plus I would have to paint it all.

Weighing my options, I think I can do this in progressively more extreme steps until the problem is solved.  As it happens, I have extra shelves left over.  I can use those to create a partial back as planned in option 3.  I’ll just make a strip down the middle, securing one 4′ shelf at the thick top and bottom shelves with screws, then using the nail gun to secure the strip to each shelf.  However, this will increase the depth of the units by 1/2″ – and only in the center.  On the plus side, the wood is already painted, so I can implement this very quickly.  If that plan doesn’t work out, I’ll probably go with option 1 and paint and cut down the 3/4″ wood into vertical supports.

The most difficult part of all of this improvement is going to be unloading and reloading the CDs from the shelves.  But, to focus on the positive, the shelves do have a lot of capacity, so I have significant room to grow the collection.

CD Shelving Unit #2

This time, I got apply all the lessons I learned from building unit #1.  The result was greatly improved and was done much more efficiently.

Before I got started, I had already decided I was going to buy a power sander and that was ordered Friday afternoon for Saturday delivery.  When I got home Friday night, I started right away.

This time, when cutting the frame sides down to 92″, I used the jigsaw instead of the circular saw.  For such a short cut, it worked out just fine.  Because I was cutting against the grain, I also utilized a tip I had read: score the cut line with a razor blade.  This was effective in preventing the top layer from splintering during the cut.  I did the same procedure to cut one of the 8′ lengths into the 4′ top and bottom of the frame.  For whatever reason, my cut left the top and bottom different lengths of about 1/16″, but since they are going to be on opposite ends, I’ll manage.

Then the shelves.  Using the 4′ top and bottom shelves as risers, I clamped and cut the 4′ sheets of 1/2″ plywood very quickly.  I saved some time by not measuring the cut line and only measuring where to clamp the saw guide.  I was running through battery after battery in my 20v kit and by the time I ended for the night, I had only 2 shelves left to do, but that would be starting a new whole sheet, so that was a good stopping point.

The next day, Saturday, after lunch, I picked up a bunch of sanding discs for my soon-to-arrive sander and a couple of even bigger clamps.  Then I finished up the shelf cuts.  I put all the shelves side by side and saw there was some significant discrepancy in their widths.  Well, this is why I bought a power sander and some really low-grit paper.  Using both sets of clamps, I bundled the shelves into two groups of 7 and set them aside.

I used my quick square to mark off the lines for shelf hole drilling and drilled all the holes for the shelves.  I was still waiting for my sander to arrive.  I made a template for the floor molding of the room.  Unit 1 just had some rough, squared-off cuts to get around the molding, but since this would be the unit on the outside and the first to be seen, I wanted the edges to be nice and round and conforming to the molding.

I used a piece of cardboard and trimmed and refined the profile, then transferred it to the bottoms of the frame sides.  Using the jigsaw again, I cut the shape out relatively close, then broke out the Dremel and used the sanding bits to make everything nice and curved and smooth.  Still waiting for my sander.

Finally around 6:00, while the cats were eating, Spock (big boy) alerted and started growling.  It was the delivery person dropping off the package.  Without delay, I unpacked the sander and the vacuum attachment and rushed to the garage to begin the sanding.

The process was very clean because of the vacuum, but it was slow, tedious, and ate through many batteries.  I didn’t take all the shelves down to the same width, but I did get them closer, which is better than what I had before.  And that finished me up for Saturday.

Sunday after lunch, I used the sander with a finer grit and went over each shelf’s edges individually.  It was clear that this was going to make the finish much nicer than it was on unit 1.  Then it was time to prep for painting.  Instead of setting all the shelves up on end, I had the idea to lay them all flat on the many buckets and kitty litter bins I had.

First, I wiped the shelves all down with a rag to remove any sawdust, then bundled them up again into one massive group with the new large clamps.  While clamped, I painted both side edges of the shelves while they were elevated in the sawhorses.  Then, I unclamped them and transferred two at a time to a couple of bucket stands, where I painted one flat side.  I did this 7 more times, then painted the 8′ frame pieces on the sawhorses.  This was completed at around 3:00.  All I had left was waiting for the paint to dry so I could flip the shelves and paint the other side.  I could have done the painting after dinner, but left it overnight for the next day.

Monday after work, I began the painting of the other sides.  The process went quickly, but as I worked, I was sorely disappointed to see the quality of the painting the previous day was very poor.  There were many, many drips along the edges that had dried.  This was clearly a significant drawback to my decision to paint the shelves flat instead of on their ends.  Since this is the unit that is supposed to be the best show of quality, I’m fairly resigned to sanding down the edges and putting another coat of paint on.  This will delay the installation process by another day.  But, quality is worth the time.

Tuesday I got a closer look at the paint.  The shelves are in decent condition and I determined they don’t need any touch up.  The sides and the top (or bottom) of the frame did need sanding and repainting.  Tuesday and Wednesday, I used the power sander again with a fine grit (220) and on the paint blobs.  It really smoothed things out.  Then I used a foam brush to put a light coat of paint over the sanded areas.  The result was very good.  If I had the inclination, I would do that process with the entire unit – sand the first coat with 220 grit, then add a thin layer of paint with a foam brush.  But, realistically, the shelves are going to be populated, so there won’t be much to see there.  The frame is much more important.

In a little bit of research, I learned an important fact about furniture painting, or any painting, really.  There is the paint drying time, which I have been significantly overestimating.  This is only about a couple of hours, whereas I’ve been allowing 24 hours.  If I did want to do mulitple coats of paint, I wouldn’t need to do one a day.  I could do both in a day.  Then there is the cure time, which can be as long as a month, but is at least a couple of weeks.  The cure time is how long it takes the paint to not be soft anymore.  I’ve generally not paid attention to this, although I do recognize the soft, sticky feeling of new paint.  Ideally, I shouldn’t load up the units until the paint is cured, but I don’t think I’m going to concern myself if the shelves get some ribbed indents from the weight of CD cases pressing into the soft paint.  It is something to keep in mind for future projects, though.

Thursday is assemble and install day and the return of the garage to normalcy.

These are pretty big units, so it’s important they be secured to the wall.  Additionally, it will be more secure if they are attached to each other.  To accomplish this, I used binding post screws, where one end is a typical screw and the “nut” is a barrel with a screw-type cap on it.  Tightening this screw closes the gap between the two heads and will pull the frames of the two units together.

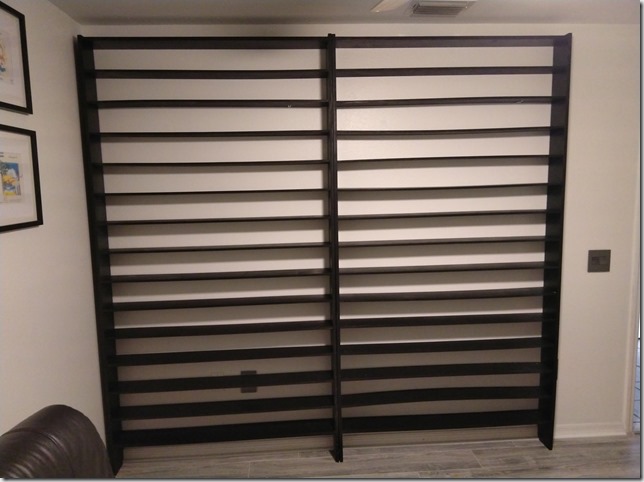
And here is the result:

IMG_20200206_184442

CD Shelving Project

Since I am running out of space in my current CD shelves (the MegaBenno), I thought it would be good to build a new shelving unit myself.  I have all the tools, I have the time, I have the skills… well, we’ll see.  While technique is certainly important, having the right tools helps a lot and should make things easier.  Should.

The MegaBenno ended up being a pretty big disappointment, even more so considering how much I paid for it.  It cost a little over $450 in materials and the end result was honestly ugly.  But I did use it anyway because I didn’t have any other option.  The capacity was not as large as I originally calculated, so its end-of-life has come mercifully fast.

After weeks of planning and designing, I settled on a plan of 3/4″ plywood for the frame and 1/2″ plywood for the shelves.  That should be simple.  You can buy each in 4’x8′ sheets relatively cheaply.  So I went to Lowes and bought one sheet of 3/4″ and two sheets of 1/2″.  While there, I had them cut the 3/4″ sheet into 6″ strips, because I would not be able to make a 8′ cut accurately with any tool I had, nor would any tool I owned be capable of making so many cuts through 3/4″ wood without dying.  I also had the 1/2″ sheets cut into 2’x4′ sections.  I should be able to handle cutting 4′ sheets into 6″ shelves.  Should.

Considering the MegaBenno was over $450, I made out pretty well only spending $120 on the wood materials..
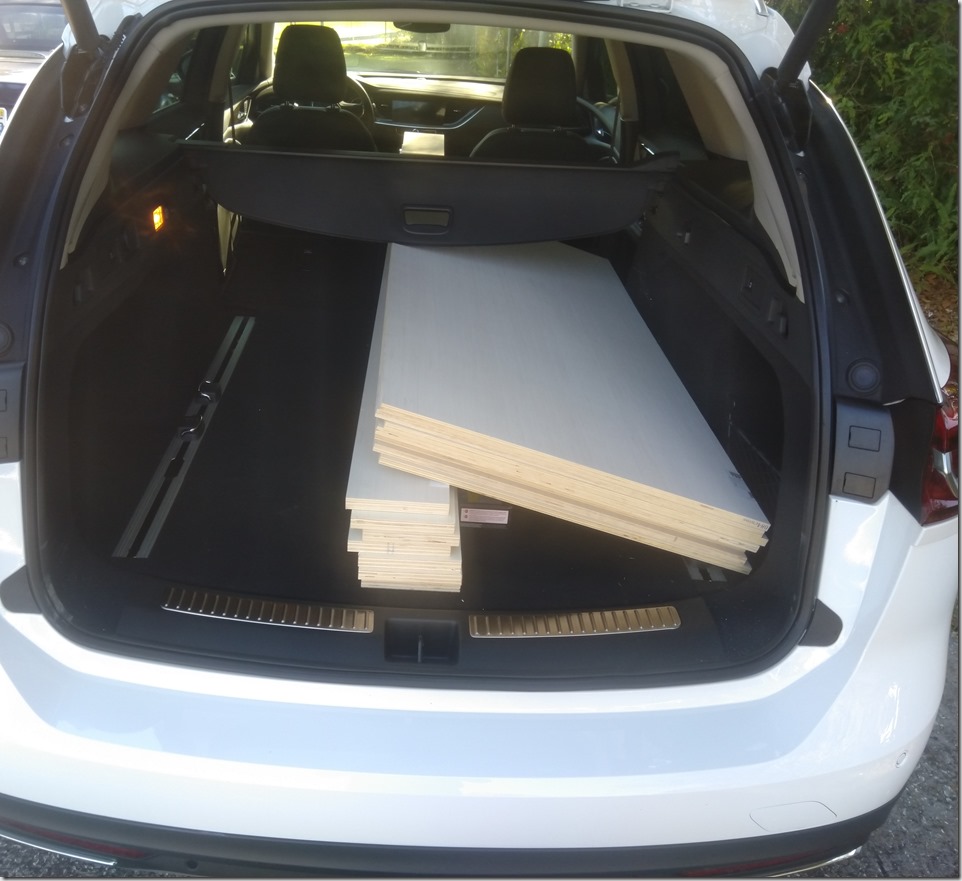
IMG_20200125_142052

Once home, I chose two side pieces and cut them down to the height I wanted: 92″.  My very first cut, not so good.  The wood splintered and it ended up at an angle.  So now, a 4′ cut looks pretty scary when I can’t accomplish a decent 6″ cut.  But I then remembered something I saw in a video where the builder clamped a straight edge to the wood and ran the saw against it to keep the cut straight.  I can do that.  I just need clamps.  And the saw is seizing up a lot, so I think it needs a new blade.  Back to Lowes.

I return with a new blade and a couple of clamps.  And on that topic, clamps are something you can never have too many of, especially when you are working by yourself.  Before I started this project, I had a tiny, cheap bar clamp and a pretty useful bar/screw clamp that got regular use.  On one Lowe’s run, I picked up two matching, hardier, bar clamps.  Later in the project, at assembly time, I bought a corner clamp, which made attaching the frame and shelves much more precise, since I could clamp the cross piece in place, then drill some pilot holes and screw the pieces together without any movement or slippage.

Before I got started cutting the shelves, I measured and marked up the side pieces for the shelves and the screw holes.  After drilling all the holes, I counted up the shelves – 14!  That’s a hell of a lot of shelves I need to cut.  I can get 4 out of each sheet, so I’ll be cutting up 4 sheets. 

On the first sheet, I made my 6″ measurement, then measured again for the saw guide.  I clamped the guide to the sheet and began cutting.  The saw kept seizing up even with the new blade.  Still, I made it through the first cut, which turned out ok.  Not great, but acceptable.  After inspecting the saw with and without the blade on, I determined the motor in the saw was bad, so I had to buy a new saw.  Back to Lowe’s.  Again.

Now with a new, bigger saw and a new blade, I set up my guide for shelf cut number two.  Somehow, while I felt I was against the guide and it looked like I was on the guide, I wasn’t.  I must’ve had the saw twisted because I ended up with a cut that was off the mark, angled strangely, and ragged.  And on top of that, the new saw kicked sawdust all over the place, much more than the old one.  It was a much worse experience.  So I straightened out the cut as best I could and put the shelf in the “maybe, probably not” pile.  After consideration, I think the poor cut was because I put the guide on the far side of the saw, which gave me much less control and feedback.  All my later cuts had the guide against the near (left) side and were much cleaner.

Now for the final cut for the sheet, essentially cutting the sheet in half.  This one was difficult because my sawhorses are cheap plastic shit, so I couldn’t clamp the wood to them, and I still had to have half the sheet hanging off the sawhorse to make the cut.  This cut was especially ragged because the sheet was hanging off the edge.  That was when I gave up for the night and chose to reflect on the process so far.

The biggest issue I am facing is that cutting off the edge of the sawhorse is difficult and creates messy cuts.  But I can’t cut on the sawhorse because the blade will cut the horse unless I am very precise setting the blade depth.  BUT… what if I raised the sheet on two planks underneath, making a channel for the blade.  AND… what if instead of cutting 6″ from the edge each time, I cut a sheet in half, then in half again (twice).  That will keep the weight on the sawhorses, evenly balanced on both sides.  It will also mitigate the loss of width I get from each cut.  By cutting the sheets in half, the slack will be distributed evenly.  I think I have a solution here.  This is why it’s good to stop and think about problems.
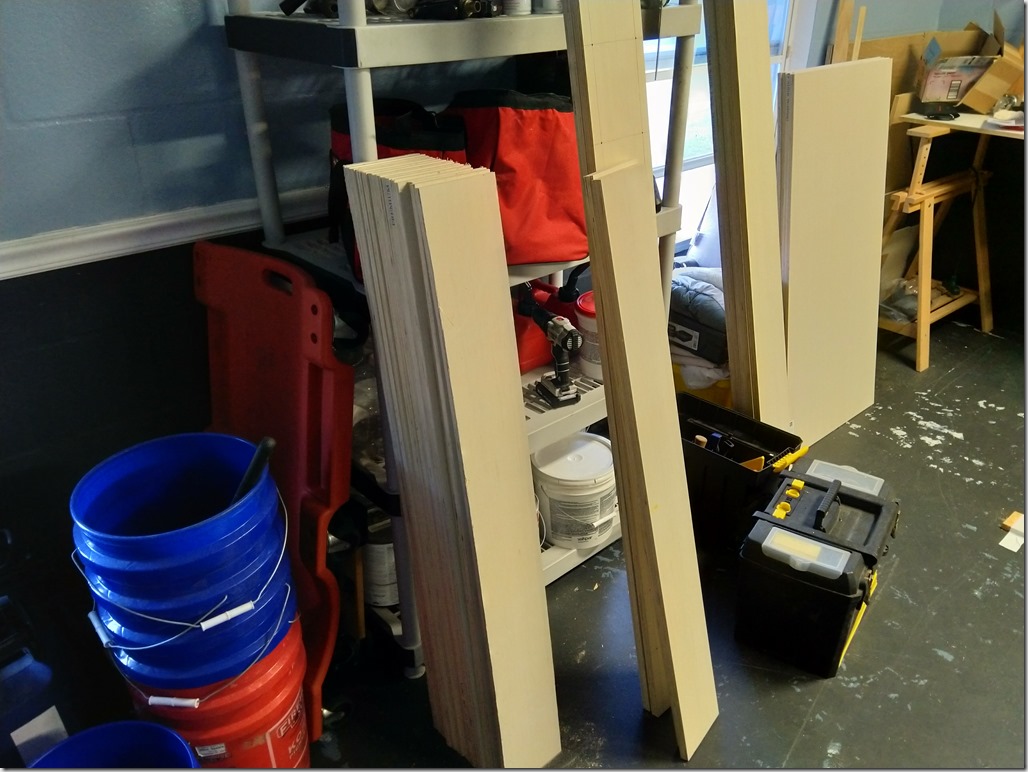
IMG_20200126_132835

The end of day two had all the shelves cut, sanded, and the first side painted.  The plan I came up with the previous night for cutting worked out very well.  The sanding portion was brutal.  It took a very long time to hand-sand each piece.  I think I will be buying an electric sander for building the second shelving unit. 

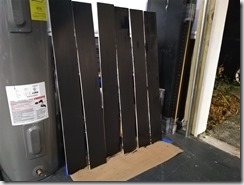
Painting was started with a lot of deliberation.  I wasn’t sure if I wanted to try painting both sides of the shelves and frame at once.  I couldn’t figure out where to put the pieces as they dried.  So I chose to paint one side at a time, letting them dry before painting the other side.  This way I could rest the pieces on walls and shelving units as I painted them.

I have a gallon of black paint (named Cracked Pepper) that has been used in various places throughout the house.  First on my bar bench, changing it from a dark wood tone to black.  Next was the trim in my office.  And with both of those projects, I still had more than 3/4 of the gallon left.
IMG_20200126_190507 IMG_20200126_190448

I am not a good painter, I readily admit it.  It should be the easiest thing to do – smear this color on something until the something becomes that color.  But I’m just sloppy and inconsistent.  In this particular case, a lot of everything else got painted as well.  Luckily, I had the forethought to put paper down on the ground, but I should have put paper behind the painted items as well.  Tomorrow, I will have to buy some foam brushes to paint the sides of the shelves, as the big 3″ brush was uncooperative with painting the thin sides.

Day 3 was painting the sides and tops (or bottoms) of the shelves and frame.  It was an hour and a half of stooping and bending, but amazingly, for all the paint that dripped everywhere, none got on me.  Some of the shelves were glued to the paper on the floor by the running paint from the previous day, so there will be some cleanup later.

That experience led me to consider how to do the painting process better next time for cabinet #2.  First thing: stop the stoop.  I have some wooden sawhorses that I can raise up to a level where I can paint without bending over so much.  Also, instead of picking up and painting the sides of each shelf individually, I should bundle them all together with clamps and paint the sides all at one time.  Then split the bundle and lay them all out flat in groups and paint one side with a wide roller.  I had been using a brush in order to apply a thicker layer of paint and also to create a bit of grain with the brush strokes, but the result isn’t worth the effort.

I’m going to let the paint dry and cure for another day before I attempt any assembly.  In the meantime, I will be prepping the pieces for cabinet #2, mostly just measuring and marking.  I don’t want to generate any sawdust while there’s paint around.

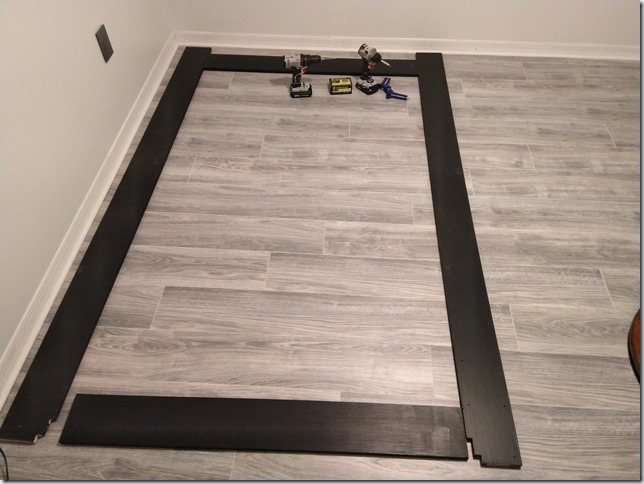
Day 5, assembly day.  The old unit has been taken down and the room is cleared and ready.
IMG_20200129_171735

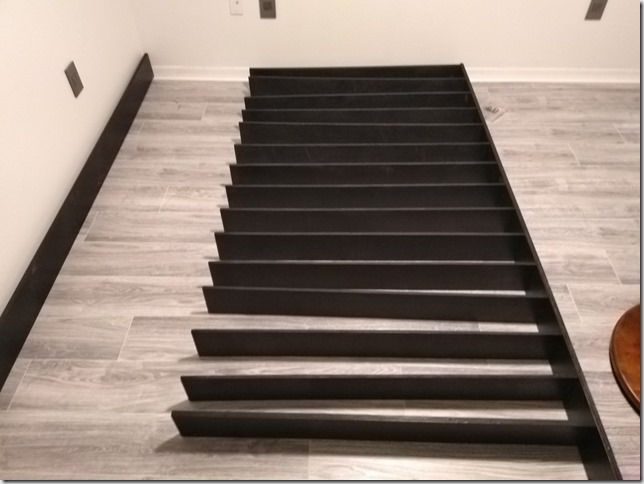
Laying out the frame.  I’m building this with the foot away from the wall so when it’s complete, I will lift it from the top and angle it back into the wall.  The reason for this technique is if I simply raised it with the feet already at the wall, I would hit the ceiling fan along the way.
IMG_20200129_180210

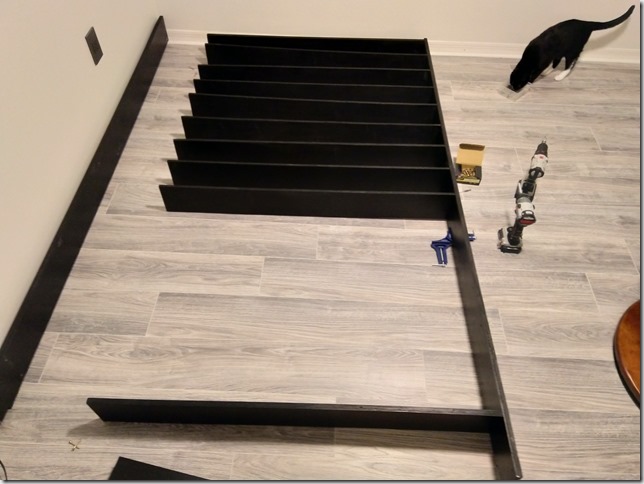
First, I attached the top and bottom shelves and the left side to complete the frame, but then when I went to attach the inner shelves, I found I needed space to adjust, so I detached the left side.  So the construction process will be: attach all shelves to one side, then attach them all to the other side.
IMG_20200129_180219

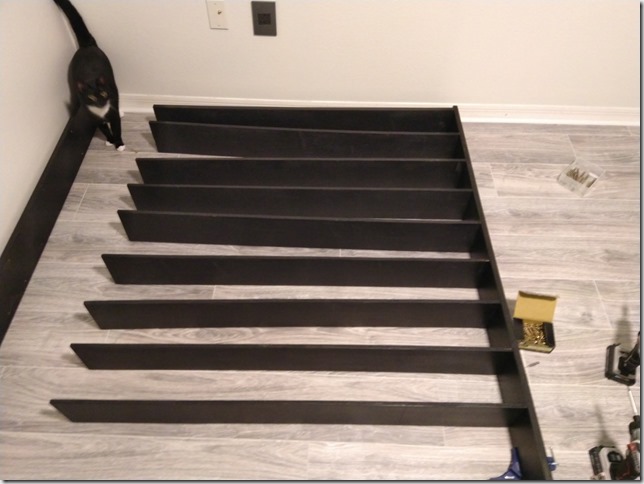
Nearly complete with one side.  You can see in this and the previous picture the corner clamp that was invaluable in keeping the shelves straight and level.  Some shelves got split despite drilling a pilot hole, but I didn’t stress over it. 
IMG_20200129_181503

One full side complete.  Although some of the shelves look like they’re angled oddly, they will be straightened out when attached to the other side.  I used a new tool this time, an impact driver.  This tool is specialized for driving screws and it took a very careful trigger finger to not overpower it and run the screw right through the frame.
IMG_20200129_185155

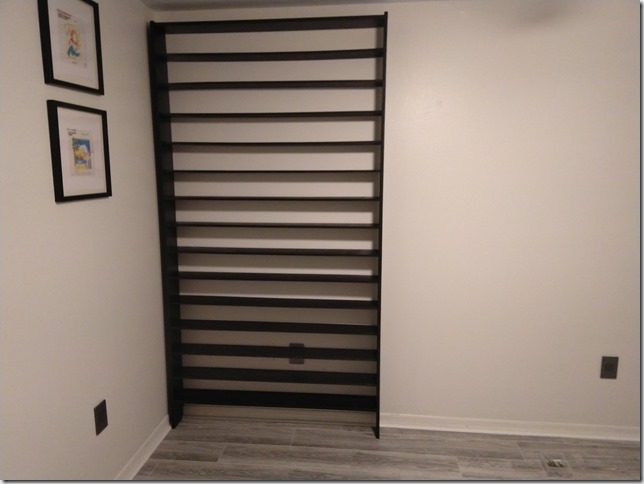
Shelf complete and raised to the wall.  I was able to reuse the wall mount from the old unit to secure it to the wall, and I’ll need to add another for unit #2.
The Shed Has Left The Building

Soon after I had the garage completed, I began moving the tools and such that I wanted out of the shed.  I didn’t really have a place to put the tools, but I did have floor space, so that’s where they ended up.

As I was moving some things around and cleaning, my neighbor stopped over to see the new work.  I mentioned to him that I wanted to get rid of the shed and he said he would make a few calls.  A few hours later he came back over and said he found someone who was interested in looking at the shed.  A few minutes later, he comes back over with another guy and we all look over the shed.  He says he’ll take it.

The guy comes back the next morning with a large trailer and begins taking the shed apart.  I was actually still in bed when this was going on and I only caught the last bit of his work.  He was working alone and I saw him yanking on the roof.  The walls started falling apart and the rest sort of collapsed.  Oh well, not my problem.

A little later my doorbell rang and the guy was out there.  He said he had it all loaded up except for the floor, which he would need to come back with some helpers in order to move it.  No problem.  Whenever.

Whenever was supposed to be the next couple days, but went on until the next weekend.  but in the end, it was all moved out.  I was left with the few items I did not throw away – some tiles, some flower pots, a plastic tub.  And underneath the shed was a mound of sand.  I cleaned up the leftover debris and moved it to my trash area so I could ration it out over the following weeks.  I was still rationing carpet from the garage, too.

I guess I’ll have to get a rake and smooth out the sand mound and hopefully some grass will grow in the area. 

The Garage Has Arrived

Nearly 15 years after I purchased the house, I finally have a garage.  As I’ve mentioned many times previously, the former owners converted the garage space to a game room.  In my neighborhood, there are very few garages used as garages.  Most are storage units, and some are more like semi-enclosed patios.  Others are converted to living spaces.  I guess that’s the way of the world with people just having too much stuff and/or too many people in their house.

I got the call to schedule the work on Thursday and the work was planned to happen the next Monday.  The contractor would come in the morning to tear out the wall and install the framing and the door would get installed in the afternoon.  I should be able to park the car inside the same day.  Of course, there’s plenty of other things that need to happen first, though.  Removing the old carpet, cleaning the concrete, reorganizing shelving, etc.

This is also the next step to eliminating the backyard shed.  Once I have a place to store all the yard tools in there, it will be time to shop it out.  And then, this is also the point where I can begin shopping for my next car, now that I have a place to store it.

The demolition went pretty well.  The installers had done a good job by filling the block with concrete and installing rebar that extended into the existing walls.  Some of the stucco was broken, which will need to be repaired and obviously painting will need to be done.  But, at the end, I had a large opening in my house.

img_20190930_105734

The garage door installers were running a little behind, so instead of showing up around 11:00, they got there around 2:00.  Their work was pretty simple with no surprises.  They finished it up within three hours, and the big hole was closed up.

img_20190930_164941img_20190930_172057

One thing that was completely shocking about the install was the door operation.  Possibly a combination of the 3-layer door construction and the belt drive opener, but it was dead silent.  It was unbelievable.

After everyone had left, I began the process of cutting up the carpet.  I made it about a third of the way through before I gave up for the night.  The whole process would involve moving everything in the garage from one side to the other, then back again, which I was not entirely in the mood for right then.

Later in the evening, when I went out for dinner, I realized that the carpet removal was going to be a top priority.  In the years of its life, the carpet has collected moisture from rain through the windows and a blown hot water tank.  And now, the carpet is a mildew factory.  Without any ventilation from the former entryway windows, the garage now stunk beyond belief.  I opened the side windows and started a fan running to continue the airing out of the room.  The carpet will be removed and the floor will be sanitized ASAP.

And somewhere in that whole process, a large-scale tile-shuffling game will be played with the contents of the room.

Catching Up

It’s been some time since I’ve posted anything here.  Mostly because it felt not much of significance has been going on, but there actually was.  My list of things to accomplish is shrinking steadily.

For many years, I’ve wanted to change the color of the primary rooms in the house.  It was formerly a yellow color and it was everywhere.  Because it was everywhere it was too much for me to commit to doing.  I eventually hired someone to do the job for me.  At the same time, I hired someone to remove the popcorn ceiling in the space, which was another too-big-to-tackle task.

img_20190611_173210 img_20190611_173221

Popcorn down; ready for painting.

img_20190625_184900

Painting complete; area rug added.  I also added an area rug in the music room, as much for appearance as for reducing the echo and reflections.

After that was complete, I replaced the smoke detectors, which had turned yellow on their own, with fresh new white ones.  I also shot the doorbell cover with fresh white paint.  So everything on the walls was fresh and new.

img_20190630_145620

And I finally – finally – got the artwork up on the wall like I’ve wanted for years.

So many years ago, I began a project of repainting the folding closet doors in the bedrooms and the pantry.  My painting turned out really crappy for some reason, so I sort of abandoned the idea.  The closet doors went back in place, but the pantry door, with its crappy paint job, just sat in the garage.  I recently decided to slap on another coat of paint on it, using some leftover paint from other projects and it turned out decently.  So, I was able to finally return the pantry doors to their place.  Some of the mistakes I made in that project were with the rollers and pivot pin that holds the door in place.  First, I installed the pieces on the door upside down.  I couldn’t figure out how the door had suddenly reversed sides.  After realizing that mistake, I was unable to remove the rollers without breaking one.  So back to Lowes for a replacement.  Installing the replacement, the new piece wouldn’t fit in the hole, despite the hole being the correct 3/4” size.  I hammered in the roller, but just broke it.  So I drilled out the broken roller and used a razor to trim the next roller sleeve to slide into the hole easier.  Success at last.  Part of the folding door repainting project was going to be replacement of the hinges, which were brass and had been painted over previously.  I do have the nickel hinges available, so I may do some swapping out on the other doors in time.

A lot of this work has been done in order to clear out the garage in preparation for the garage door installation.  Things that were previously stored in the garage are now stored in closets in the bedrooms.  The folding doors are now out of the garage.  Along the way, I found the dart board that had been installed in the garage when it was a game room.  On a whim, I decided to remount it, which will now necessitate installation of a light and the purchase of some darts.  (I am disappointed I can’t find the darts that used to be here.)

One of the bigger space hogs in the garage is the leftover paint cans from all these projects.  I had seen something online about storing paint in mason jars so you could see the colors and take up less space in the process.  I liked the concept, so after years of procrastination, I bought the mason jars and transferred the paint to them, using my label maker to document the paint color and finish.  In many cases, I had two jars of each color, so half a gallon of extra paint – more than enough for touching up.  All of these quart jars went on the floor in the pantry, which is now behind a closed door.  There are some unopened gallon cans of paint and primer than I’m probably going to keep in the garage somewhere on a shelf.  Otherwise, if it’s opened, it should be in a mason jar.

In my office, which is now on the lanai, things were rather messy.  I had a couple of plastic bin drawer units that held all my cables, and I had a lot of cables.  It was always a hassle if you wanted to find anything.  I took the opportunity one weekend day to relocate all the cables from the six plastic drawers to an unused storage cube unit, which had a bunch of pull-out fabric cubes with labels.  I broke up all the cables into the different types, gave each their own cube and labeled the cubes accordingly.  That freed up space in my office and moved the clutter to a bedroom closet, even though it wasn’t clutter anymore.  I still have room to work in both bedroom closets, so I need to determine what is going to be stored in each.

img_20190423_185747Outside, I had to refresh my floodlight bulbs.  I had a couple of broken and burnt out bulbs, that I wanted to convert to LED.  Along the way, I made a discovery.  Early on when I bought the house, I installed a dusk-to-dawn light at the driveway corner.

This light was on a switch near the main entryway and always just remained switched on, so the light could turn on and off with the sunset.  What I didn’t know, was that the switch also controlled the lights on the other side of the house.  While I was replacing the bulbs, I learned that both bulbs on this fixture were burnt out, and why wouldn’t they be?  They’d been switched on for over a decade.

The problem was now, if I replace the bulbs, the light will shine all day and night.  If I turn off the switch, I lose the dusk to dawn light.  So I decided to swap the fixture with a motion-sensing version.  For the most part, the lights would stay off unless someone walked nearby.  So, sometimes at night, I will see a burst of light come in through my bedroom windows where the motion sensor light is pointing.  It’s fine.

Kitchen Sink Replacement

I designated Sunday to be the day I would change out my kitchen sink.  It was actually more than just the sink.  It was also adding an instant hot water tank and an under-sink water filtration system.  This project has been a long time coming.  I bought the sink back in April and most of the other parts a month or so later.  But everything sat in the garage waiting for the right time.  In July, I had an electrician install an outlet for the water heater, but still, the time wasn’t right yet.  The sink was just sitting in the garage waiting for install.

With the upcoming garage door install, a renewed interest in clearing out the garage started, and part of that was clearing out that sink and the components.  I planned to do it on Sunday, initially budgeting a couple of hours.  Judging from my initial budget of a couple of hours, I then budgeted the whole day.  By Sunday’s end, I wondered why I didn’t start this on Saturday.

The process got off to a bad start right away.  Simply turning off the water under the sink was troublesome.  After a decade of never being turned, the shutoff valves were frozen and stiff from years of mineral deposits (the house has ridiculous calcium in the water).  Freeing them up introduced some minor leaks, so I had to shut the water off at the hot water tank.

img_20190915_112900

img_20190915_121240

Removal of the old garbage disposal and sink wasn’t too difficult.  Having the sink removed afforded an opportunity for cleaning, which is something that happens every once in a while, where I find inexplicable messes dating back to the previous homeowners.  As soon as possible, I dry-fit the new sink in place and was relieved it fit without any issues.  The last time I looked at my watch it was 10:30 and now all of a sudden, it was after noon.  I took a break for lunch.

img_20190915_135219

Returning from lunch, I decided to plan the placement of the water filter and hot water tank.  This turned out to be harder than originally thought.  To plan properly, I needed to have the garbage disposal in place to see what room would be left over.  So I had to install the drains in the sink.  I had hoped to have the drains installed long ago, before even thinking about the sink install, but that never really happened.  Instead, I made a quick run to Ace Hardware to get plumbers putty, as well as a couple of fittings that I didn’t realize were not included in the hot water kit.

There’s not a lot of room under the sink and with the water pipes, drain pipe, and garbage disposal all in the way, my install options were highly limited.  I originally wanted the hot water on the right side and the filtered water tap on the left, but that was reversed out of space requirements.  I mounted the components on the walls and checked the clearance of everything with the sink back in place.  So far, so good.  While the sink was out and I had access to everything, I installed all the water taps for the new devices.  I wasn’t overly pleased that I couldn’t route the filtered water into the hot water tank.  The filtered water had a plastic water line in from the water supply and out to the faucet.  The hot water tank had a copper pipe from the water supply.  So, two taps were needed (one was not included with the install kit).

Next was to pre-install the faucets and taps on the new sink before I dropped it in.  This was fairly uneventful except for some confusion on how the washers and gaskets worked on the filtered water tap.  As I secured the pieces, I was highly impressed with the sturdiness of the sink material.  There was no flex like on the old sink.  Once everything was attached, it was time to commit the sink to the counter.  I laid down a line of caulk around the whole opening and dropped the sink in.  There was a lot of excess caulk to clean up, which was messy as hell.  I didn’t have any running water there to clean any of it up, so it was a back and forth trip between the laundry room sink with water, and a whole lot of paper towels.  There’s underside clips that need to be installed on the sink and because of the unreasonably tight clearance at the front of the sink, I only installed clips on the left, right and rear of the sink.  I’m sure it will be fine.

I’m still ignoring the minor leaks in the supply valves because I need to focus on the drain pipes.  I reused the gross old pipes from the previous sink (with some slight washing), but because of the new sink’s greater depth, nothing fit anymore.  Everything was a inch or so lower than the outlet pipe.  This was, at this hour, devastating.  I really didn’t know what the corrective course would be, because I didn’t know what pipes were available for me to purchase.  I took a few pictures of the pipes in their mismatched positions, bagged up some of the pipes and headed to Lowes.  It’s 7:00 now and they close in an hour.  If I don’t figure something out, I’m done for the day.

img_20190915_183823 img_20190915_183949 img_20190915_184017

Staring at dozens of potential options, I didn’t see exactly what I wanted.  As best I could determine, I needed a drain pipe that had a right angle and dropped an inch or so after the bend.  There’s no such thing.  One pipe caught me eye, which was a replacement drain pipe for the garbage disposal.  The illustration showed a straight pipe out of the disposal.  I didn’t know that was an option.  The disposal arrives with an L pipe.  So, if I replace the disposal drain pipe with a straight pipe, that raises everything up significantly.  But, that also means I have to extend the pipe after the T valve.  This is going to be my best bet, so I bought the straight pipe and two extension pipes (one extra in case of screwups).

Back home now, I struggle to piece everything together like some sort of puzzle game.  I had to shorten a couple of pipes to make them fit, and along the way, I had some really tight fittings that leaked until I could balance the pressure in different areas.  But I did get a leak-free drain test around 9:00.  That was as good a time as any to give up for the night.  The kitchen was a disaster with tools and rags and packing materials and undersink cleaning bottles all over the floor and counters.  And despite what seems like success, I still hadn’t addressed the leaking supply valves.  Aside from the obviousness that you can’t have leaks under a sink, I couldn’t have leaks on those valves because the hot water heater was installed underneath them and a leak would simply short out and ruin my expensive purchase.

I still had Sunday garbage to take out and I was sore.  Very sore.  Lots of cramping myself under the sink and getting up and down over and over again.  I also left the hot water shut off for the night.  I would have to open it back up first thing in the morning before showering, then close it again before leaving for the day.

The next day, I re-evaluated the leaks.  The one was easily fixed with some teflon tape.  The other required another trip to Lowes to buy a new brass washer for the inner assembly.  Of course you can’t just buy a washer (that I could find).  I bought a repair kit that had a bunch of rubber and metal washers and screws and o-rings.  All for one washer.  In the end, though, that fixed the leak.

I reinstalled the hot water tank and tested all the connections.  No leaks coming in or out.  I turned the water and electric back on and I had a fully operational sink.  And just to be absolutely safe, I placed a leak detector under the sink, so if it does start leaking at any time, I’ll get a 120db notification.

img_20190915_203450