Category Archives: The Anchor - Page 5

Side Project: Removing Redundant Fence

When I first bought the house, my neighbor and I had fences between our properties and there was about a 4ft gap between the fences.  Enough to get a lawn mower in and not much else.  Fairly recently, my neighbor came over and discussed his plans to build a new privacy fence and build it right up against my fence, eliminating the gap.  He said he would relocate my fence gate to the front instead of the side as part of the deal.  I’m not sure what kind of a deal it was, since he assured me the land was his and my fence was at the property line.  Four feet, what do I care?

So anyway, his new fence has been built for some time now and there’s been some wild grass growing between our fences.  I decided to get in there and kill off that grass.

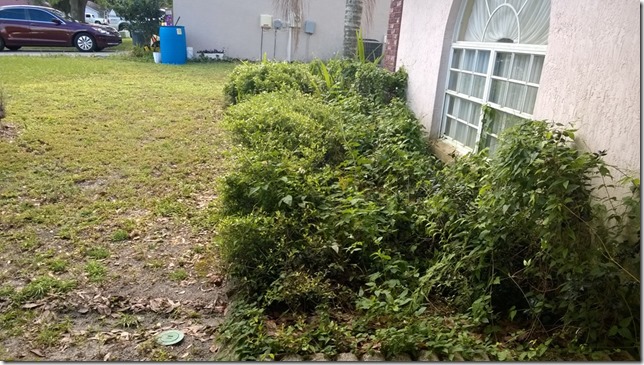
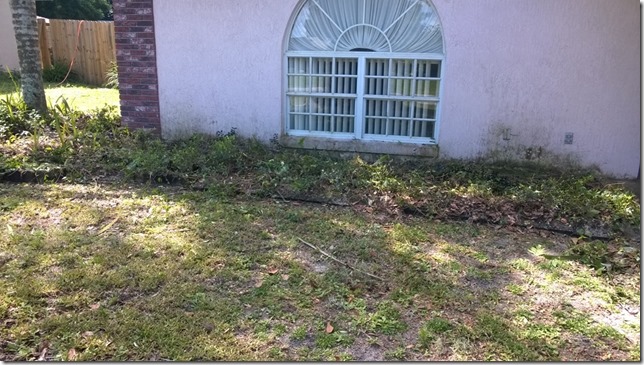
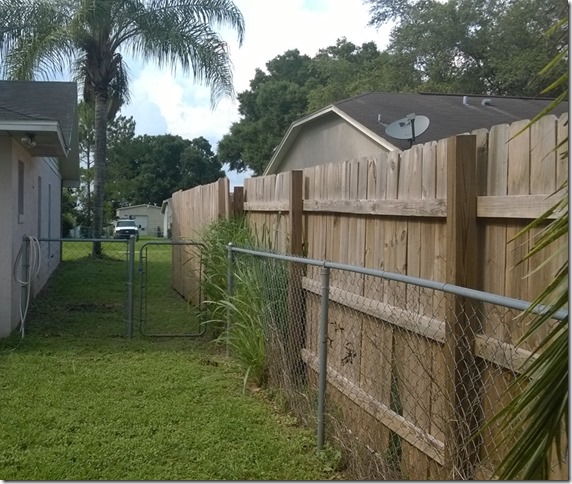
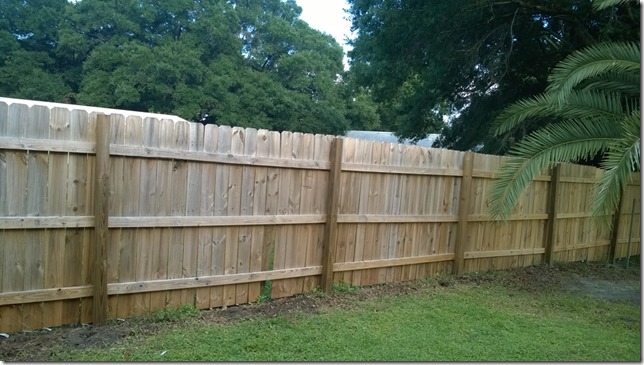
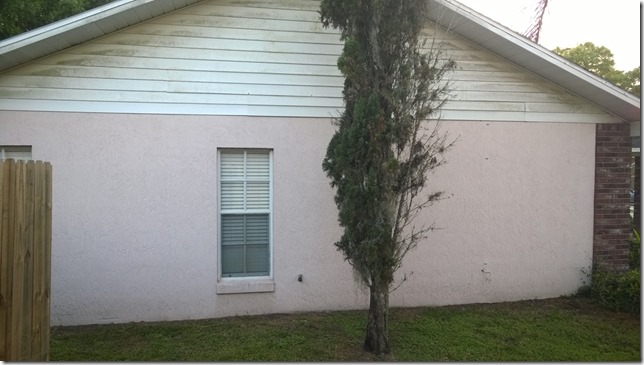
This is the way the fence looked before the removal.  You can see the grass plants at the front gate between the fences.

wp_20160614_002

wp_20160407_032

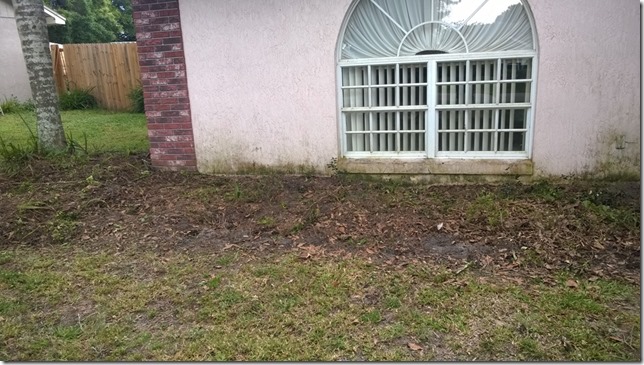
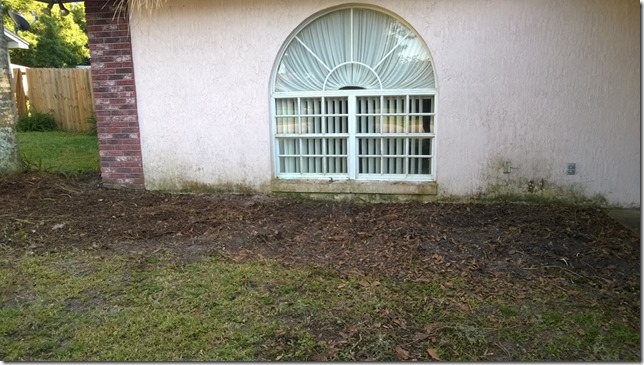
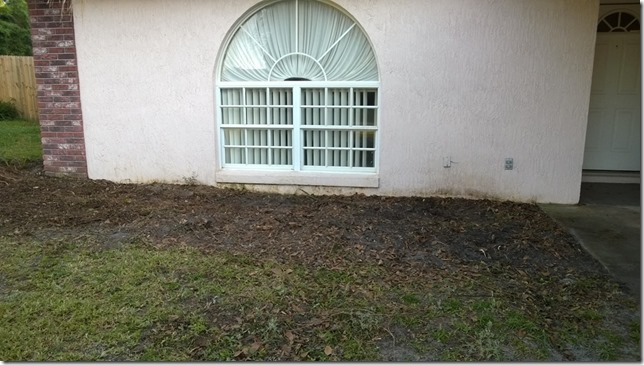
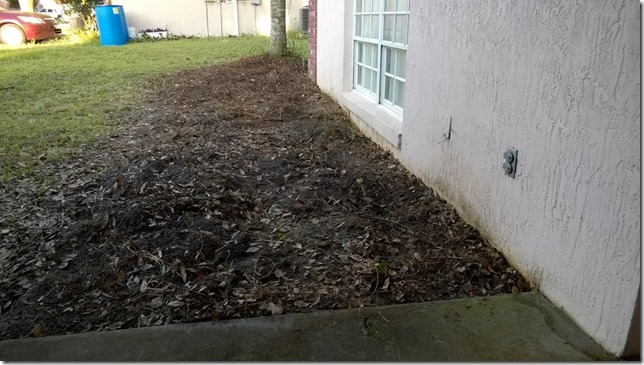
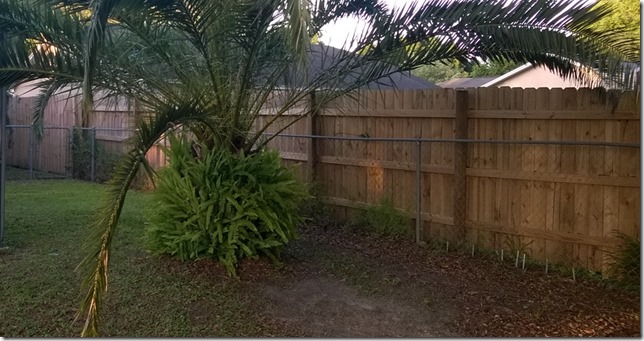
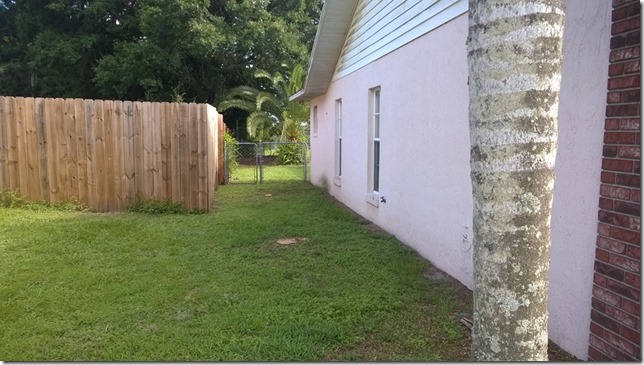
After tearing out the grass plants, I decided to just keep going and eventually pulled out all the fencing.

wp_20160614_006

wp_20160614_007

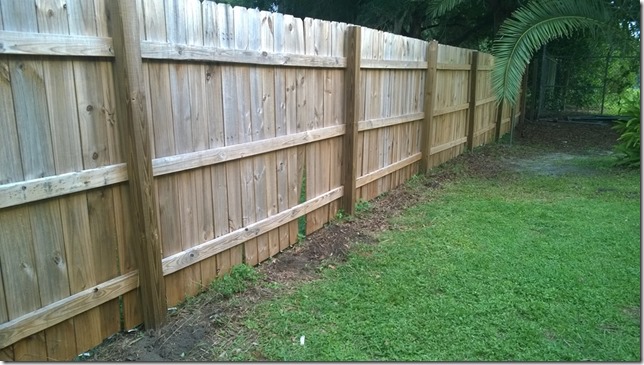
It looks a lot cleaner now.  The fence now becomes my neighbor’s full responsibility.  This will also make things easier for my lawn service, so they can weed whack the areas they couldn’t before because of the wire fence.

Third Project: Delandscaping Pool Planters

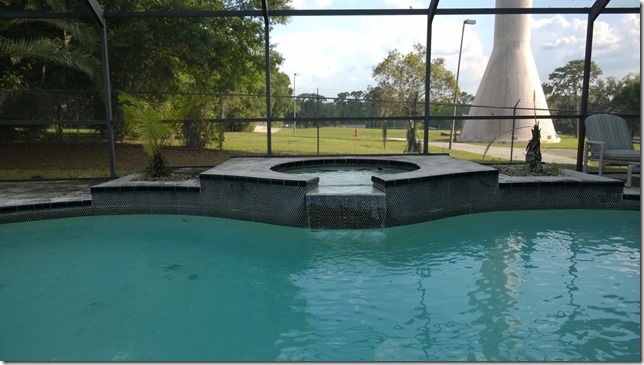
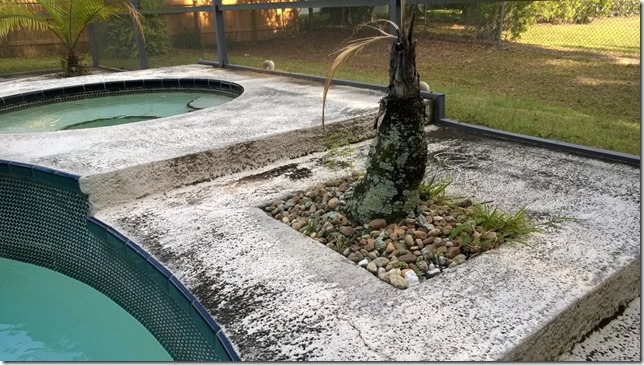
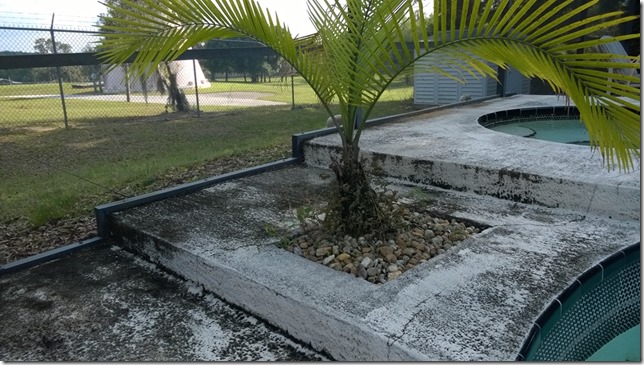
The pool deck has an elevated waterfall spa with two planters on either side of the spa.  The previous owners had planted palm trees in them.  There’s plenty to dislike about this setup, at least in my eyes.

Because of the difference in sun exposure, the trees grew at different rates, so that was unappealing.  The trees would grow and shed their fronds and bark, making a mess.  The rocks in the planters would develop weeds that needed maintenance.  And the worst part of all, when you needed to pressure wash the deck, the planters would spew stones and dirt all over the place unless you were extremely precise with the pressure wand.

For all these reasons, I wanted those trees gone.  As far as what will be in their place, I’m leaving my options pretty open.  It may be plants (potted of course), it may be fountains, it may be “leapfrog fountains”, or maybe grass (for the cat to enjoy), or it may just not be anything.  The first step is getting those trees gone and covering the hole.

The plan for the hole is kind of an outgrowth from the leapfrog fountain idea.  I wanted to place a cover over the openings with a pass-through rubber loop mat, the kind used at entryways and sometimes on pool decks.  They aren’t all that cheap.  Initially, I was looking at about $300 for two mats.  Then I determined I could get one larger mat and cut it in half.  That brought the price down to $200.  Recently, I saw a blue mat in the size I needed for under $80, so I bought it right away.

By the time I ordered the mat, I had mostly removed the rocks and dug out the trees.  The digging bar was invaluable and continues to be the best tool I have ever purchased.  I had also tried and failed at making various soil sifting devices until I broke down and bought the standard hardware mesh.  I also held off on pressure washing the deck until I had the mat in place.  It would be a total disaster to be spraying water without the stones in the planter.  I actually purchased a second electric pressure washer so the GF and I can double-team on cleaning tasks.  Since the deck needs done, as well as the driveway and walkway, this should save us plenty of time.

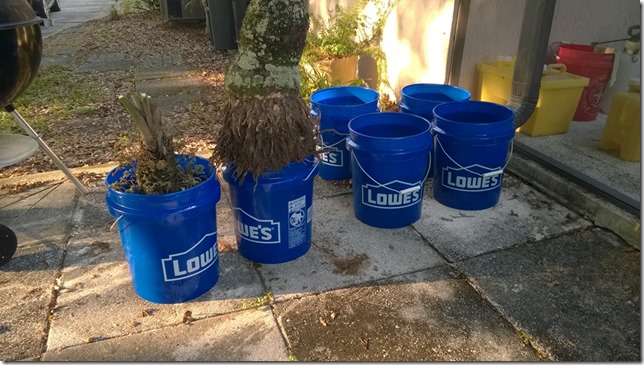
As far as the planter, my plan is to bury 5-gallon buckets in the holes and then cover them with the mat.  This keeps my options open to install something under the surface, whether it be a potted tree or a fountain or even secret storage.  I have some Lowes buckets with lids ready to go.  I’ll have to cut the bottoms of the buckets to provide drainage.

The end result fell pretty short of what I had envisioned in my mind.  But it will have to do for now until I can come up with a better idea.  One thing that is nice is being able to walk around the area without palm fronds in the way.

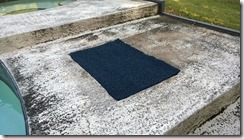
This is what I started with:

wp_20160428_001

Notice how the one palm is just dead.  That was a recent thing I caused when I trimmed it back without regard.

wp_20160428_002wp_20160428_003

Then I started getting the rocks out

wp_20160428_004

Using the digging bar, I eventually ended up getting the trees out and was left with a couple of holes.  Looks at the size difference between the two trees.

wp_20160429_001

wp_20160429_003wp_20160429_004

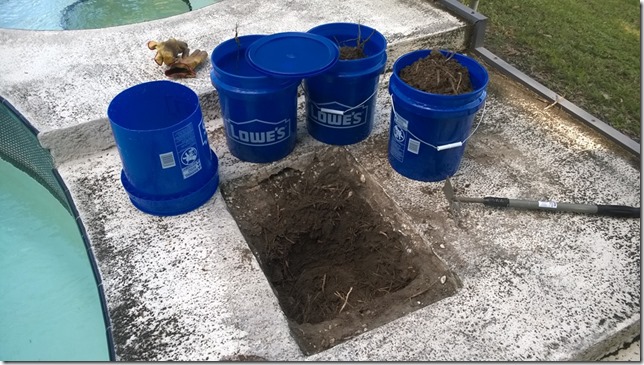
I dug out the holes to hold the buckets.  The bucket to be planted is on the left, with its bottom cut out.

wp_20160523_003

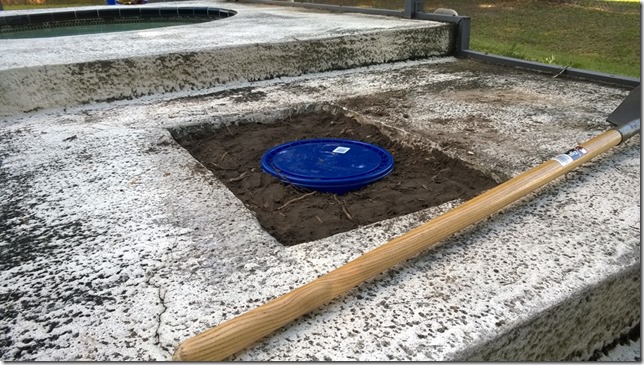
Then buried the buckets

wp_20160523_005

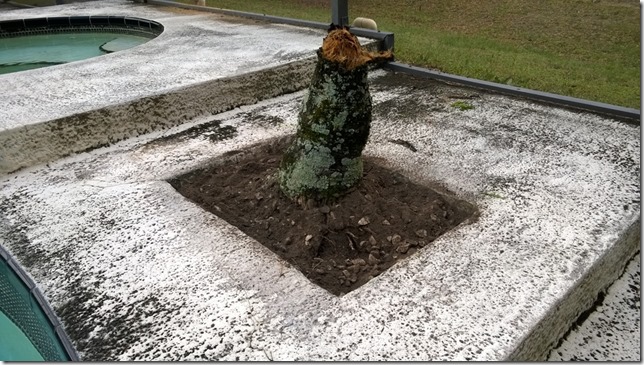
I brought the mat out and cut it to size.  This is probably where I failed to make the concept presentable.  The mat was difficult to cut accurately and the planter was not a uniform size.  This resulted in a mat that didn’t fit the hole perfectly.  Additionally, it was difficult to get a nice, smooth surface with the bucket and ground.

wp_20160525_004 wp_20160525_005 wp_20160525_003

I’ve gone back and tried to fix the fit of the mat in the planters and probably will continue to tweak it a few more times to make it better, but I‘m not convinced it’s ever going to be the way I expected it to be.

wp_20160525_002

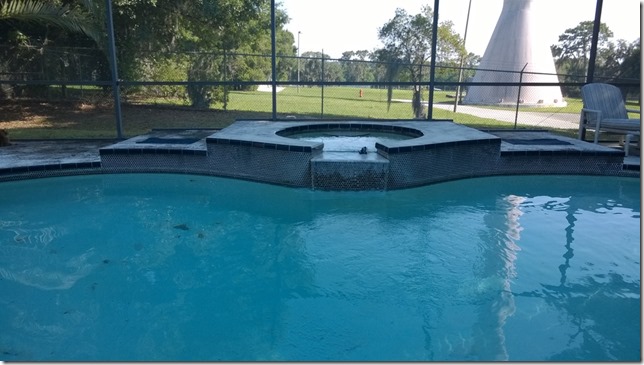
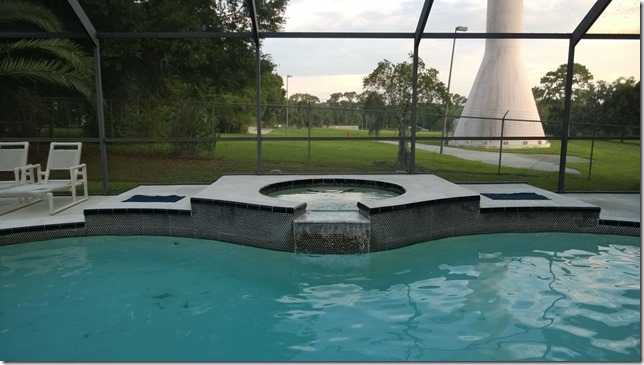
And after pressure washing:

wp_20160608_002

So, I’ll put his project behind me and plan for better things in the future.

Mini-Project: Fence Improvements

In another post, I said that I removed my chain link fence that abutted my neighbor’s wooden privacy fence.  That really cleaned up the border especially since I was able to clear out some horrible weeds between the fences.  However, this introduced a slightly new dynamic.  There was now only one fence between us.  I now have a vested interest in maintaining this fence, for my own benefit.

And the problem with that is, this fence kind of sucks.  The wood is thin, cheap, soft pine and is secured very poorly.  By poorly, I mean it’s held on with staples.  The simple warping of the wood from normal rain exposure has pulled the boards away from their mounts in multiple places.  Since I have sort of adopted the upkeep of the fence, I intend to improve this.

I approached my neighbor last weekend while he was mowing and explained the whole situation to him.  He was agreeable to everything.  I told him I would buy the screws needed to secure the slats and would secure all the boards facing my property (since I wasn’t going to go into his yard to secure his side) and I would assist in securing the boards on his side if he wanted.  He was all for it, maybe because he understood the fence wasn’t going to last much longer.

Yesterday, I bought a 5lb box of screws and stepped out in the 97 degree heat to complete my obligation.  I brought along my Porter Cable 20v drill/driver, which worked like a beast the entire time.  I ran down one battery with only about 10 screws left to go.  Flipped batteries and I was good for another hour or more.

I made a quick improvisation while working.  The box of screws was on the ground, and after only a couple boards, I realized there’s no way I’m going to keep stooping over to pick up a couple of screws.  So I got a large 32oz plastic cup from inside and cut some vertical slits in it.  I ran my belt through the slits and poured a bunch of screws into the cup.  Voila, a waist-level screw holder.

Since the existing fence material wasn’t the best, I compromised on two screws in the top beam and two in the bottom, leaving the middle beam alone.  Also, not going for the Parade of Homes, I didn’t expend much effort on making sure the screws lined up nice and neat.  I just wanted a secure fence where the boards couldn’t be kicked out by a child.

There’s so many things going on, so many irons in the fire; there’s no shortage of things I can do at any given point.  This was a quick little project to tick off the list and make myself feel like I’m making progress.

Fourth Project: Removing Overgrown Trees

I had mentioned this in an earlier post.  This tree.  This massive palm tree in front of the house.  It has to go.  I’ve disliked it for quite a while.  When I bought the house, it was pretty large and it didn’t take long for me to see it was becoming a problem quickly.  The fronds would sit on the roof (which is widely known to be a cause of bug problems).  Additionally, it was blocking the view of the house, which annoyed me.

The previous owners were the ones who planted it, from a tiny potted plant from Home Depot.  They were amazed at how large it grew so quickly.  It was my plan for some time to make them an offer to pay for removal and transportation to their new house down the road.  But that would have to wait until the house was fully mine.

As it all turned out, the opportunity to gift them the tree never happened.  A neighbor of mine does my lawn work regularly and one month I didn’t feel like cutting the fronds on that beast and asked him to do it with his next lawn cut.  Now before I finish that story, let me talk about another unrelated tree story.

Another neighbor (next door) has some trees that hang over my property and drop dead branches all the time.  His house is generally abandoned so I couldn’t get a hold of him to tell him to cut his trees back.  So I hired a tree service of my own.  The lady that came out was a licensed arborist and chattered non-stop about every tree everywhere on my property.  The trees I was asking to trim, she said, were a horrible choice for a residence because once they get to certain age, they start falling apart, which is exactly what was happening with me.  When we walked around to the front of my house, she said in passing that a palm that size needs to have at least 18 fronds to provide enough nutrients to stay alive.

And you can probably guess now what happened when my neighbor (who is not an arborist) trimmed that palm.  I came home from work that day and saw the results and immediately said to myself, “oh no.”  There were maybe 4 or 5 fronds poking out the top.  And just like that, the tree died within a week.

I can’t really blame my neighbor and I never accused him of killing the tree.  I did want the tree gone anyway.  But now, I had to pay to have the tree removed.  I did have my neighbor get me the quote for removal (I figured he owed me that), which turned out to be less than I expected.  Along with that palm tree corpse, I was also going to have a couple of tall pines that were way out of scale for the house – and one was being choked to death by Spanish moss.  The total for removal, stump grinding and disposal was under $600.  I was expecting over $1000, so good for me.

I wanted to hold off on the removal until my former co-owner had moved out completely, but last weekend, my hand was forced.  The palm had rotted enough that it had broken in half and fell over.  So, although a dead tree in your front yard is a pretty bad eyesore, a toppled tree in your front yard is even more so.  Maybe it was the tropical storm that came through (and was actually pretty much a non-event) that blew it over.  I noticed it leaning in the days before it fell and it convinced me I needed to take action.  Not soon enough, though.

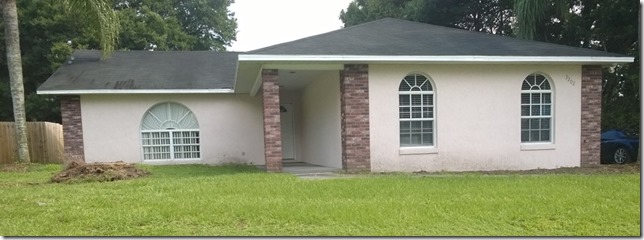
This is the palm back in its glory days (via Google Street View),

image

Then sans all fronds,

wp_20160407_042

And in death,

wp_20160613_002

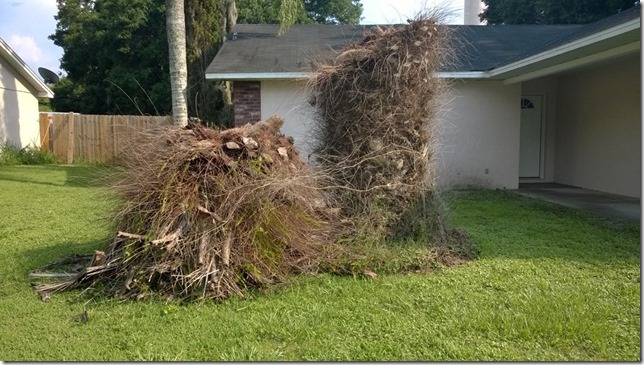
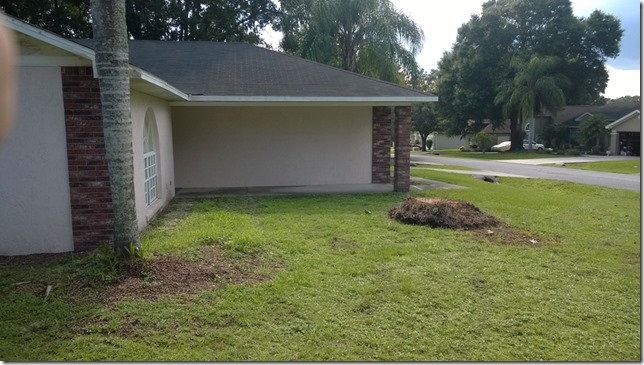
And then removed,

wp_20160614_003

wp_20160614_004

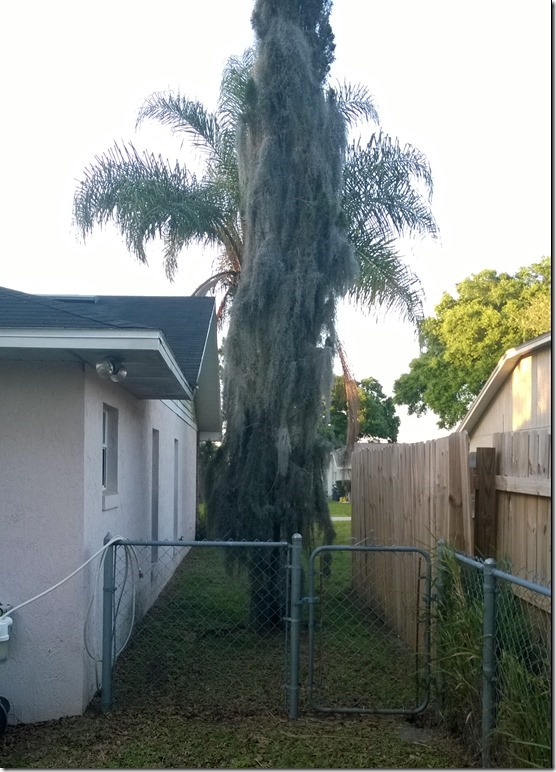
This is how the other trees were:

wp_20160407_037

wp_20160407_038

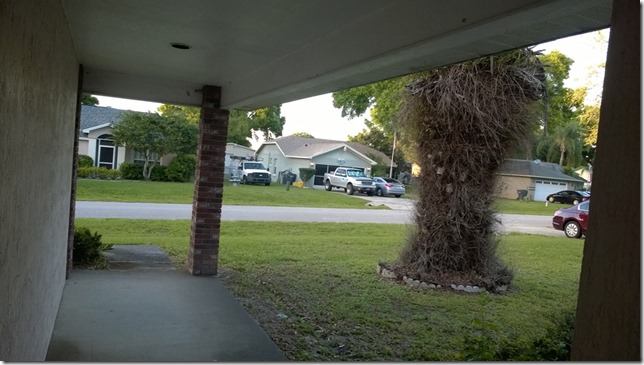
And now they’re gone,

wp_20160614_001

Design: Electrical Switches

One day, a while ago, I was with the GF at a lighting showroom.  It wasn’t even for me, because I wasn’t at the remodeling point yet.  My house hadn’t been cleared out yet at that time.  But anyway, this was a showroom where everything was “expensive”, like my previous design post defines.  It’s not really “expensive”, it’s just the way it is.  It more that the lights you consider normal-priced are “cheap”.  It’s a harsh reality to accept, that quality costs money and the acceptance of cheapness is the current norm.

So while we’re browsing these outrageously priced fixtures, there’s a small display of switches and outlets with the name “Adorne” by Legrand.  Legrand is a name I would revisit while I was browsing new home models.  They are pretty well known in the industry.  But anyway, the Adorne collection is a fancy set of light switches and outlets.  They have a different form factor: square instead of rectangular.  The wall plates have no visible screws.  The switches themselves come in white or graphite.  At the time, I thought, “that’s neat” and didn’t think much of it again.

One night, I was giving consideration to my future plans and that the color palate of the house would be grey and blue.  I went through the house and took inventory of all the switch plates I would need to swap out to make them fresh and new.  But then I thought how the stark white plates would look against the blue and grey.  What if I could get colored switches and plates?  Some internet research brought up the Adorne collection again and I was sold.

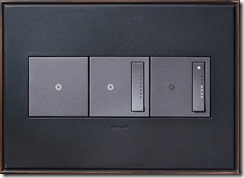
5softapswitch_softapdimmers_oilrubbedbronzewallplateIt’s a rather expensive commitment.  I have 37 switches to replace, plus 2 dimmer switches and I want to install timer switches for the bathroom fans.  At retail prices for these switches, that’s almost $450.  Did you hear that?  You can get a light switch for $1, you know?  So how much is style worth?  And that’s just the switches.  The wall plates are another $250.  Ok, so $700 to completely revamp the look of the switches.  The outlets are going to have to wait.  They have to.

But, all the switches will be graphite, which is like a dark grey.  They are going to look stunning and there’s not going to be anything else like it around.  I don’t even see these switches in the high-end model homes I’ve been checking out.

Because I have time and because I’m going to be doing this as I go room-to-room, I need to keep an eye open and an ear to the ground for any surplus or auctions that are selling these switches.  They’re uncommon, so that might mean I can find some where no one else would know what to do with them.

Design: Ceiling Lights

The first light fixture to be replaced in my remodeling project is in a place hardly anyone is ever going to see: the master bedroom closet.  When I was prepping to do the rework of that room – removing all the shelving, removing the popcorn ceilings and repainting – I found that the ceiling light’s glass globe was broken.  It had a hole in it.  I didn’t have any love for that tiny, basic fixture anyway, so it was decided to replace it.

It’s pretty easy to say, “just replace it”, but replace it with what?  There’s thousands of fixtures to choose from out there.  I started at the usual, obvious choices: Lowe’s and Home Depot.  I wasn’t inspired by anything there.  Firstly, it’s stuff that everyone is looking at and buying.  I want to fill the house with unique things.  Things that make people say, “Where did you get that?” instead of “Oh yeah, I’ve seen that at Lowe’s.”  Second, the things that caught my eye were all “expensive”.  I would see something, say “that’s not bad”, then say “75 bucks?”.  As it turns out, being unique is nowhere near the 75 dollar price point.  I would have to change my expectations there.

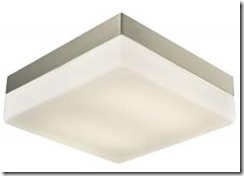
alico-fml2030-10-16m1Striking out at big box stores, I turned to the Internet.  Here, the entire world was available, for a price.  Instead of saying “that’s not bad”, I was saying, “that’s awesome” and instead of saying “75 bucks??”, I was saying “350 bucks?!”  Somewhere in the middle, I found a light where I said “that’s pretty cool” for “150 bucks.”  This light is LED, which is something I want to promote throughout the house – get lights that survive until the next full remodel.

As I’ve said in other posts, this redo of the house requires some thinking ahead, where one purchase influences later purchases in the name of consistency.  So, the unique feature of this light is its square shape.  I suppose it’s also what makes it more expensive, that a square glass globe might be more expensive to make than a round globe (plus being LED).  But anyway, now, I need to repeat that style in other areas of the house.

98% of the lighting in the house is either florescent or recessed.  There’s really only two surface mount lights I have to work with unless I intend to do conversions, which may be in the plans for the hallway.  Lighting in the other two bedrooms are provided by the ceiling fans.  There is also some pendant lighting over the bistro table in the “dining” area.  So, the initial plan now is to pick up one more square light with nickel trim.

Lighting: Going LED

I previously wrote about the fancy, expensive LED light I got for the important living space of the master bedroom closet.  I said that I wanted to go LED as much as possible in the house.  This is still true.

Prior to the house becoming mine, in my dreaming and planning periods, I wanted to replace all the recessed lighting with LED equivalents.  But, prior to actually designing that out (because you have to determine what type of cans are installed), a sale came up on Meh.com for LED bulbs.  I bit.

Tonight it’s storming outside, so I can’t go out and get my ladder.  That means I can’t change out any bulbs in my living room or bedroom.  But I can change out the bulbs on the lanai – the future office.

I’d done this room once before, when CFL was the hot newness.  I had a pair of mismatched bulbs, of different wattages and different color temps.  It was really stupid.  And for all the claimed benefits of CFL, I tried to shrug off the warm-up delay they all suffered.  Well, I’ve kind of had enough of it.  Instant-on LED is where it’s at.

Before starting, I measured the old lights.  The two old bulbs registered this brightness on my phone’s app:

wp_ss_20160803_0002wp_ss_20160803_0001

According to the app, it was like a cloudy day in my office.  After quickly installing the LED bulbs, the readings changed dramatically:

wp_ss_20160803_0003wp_ss_20160803_0004

Not a bad upgrade if I say so myself.   (The extra light in the first reading was spillover from the kitchen, which says just how poor the old bulb really was.)  For comparison, this new light level is the same as my office at work.  The office where the “kids” complain about how bright it is all the time and how they want half the lights turned off so they can work.  Damn vampires.

I then changed out the bulbs in the hallway and entryway and despite the change from a 75W incandescent to 65W LED, the brightness change from the lower wattage was hardly noticeable at all.  And since these bulbs are all the same batch and model, the color temperature is going to be consistent throughout the house, which is nice.

Stocking Up On Legrand Adorne

In a previous post, I mentioned that I would have to keep my eyes out for clearance or discounts on a lesser-known, very expensive brand of electric switches, the Adorne collection from Legrand.

Well, I certainly didn’t expect to be rewarded so quickly.  Just today, I was out driving on my own and saw a store that had intrigued me for a short while.  I’m no stranger to pawn shops, thrift stores, and flea markets, so I don’t mind a little sketchiness when shopping.  This store was tucked way back in a plaza with poor signage and somewhat outrageous claims, like “never pay retail ever again!”

The store was essentially a dumping ground for Home Depot scratch-and-dent, overstock, and returns.  That’s not exactly a bad thing.  It’s not a bottom-end Chinese import store that reeks of hazardous chemicals.  And it was packed full of everything.  There was some really nice stuff in there and the prices were generally about 50% of the best price I found new.

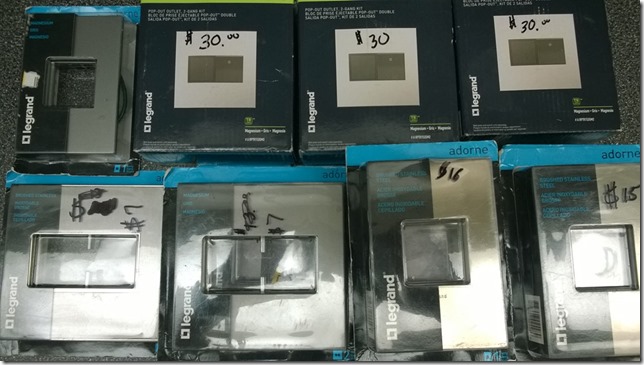
And that’s where I found the Legrand pieces.  I saw one and lunged for it.  Then I saw there were more in the same bin.  So I pulled them all out onto the floor and started sorting them.  At first, I was disappointed that there were so few in the color I wanted: magnesium.  Then I realized that the majority of them were in a pretty close tone: brushed stainless steel.  Not only that, the brushed stainless ones were the same price.  So I snatched up all the magnesium and stainless they had.

So how good of a deal was it?  Well, I got one 1-gang magnesium plate for $15.  That’s almost double retail price.  Uh, wait.  That’s a good deal?  Hear me out.  I also got eight more 1-gang stainless plates for $15 each.  Those retail for $38 a piece ($32 on Amazon).  Ok.  Not bad.

I also snagged a few 2-gang plates.  Two in magnesium, which retail for $15 (inexplicably, $21 on Amazon) and one in brushed stainless, retailing at $62 ($48 on Amazon).  Each for $7.  Yup. $7 for a $62 wall plate.

I made a return trip because I needed to share this store with the GF, who ended up getting a great deal on three Husky tool chests.  On that second trip, I found a few more Adorne pieces: pop-out outlets!  These were priced at $30 and retailed for $62 ($55 or so on amazon).  I was able to get three of those in magnesium.

So, I’ve spent about $270 for today, but I have well over $600 in stuff for my project.  Excellent!  Reviewing my purchase list, I have more than enough 1-gang plates, and three of the four needed 2-gang plates.  I need five 3-gang and one 4-gang, yet.  However, reviewing my purchase list exposes a fail on my part.  I way overspent on wall plates.  I budgeted $9.18 per plate and I paid $15.  Yes, I did get stainless plates, which are very cool – a definite upgrade from what I originally budgeted. I’ll need to maximize their placement in the house to ensure they make the biggest impression for what I paid for them.  I shouldn’t waste them on electrical outlets, except for maybe kitchen counter outlets.

wp_20160731_002

Still.  It was a good day.

Project: Replace Cabinet Hardware

This is such a minor project, anyone could do it.  But, I am hoping it has an impact larger than the effort required.  They say changing the hardware on cabinets can completely change the feel of a room.  I’m going to find out.

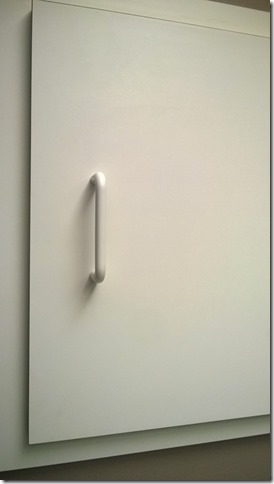
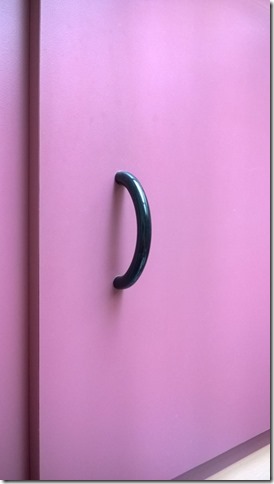
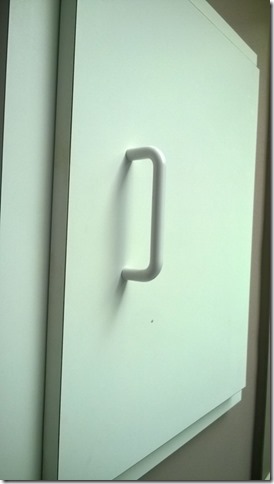
Ever since moving into the house, the cheapness of the cabinets has always irked me.  The cabinets are simple laminate, white in the kitchen and master bath, and kind of a plum color in the guest bath.  The handles are cheap plastic, either black or white, rounded or square.  I can live with the cabinet material and the colors (the plum will be the first to go), but those handles…

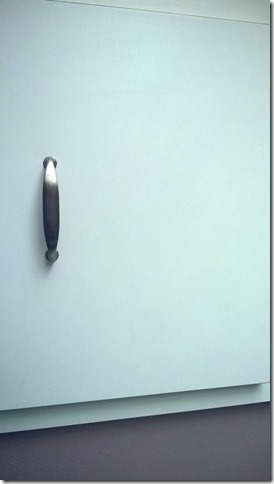
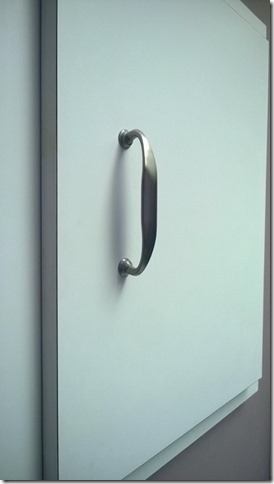
So I quickly chose some nickel metal pulls and will be installing them shortly.  I have 37 pulls in the kitchen, 8 in the master bath and 7 in the guest bath.  I bought 45 pulls, since that’s the best multipack purchase available.  That means I can do the kitchen and one bath.  More than likely, it will be the white cabinets in the master bath and I’ll find some black pulls for the plum cabinets.  My investment so far is just under $70.  That’s less than half what I’m spending for the ceiling light in the master closet (which was the original order; the pulls were an impulse add-on).

I have been trying to keep in mind that I need to consider the entire house when making changes.  The end result is that I want the whole house to look like a freshly-built house.  You don’t get that look when upgrading one room at a time over a long period.  When a new house is built, the entire houses’s hardware is purchased at once and it makes the house appear consistent throughout.

In the case of the pulls I purchased, I have had them in my wish list for a while.  But serendipitously, the curves in the pulls echo the lines of the replacement door handles I purchased – and had evaluated completely separately.  That’s fortunate, because the pulls I chose aren’t exactly the ones I would have purchased on first sight.  The pulls I ended up with have a little embellishment at the ends that isn’t as sleek, modern, and minimalist as I normally like.  But, like I said, they tie in with the door handles, and I think that’s a really good thing.  It may actually influence the bathroom hardware choices I make when that time comes.

But of course the screws are too long, so I either need to cut them down or buy new ones in the proper length.  Probably will be the latter.

I went to Home Depot and couldn’t find the size screws I needed.  I did learn that the screw heads had different names.  Cabinet screws are called Truss head screws.  So I decided to cut the existing screws down.  But then, I learned an awesome tip.  While I was searching for the best way to cut screws while not messing up the threads, I read a comment about wire strippers.  That’s not what I expected.  Apparently, most wire strippers have screw cutters built in for some common sizes of screws, in my particular case, I was dealing with 8-32, which they supported.

PA-02

That part labeled “E” is the screw cutter.  The holes are threaded and you thread the screw in there to the depth you want it cut at, then squeeze and cut.  Because my hands couldn’t handle cutting 50+ screws, I ended up putting the pliers on the ground and hammering them closed with a rubber mallet.  but it worked extremely well, with no messed up threads.  So much easier than the first three screws I cut with a dremel.

With the success of the screw cutting, I was able to install the pulls in the kitchen.

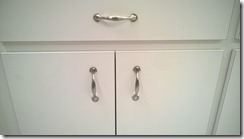
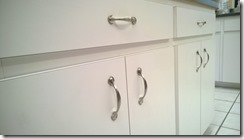
Before
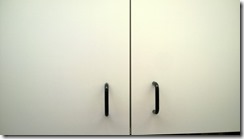
wp_20160720_002 wp_20160720_003

And after:

wp_20160723_002 wp_20160723_003

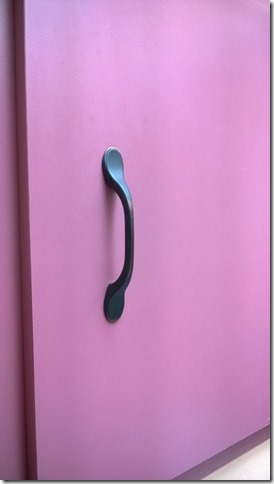
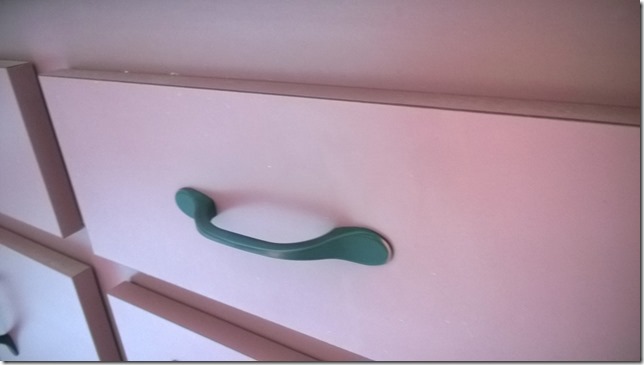
For the guest bath, this is what I was working with there (phone camera+fluorescent light=blah):
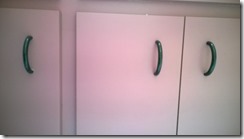
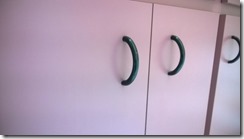
wp_20160720_004 wp_20160720_005

With about $18 in new pulls, here’s the before and after:
wp_20160720_006 wp_20160720_007

wp_20160723_004

Moving on, I got to the master bathroom with the spares from the kitchen.  Wait. They don’t fit.  Damn it.  These cabinets have 3.75” pulls.  Arrgh.  Now all three rooms are going to have different cabinet pulls.  That sucks.  As far as the leftover pulls, I can probably use them when I install cabinets in the laundry room.  Then I can have the kitchen and laundry room match.

But now, what to do with the master bathroom?  I should keep the color scheme the same: nickel on white, while the guest bath is bronze on plum.  Off to Lowe’s again…

After being disappointed at the selection of 3.75” pulls, I compromised and spent another $34.  That night, I finished the master bath.  And finally…

Before:
wp_20160725_001 wp_20160725_002

And after:

wp_20160725_004wp_20160725_005

I’m underwhelmed by the master bath result, but it doesn’t have to be permanent.  This project had a total cost of a little over $120.  On to the next project.
First Ceiling Fan Order

I talk a lot about consistency in the remodeling of the house.  Right now, I have four different ceiling fans in all my rooms.  I want to improve on that.  Also, the master bedroom and living room have cheap contractor fans in white and shiny brass (although, matching!).  Yuck.  So I want to improve on those as well.

There are a lot of options out there for ceiling fans.  It has been days upon days of searching for a style that I even liked.  And, like my closet light, I found myself emotionally whipsawing between “That looks good” and “oh, it’s $600”.  When you get used to going to a big box store and seeing things you want for $75-100, it skews your perception.

But I still had to find a style I liked.  One of the bigger hurdles to overcome was that I didn’t want an integrated light, at least for these rooms.  The bedroom fans will require one since that will be the only lights in the room.  After a long time of searching, I did find a style I liked at a price I could live with.

ell-avl56tit5rw_black1

This fan is about $260, and I need two of them.  I want the fans in the master bedroom and living room to match.  Those are the two biggest rooms in the house, so the extra size (56” instead of the existing 52”) will be better suited.  Then I started doing the research.

Both of the planned rooms have vaulted ceilings.  When you have vaulted ceilings, you need to make sure the fan supports being mounted like that.  I couldn’t find anything saying these fans could be.  That means I couldn’t use these fans.  But I didn’t want to believe that.  I searched for angle mounting kits.  I even visited a showroom and asked “experts”.  They said that the fan could be mounted up to 20 degrees.  I wanted to confirm this through another source, but I couldn’t find anything that said so.  After a lot of hunting online, I finally ended up on the manufacturer’s website where I could download the installation manual for that fan model.  Perfect.  The manual showed that you could install the fan on a ceiling with a slope up to 25 degrees.  My calculations say that my ceiling is 10-11 degrees, so that’s set.  I dreaded having to find a different model of fan.

The next hurdle is the downrod.  More of a concern than a hurdle, but the manual confirmed that the downrod could be swapped out with a longer one.  The fan comes with a 6”, but I wanted 12”.  Besides, the wider blades will probably require that extra space.

Then, as I read through the manual, I saw that the fan was run by remote control.  Damn it.  I looked closer and saw that you had to use their ugly remote control wall switch, too.  That takes this fan out of the running, because I was set on using Adorne switches.

But I wouldn’t give up.  I spent too much time getting this far to give up.  I studied the manual and saw the fan itself had standardized wiring like any other fan.  I saw the remote receiver was wired in-line with the fan’s wiring.  What if I just eliminated the receiver?  I searched for info on that idea and on a Home Depot forum, an expert confirmed that as long as the receiver isn’t integrated and it can be removed, you can use traditional wall controls with a fan that is remote-capable.  Shortly after, I got an answer to an email I sent to the manufacturer that said I could hardwire the fan.  This fan is a go.  So the cost will be a little over $500 for two fans.  Not bad considering a lot of fans I didn’t even like cost more than that individually.

Now, about that price.  The particular model I wanted has been discontinued.  Some online stores didn’t have them in stock anymore.  The replacement model of the fan had a black body instead of titanium.  I was willing to buy the current model until one of sites I visited (and I was on tons of websites) listed the discontinued model for $146 plus a 12% coupon.  Well, that looks like a sign to jump on this offer.

So, today I’ve ordered both fans plus two 12” downrods for a total of $267 – essentially half of my original budget.  The downside is that it will take 4-6 weeks for delivery.  That’s ok, I have plenty to do.  Today, I also bought the Adorne switches and outlets for the master bedroom for $112.

Looking ahead, I need to find two matching fans for the bedrooms with integrated lighting.  Then, one more fan for the lanai/office.  I may repurpose a fan I’ve had in storage ever since I bought the house, as long as I can cap off the light fixture on it.