Category Archives: The Anchor - Page 11

The Laundry Riser – Finished

Unfortunately, I didn’t take any pictures of this in-progress.  I mentioned a couple of posts ago that I had built a square frame for the riser using pocket holes.  A couple days later, I bought another 2×4 and added some joists in the frame.  Over the weekend, we brought home a cut-down sheet of 1/2” plywood for the platform base.

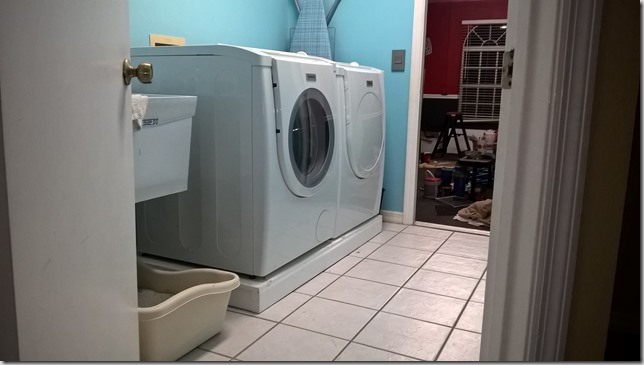
The first thing I needed to do was cut the plywood to the precise size.  In the end, it was a pretty pathetic result.  Trying to cut such a long length with a circular saw resulted in me skewing the angles.  This means the platform doesn’t sit square on the base.  I decided I would live with it.  It’s more of a utility platform and not a piece of the house.

Then I used some wood putty to fill in screw heads and smooth the front of the platform.  The result of that effort wasn’t all that attractive either.  So I’ve kind of written off this whole project as a learning experience.  But in the end, the platform accomplished exactly what I wanted it to.  It raised the dryer so that its exhaust port is almost perfectly level with the vent port.  You can see how close I was able to get the dryer to the wall.  If you look closely at the corner of the riser, you can see how poorly I made the cut – 1/4” at least.  That’s why I squared up the front and put my crappy cuts to the back.

WP_20170130_20_07_02_Pro (2)

And getting the washer and dryer up onto the platform and against the wall returned a lot of space, just as expected.  The washer and dryer used to extend beyond the door frame.  Now, you can walk through the area without feeling like you’re going to run in to anything.

WP_20170130_20_05_47_Pro

The Laundry Riser

I mentioned elsewhere that I was having some issues with the new venting tube for my dryer.  Because the tube was semi-rigid, I couldn’t make the tight turns that the old wrapped, spring-style tube used to.  And because I couldn’t make tight turns, I couldn’t get my dryer close to the wall.  So ever since I’ve redone the laundry room, my washer and dryer have been jutting out at least 6” further from the wall than previously.

The solution I came up with was to raise the washer and dryer so the outlet port on the dryer would meet up with the vent port in the wall, eliminating all bends in the vent tubing.  This should be a piece of cake.  The difference between the port in the wall and the dryer port is about 4”.  So a base of 2×4’s with a 1/2” plywood top will be just about perfect.

Over time, I’ve collected a bunch of tools I haven’t had a lot of opportunity to use.  And this project would let me get a few more things that I probably won’t use very often, either.  One of the cooler new things I’ll get to use is a pocket hole jig.  I probably don’t need to go to that extreme to build a frame, but I’d read some really good things about pocket holes and wanted to see it for myself.

With a $40 Kreg jig and a couple of 2×4’s, I cut out a frame and fastened the pieces together.  It was very simple to do and the results were quite solid.  I did intend to put a couple of joists in the middle of the frame, since I’m dealing with some heavy equipment on top.

I’ve been collecting random tools here and there and it’s just stuff I’d always found workarounds for in the past.  Like sawhorses, I’d just use some boxes or anything else flat and elevated.  Like clamps, I’d just use my foot or a weight like a cinder block.  There’s something really nice about having the tools that are supposed to be used, instead of improvising.  And as I keep collecting more things, I can do more things the right way.  A few years ago, I probably would have cut the frame with a hand saw and used whatever nails I had lying around to fasten it all together.

So at this point, I just need to get the plywood top, attach it, and paint the whole thing.  Then, I need to move forward on getting cabinets for that room. 

Master Bath Beginnings

I have a backlog of things I need to post about.  A lot has happened in the Master Bedroom in the time passed.  The Master Closet is completed also.  But before I can get everything cleaned up and staged for taking a picture or two, I decided I wanted to do the ceiling in the master bathroom.  Then I got ambitious.

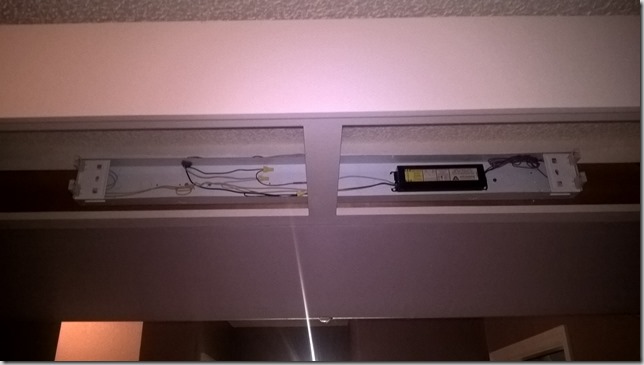
To scrape the ceiling, I would need to work in and around the light soffit over the dual sinks.  I began by removing the diffuser panels and inspected the florescent light fixture in place.  I wanted to swap that out with something LED, but wasn’t sure yet.  A longer-term project was to remove the soffit altogether and replace the light fixture with something more engaging.

WP_20170110_16_59_44_Pro

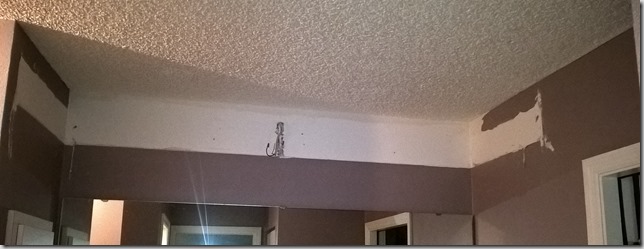
While I was up in there removing the bulbs, I noticed that the soffit was held in place with only 5 screws.  And just like that, my long-term plan became my current plan.  I’d seen too many DIY videos glamorizing the process of “demo”.  The soffit is coming out.

WP_20170110_17_00_06_Pro

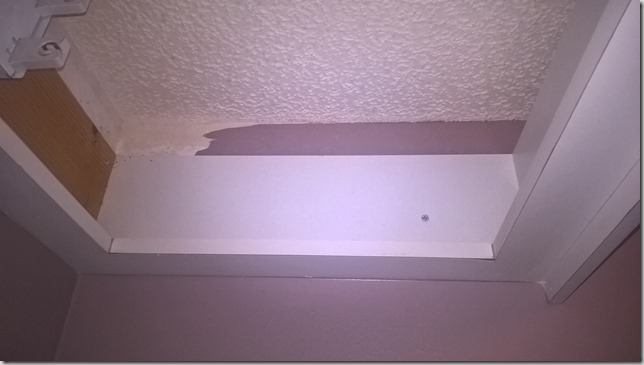
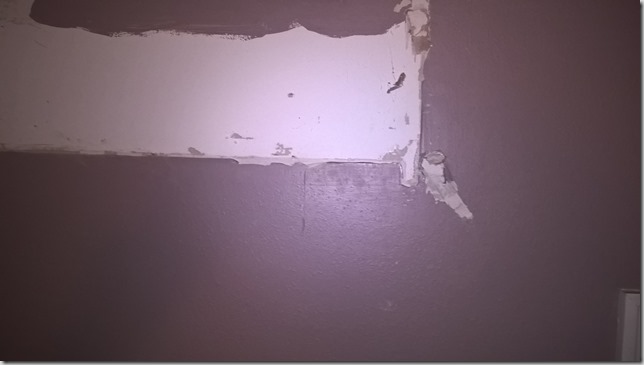
I removed the florescent fixture and noted the mess that was made when it was installed.  I was sure I’d be making a bigger mess by yanking this box out, and my immediate intention is to get rid of the tile toilet paper holder and towel rack, so drywall repair is already in the plans.

WP_20170110_17_58_36_Pro

I started to work the screws out.  They were 4” ,monsters and had odd heads that really battled with my driver bit.  With a little manual and a lot of power driving, all but one screw was out.  The soffit was still firmly in place.  I retrieved a utility knife and sliced the caulk seams around the edges.  Then it started to move, just barely.

I didn’t need the thing crashing down and possibly breaking the full wall mirror underneath it, so I climbed up on the vanity, supported the soffit with my shoulders and started working it free.  It was fit in there really tight.  And it was probably installed before the orange peel texture was on the wall.

After a lot of effort, I was able to free it from the wall with only some moderate drywall gouging.  Now I have a new problem.  How am I going to light this area?  The vanity is 70” wide.  Quality LED vanity lights in the 40” range are $400 and up.  I know I’m insisting on quality with my remodel, but that’s really a lot for a light.

WP_20170110_17_58_15_Pro

Further, I have to consider the Alico lights I’ve chosen for the closet and bathroom.  They are square in shape, and I should continue that design.  There is 24” between the sinks.  Maybe a 24” fixture dead center will illuminate the area well enough.  Maybe I’ll have to route wiring to have two lights, one over each sink.  Or, even another option is to have an overhead light fixture.  Plenty of choices to mull over.

WP_20170110_18_37_37_Pro

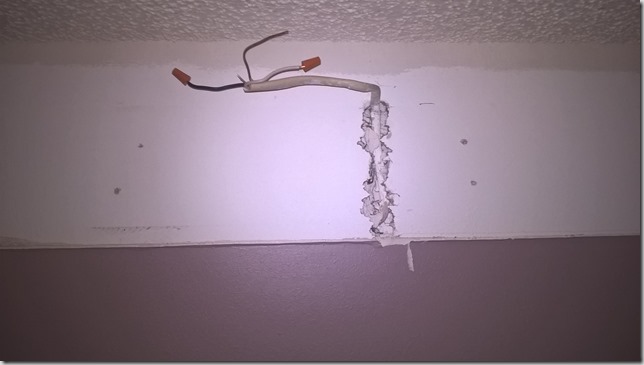
I will probably have to do some wiring anyway.  There’s no light box in the wall.  Just wires.  I’ll need to install something there.  It’s not the only electrical work I have to do in that room, either.  I have to upgrade an electrical box from a two gang to a three gang.

Next up is the scraping of the ceiling.

Master Bedroom Progress and Regress

It’s been a really drawn-out project, this first major room I’ve been redoing.  It started with the ceiling.  It’s a big ceiling.  Scraping off all the popcorn was a mess and a half.  And then the sanding of the leftovers was even worse.  I learned that I was using too fine of a sandpaper.  I was using 120 grit and I should probably have used my 80 grit instead.  So that took a lot longer than expected.

Then the patching.  I think I did a pretty poor job of patching, but since the ceiling is so high, it’s not going to be as noticeable.  Like previous attempts, I over patched, which required more sanding, then more patching, and on and on.  Around most of the edges, I was down to the tape and oddly, in many places, there was a gap between the wall and the ceiling.  I tried to fill those in with joint compound where I could.

Then the priming.  I used up what primer I had left, which covered about a third of the ceiling.  Then the next day, I went to Lowes to get more primer and was confused by what was there.  The oil based, low-odor primer I was looking at had a green label.  I was certain I had just finished a purple label can.  The purple label was a water-based primer.  Damn it.  I’d been using the wrong primer this whole time.

So I got the oil-based stuff and worked with it that night.  Let me tell you, there is a world of difference between the two.  Oil based is smelly (despite being “low odor”), runny (like raining down on me and everything else), and it separates in the can into oil and solids (lots of stirring).  But, the results of the oil based were significantly better, in my opinion.  It really requires a different technique, though.

We’re many days into this project and I just barely have the ceiling started.  I decide to prime the walls while waiting for some backup.  The latex primer I bought went on ok, but thin.  It muted the dark green well enough to paint over.

I finally get to the point of painting.  I have the help of my awesome GF this time and while she cuts in on the ceiling, I roll.  The results were decent.  We decided we needed another coat up there, which we would do after knocking out the walls.  The next morning, we tape up the ceiling and baseboards for protection and paint the walls.  The accent wall is a deep, dark blue and it took about three heavy coats to cover it.  The orange peel texture on the wall really worked against us there.  the other walls were a medium grey and they also took multiple coats because of the texture.  The results look great.  The room is shaping up, finally!

After drying, the GF does a quick test on the ceiling tape, resulting in disappointment.  The painters tape is pulling off the ceiling paint.  Oh well, it had to be retouched anyway.  A couple of days later, I go to remove the rest of the ceiling tape.  The tape is taking everything with it.  It’s pulling off ceiling paint, ceiling spackle, and wall paint.  It was leaving the ceiling in a total disaster.

To save the walls, I used an exacto knife to cut every tape seam in the room before pulling the tape off.  Some places where I didn’t cut well enough pulled the paint off anyway.  The ceiling now required a full repair, priming and painting.  Over the next weekend, I patched it up as best I could (which is not expert grade), and primed it.

Last night, I repainted the ceiling again and am hoping to call it complete.  I packed up everything in the room and swept the floor.  In preparation, I brought the ceiling fan in and will finish up the outlets shortly.  Then the bed and mattress get ordered and wardrobes purchased for the master closet.  Then I can rest.
Resource: 1StopLighting

I recently posted about finding the exact ceiling fan I wanted for an awesome price at a particular website.  I had seen this fan listed plenty of other places and most all of them said “Unavailable”, ”Discontinued”, or “Out of stock”.  But not here.  At the time I first found this website, I was still wondering if I could mount the fan on my sloped ceiling.  So I sent them a question through their website asking about mounting options.

The next day, when I learned from the installation manual that I could install the fan on my ceiling, I returned to their website and placed the order.

Oddly, I didn’t get an email confirmation right away.  I thought that was really weird.  So I went to their Order Status page, but I need my order number before I can check the status.  So I fired off a quick email to their service department.  Then I had the idea that I should just call – it’d be quicker.  So, while on break, I called.  The lady was pleasant and gave me the order number I needed.  She also emailed me a copy of the sales confirmation.

Later in the day, I got a second email with my sales confirmation.  I’m not sure which was from the CSR and which was from the website, but a picture was starting to form in my mind and I didn’t like it.  This company has human review of every order before confirming an order is valid.  That’s pretty old-school and I don’t like it.  Mind you, my credit card had been charged immediately.

Later on yet in the day, I got another email.  This one said the products I ordered are discontinued and can’t be fulfilled.  Mind you, my credit card has been charged already.  So I immediately called them and cancelled the other items on the order, the downrods.

Then I get an email from my original contact with the company asking if I could mount the fans on my ceiling.  They replied that the item was discontinued and couldn’t be ordered.  Then after that, I got an response on my other request about my order number saying that they have resent my order confirmation. Holy shit.

Look at the disaster that happens when you try to have an old technology website/business operating as a real-time/modern business.  It completely falls apart.  And the end result for me is that I felt very betrayed.  They didn’t have any product availability status on their website.  They didn’t have any stock status (because they don’t keep stock, they just order from the manufacturer when an order comes in).  They charge your credit card before they confirm they can get the product.  Their customer service, while not bad at all, is still not speedy enough.

This experience damaged my impression of all other resellers in that industry.  I browsed around looking for alternative sellers and couldn’t bring myself to try any of them.  Where did I end up?  Amazon.  I relegated myself to buying the maple blades instead of the black blades (for now).  The seller showed a specific quantity in stock, so I had faith that I would get my product.  The price was a bit higher. $194 instead of $134, but still not $260.  And the product should be here within a week, instead of 4-6 weeks. 

Just one more reason Amazon is taking over the world.

Second Ceiling Fan Order

As I just reported, my order with 1StopLighting fell through because they have a ridiculous online shopping business model – listing products for sale that are not available.  After that fiasco, I turned to Amazon.  Well, before that happened, I searched diligently for another source.

The exact model of fan I wanted is AVL56TIT5RW.  Deciphering the model number (a’la meh.com) would result in Avalon 56Titanium 5-blade Remote Wired.  The other model in the series is  AVL56BNK5RW (Avalon 56Brushed Nickel 5-blade Remote Wired).  The titanium model has black/titanium blades and the brushed nickel has maple/light maple blades.  When I visited a local lighting showroom, they suggested I buy the nickel model and buy replacement black blades.  That’s a viable option.

So searching for the nickel model number, I came across a seller on Amazon that was selling that model, but with a brand name of Bala.  The fan I’ve been searching for is made by Ellington, which is a brand of the manufacturer Craftmade.  Searching the internet for Bala fans returns a decent number of hits of products.  It appears that Bala might be a “house brand” for Ellington/Craftmade.  So good for me, I’m getting a high-quality fan that’s been private labeled.  Actually, two fans.

Now about that blade color.  My first thought is that the maple color would kind of steer my design decisions in the rooms to include more wood tones (“more” from a planned amount of zero).  But then I gave some consideration to painting the blades.  A quick search showed that yes, painting blades is a viable, frequent, and very popular solution.  It’s even promoted by ceiling fan manufacturers.

Now I’m settled.  Instead of a titanium fan body, I’m getting brushed nickel (which might even be better for me) and I’m still getting my black blades.  I’m paying a little more, but not paying as much as if I insisted on the original.

More Adorne Options

While I was planning all my outlets and switches using the Legrand Adorne collection, I was a little bummed that there weren’t any options for the other jacks in the house, namely, telephone, television, and network.  That meant I would still need to keep the traditional wall plates on the walls, diminishing the effect of the fancy wall plates.

I shot off a quick email to their sales department asking when they would have such jacks available for the Adorne collection so that I could have a consistent look throughout.  I got a reply saying they already had it.  It’s called the Connectivity series.  This series is very well thought out and includes RJ-11 (telephone), RJ-45 (network), coaxial (television), as well as HDMI, speaker wire terminals, speaker binding posts, and RCA jacks color coded for audio left/right/subwoofer, video, and RGB.  That pretty much covers everything.

That’s perfect for me. I don’t need a lot of pieces from that series: 5 coax, 3 telephone, and 2 network.  But having the reassurance that all aspects of outlets are going to be covered is great.  Kudos to Legrand.

Master Bedroom–Removing Popcorn

It’s been a little while since I’ve kicked off a new project.  I had planned on doing the laundry room next, but reprioritized to work on the master bedroom so that things can start getting moved around.  This is going to be like those sliding number puzzles until everything in the house is in order.

After a slow prep period of removing the ceiling fan and AC vent, covering up the recessed lights, restocking supplies like primer and getting new supplies like plastic sheeting for the walls and a new garden sprayer, I was ready to start.  I didn’t use plastic in the closets when I scraped their ceilings, so I was curious to see what a difference this could make.  Honestly, it wasn’t really useful at all, especially since I was going to repaint the walls anyway.  Part of the reason I wanted the plastic up was to protect the switches and sockets from the water I was soaking the popcorn with.  I didn’t even really need to worry about that.  I could have just covered the sockets with plastic and tape.  very little water got on the walls.  Judging by how hard the scraping went, I probably needed to open up my spray nozzle and put out a lot more water.

The ceiling in the master bedroom is vaulted, from 8 feet to 10-1/2 feet.  This means I had to get the bigger ladder out for one side of the room.  Spray and scrape, spray and scrape.  It was a couple hours of work and an incredible mess.  In the time since doing the master closet, I already forgot how messy the process was.  Plus, being over twice as big, it was over twice the mess.  I also forgot how useless papering the floor was.  When I would go to roll up the paper, the popcorn would just spill out anyway.  But I did fill up a tall kitchen garbage bag with popcorn and damn is that stuff heavy.

The next morning I looked in the room and once again was surprised at how much bigger the room looked.  Still have sanding, patching, sanding, priming, and painting to do yet, but progress is being made.

Learning As I Go

I have a personal issue where I can’t accept that it takes time to learn things.  In my profession, I’ve been doing it for over 20 years, so I just sit down and do it, I don’t have to think about it.  When a problem arises, it’s usually something I’ve seen before, so I just fix it like I’ve done a dozen times before.  It’s not quite like that with home improvement.

It’s not that I’m new to it, since I’ve been screwing things up for decades, but it’s that I don’t do it regularly enough to really get a handle on the cause and effect, or of the proper steps to be successful.

Take the simple task of painting a door.  Sounds pretty easy; put paint on a door.  But to do it right, you should take the door off the frame, remove the hardware, then paint it.  No problem.  But to do it better, you should clean the door up and sand it down first.  Well… ok.  But if the door is dirty, stained, or marked, you should prime it first.  Well, this is a little more subjective.  What is “dirty”?  And my paint is supposed to be “paint+primer”, is that good enough?

So I removed the door, stripped the hardware, sanded it, then painted it.  The result wasn’t all that great.  Ok, so I need a second coat of paint.  Next day, put on a second coat.  Still not good enough.  I should have primed it.  Plus, a seam of old paint had to be sanded off.  A waste of two days and two coats of paint.

I’m looking forward to the day that I have a proper routine and just do it right the first time, instead of having to constantly redo my mistakes.  However, I believe that if you don’t see the result of doing it poorly, you won’t know why you’re doing it the right way.  So, this must just be an expensive, time-consuming training exercise.

Project: Cooking Hinges

I have four closets in the house that have bi-fold doors.  With the updating of the door hardware to nickel, I have a small issue with the hinges on these bi-fold doors.  They’re brass and I wasn’t able to find any drop-in nickel replacements for them.  Well actually, the hinges are painted over, which might be even worse than being brass.

It’s not a huge deal because you only see the hinges when the doors are open (that’s how bi-fold doors work).  But still, I want things to look good when they’re visible.  So, I think that having the hinges unfinished instead of painted will be an improvement, and I want them to at least look like they are nickel.  So, I’ll just spray paint them and hope that looks sufficient.

But first, I have to get the old paint off.  I heard from the Internet that this is a simple task involving heat and water.  I’m pretty sure it is, because I used the same technique when getting the paint off my closet shelving brackets.  But this is probably going to take a while to get off.  To accomplish this, I purchased a cheap $20 crock pot and the hinges will soak in water on high heat throughout the day.  The paint should be “fall off the bone” ready when I get back from work.

While prepping for that, after removing all the hardware from one door, I got to try out my new sawhorses.  With the doors propped up, I sanded down the edges of each part of the door and scuffed up the surface for the new paint.

If this soaking and spray painting trick doesn’t work out, a subsequent search with more appropriate keywords brought up some places to find my hinges.  Not knowing what the hinge is called was holding me back.  Apparently, the hinge is a “3-leaf mortise hinge” and is commonly used for shutters.  …And my doors, for whatever reason.  I would need 18 of the things, which would cost about $40.  That’s a bit more than the cost of the spray paint and crock pot that I bought, so maybe it won’t come to that.

And while I’m at it, the two single bi-fold doors on the linen closets need some adjustment.  The top anchor seems to have drifted a little, so the door presses up against the wall when closed.  In both cases, it’s actively damaging the wall, so I need to repair the wall and adjust the anchor.  Not sure why I lived with it like that as long as I did.

The soaking did the trick.  The paint just slid right off.  However… the painting of the first set of hinges resulted in some pretty shitty results.  Terrible-looking.  I know I said I wanted everything in my remodel to be quality, so I don’t even know why I cheaped out on this.  So, I guess I’m ordering new hinges for those doors, too.  And no more slow cooking brass.