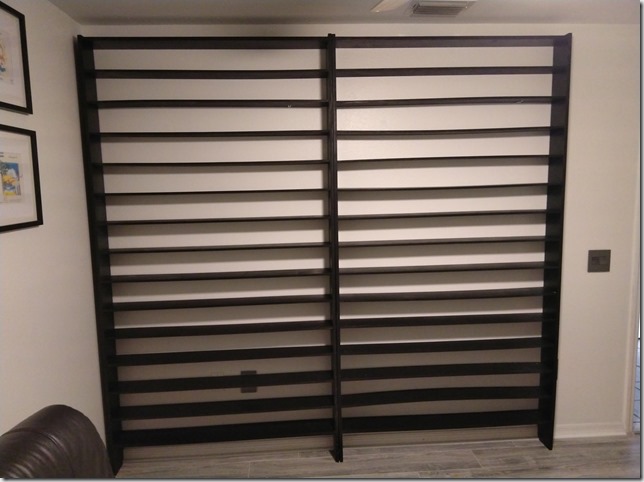
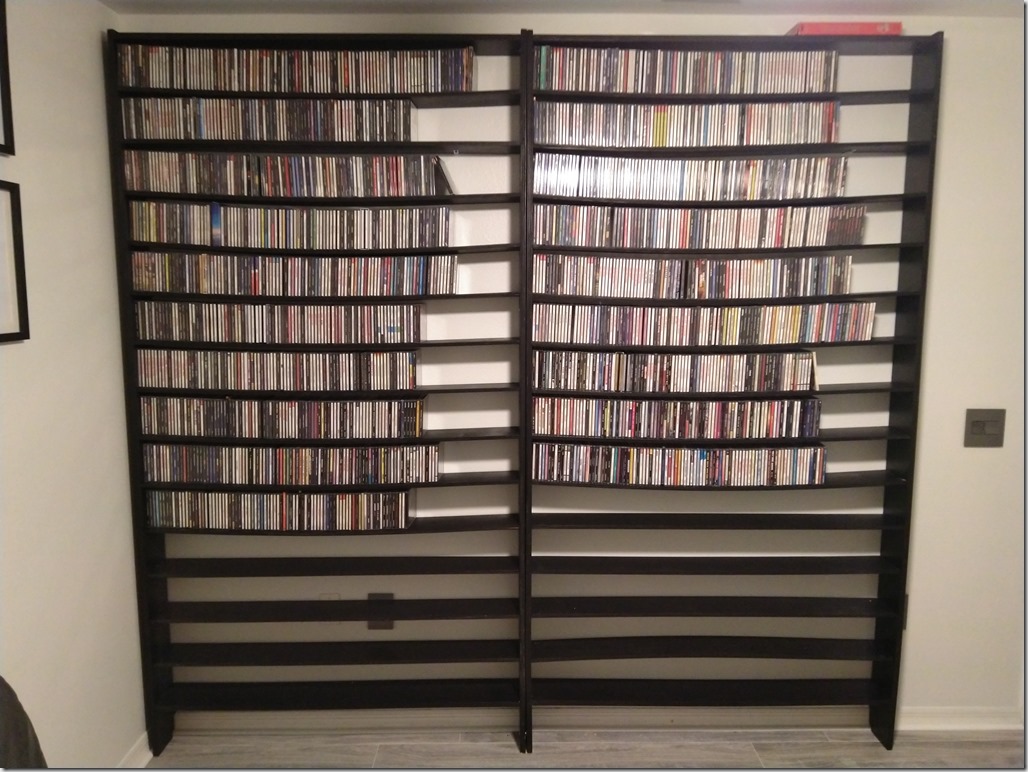
This time, I got apply all the lessons I learned from building unit #1. The result was greatly improved and was done much more efficiently.
Before I got started, I had already decided I was going to buy a power sander and that was ordered Friday afternoon for Saturday delivery. When I got home Friday night, I started right away.
This time, when cutting the frame sides down to 92″, I used the jigsaw instead of the circular saw. For such a short cut, it worked out just fine. Because I was cutting against the grain, I also utilized a tip I had read: score the cut line with a razor blade. This was effective in preventing the top layer from splintering during the cut. I did the same procedure to cut one of the 8′ lengths into the 4′ top and bottom of the frame. For whatever reason, my cut left the top and bottom different lengths of about 1/16″, but since they are going to be on opposite ends, I’ll manage.
Then the shelves. Using the 4′ top and bottom shelves as risers, I clamped and cut the 4′ sheets of 1/2″ plywood very quickly. I saved some time by not measuring the cut line and only measuring where to clamp the saw guide. I was running through battery after battery in my 20v kit and by the time I ended for the night, I had only 2 shelves left to do, but that would be starting a new whole sheet, so that was a good stopping point.
The next day, Saturday, after lunch, I picked up a bunch of sanding discs for my soon-to-arrive sander and a couple of even bigger clamps. Then I finished up the shelf cuts. I put all the shelves side by side and saw there was some significant discrepancy in their widths. Well, this is why I bought a power sander and some really low-grit paper. Using both sets of clamps, I bundled the shelves into two groups of 7 and set them aside.
I used my quick square to mark off the lines for shelf hole drilling and drilled all the holes for the shelves. I was still waiting for my sander to arrive. I made a template for the floor molding of the room. Unit 1 just had some rough, squared-off cuts to get around the molding, but since this would be the unit on the outside and the first to be seen, I wanted the edges to be nice and round and conforming to the molding.
I used a piece of cardboard and trimmed and refined the profile, then transferred it to the bottoms of the frame sides. Using the jigsaw again, I cut the shape out relatively close, then broke out the Dremel and used the sanding bits to make everything nice and curved and smooth. Still waiting for my sander.
Finally around 6:00, while the cats were eating, Spock (big boy) alerted and started growling. It was the delivery person dropping off the package. Without delay, I unpacked the sander and the vacuum attachment and rushed to the garage to begin the sanding.
The process was very clean because of the vacuum, but it was slow, tedious, and ate through many batteries. I didn’t take all the shelves down to the same width, but I did get them closer, which is better than what I had before. And that finished me up for Saturday.
Sunday after lunch, I used the sander with a finer grit and went over each shelf’s edges individually. It was clear that this was going to make the finish much nicer than it was on unit 1. Then it was time to prep for painting. Instead of setting all the shelves up on end, I had the idea to lay them all flat on the many buckets and kitty litter bins I had.
First, I wiped the shelves all down with a rag to remove any sawdust, then bundled them up again into one massive group with the new large clamps. While clamped, I painted both side edges of the shelves while they were elevated in the sawhorses. Then, I unclamped them and transferred two at a time to a couple of bucket stands, where I painted one flat side. I did this 7 more times, then painted the 8′ frame pieces on the sawhorses. This was completed at around 3:00. All I had left was waiting for the paint to dry so I could flip the shelves and paint the other side. I could have done the painting after dinner, but left it overnight for the next day.
Monday after work, I began the painting of the other sides. The process went quickly, but as I worked, I was sorely disappointed to see the quality of the painting the previous day was very poor. There were many, many drips along the edges that had dried. This was clearly a significant drawback to my decision to paint the shelves flat instead of on their ends. Since this is the unit that is supposed to be the best show of quality, I’m fairly resigned to sanding down the edges and putting another coat of paint on. This will delay the installation process by another day. But, quality is worth the time.
Tuesday I got a closer look at the paint. The shelves are in decent condition and I determined they don’t need any touch up. The sides and the top (or bottom) of the frame did need sanding and repainting. Tuesday and Wednesday, I used the power sander again with a fine grit (220) and on the paint blobs. It really smoothed things out. Then I used a foam brush to put a light coat of paint over the sanded areas. The result was very good. If I had the inclination, I would do that process with the entire unit – sand the first coat with 220 grit, then add a thin layer of paint with a foam brush. But, realistically, the shelves are going to be populated, so there won’t be much to see there. The frame is much more important.
In a little bit of research, I learned an important fact about furniture painting, or any painting, really. There is the paint drying time, which I have been significantly overestimating. This is only about a couple of hours, whereas I’ve been allowing 24 hours. If I did want to do mulitple coats of paint, I wouldn’t need to do one a day. I could do both in a day. Then there is the cure time, which can be as long as a month, but is at least a couple of weeks. The cure time is how long it takes the paint to not be soft anymore. I’ve generally not paid attention to this, although I do recognize the soft, sticky feeling of new paint. Ideally, I shouldn’t load up the units until the paint is cured, but I don’t think I’m going to concern myself if the shelves get some ribbed indents from the weight of CD cases pressing into the soft paint. It is something to keep in mind for future projects, though.
Thursday is assemble and install day and the return of the garage to normalcy.
These are pretty big units, so it’s important they be secured to the wall. Additionally, it will be more secure if they are attached to each other. To accomplish this, I used binding post screws, where one end is a typical screw and the “nut” is a barrel with a screw-type cap on it. Tightening this screw closes the gap between the two heads and will pull the frames of the two units together.
And here is the result:


