Pool Refinishing Progress – Stage 1

I was told when I paid my down payment on the pool refinishing that I would have the leak inspector check the pool out, then they would begin work.  I spoke to the leak people, who scheduled me for the next Monday and prepared me for the cost of the service, almost $300.  Sure, whatever, it has to be done, right?  And before they get there, they want the pool clear, in case they need to go underwater to inspect.

Well, I guess it didn’t need to be done?  I got a text the next day that they were going to begin work on the pool right away.  I explained that I was scheduled for leak detection the next week.  They said, don’t worry about it.  I said I would have to shock the pool immediately if they needed it clear.  They said don’t bother. Ok, then.

The day after that, I got a phone call saying the crew was on-site, but they couldn’t get in.  I was confused.  The screen doors are unlocked.  I was suspicious they were at the wrong house.  The guy said he’d tell the crew to try harder and get back to me.  When he called back, he explained that they could get at the pool, but they couldn’t find any power outlets.  They were trying to get into my lanai to get to the outlet.  I said, no, that’s my house.  Why would that be unlocked?  So I directed them to an outlet by the pool mechanicals.  Right on.  Good to go.

The crew was there to grind down the marcite around the tile and the returns and the drains, where it was going to be thicker, or because it needed a strong edge.  Something like that.  When I got home that night, the crew was gone, as was all the water from my pool.

wp_20180412_16_44_48_prowp_20180412_16_57_23_prowp_20180412_16_57_39_prowp_20180412_16_57_53_pro

You can see the condition I left the pool in for them.  It didn’t really matter because the whole thing would be acid washed as part of the prep.  But it did stink.

The pool light has been yanked out, so hopefully an evaluation can be made as to what replacement I can have installed and how much the new light will cost.

Pool Redo Begins

Well, it’s been about four months since anything interesting has been done to the house.  Last year around this time, I got quotes for resurfacing the pool and potentially replacing all the mechanicals, like pump and filter and heater.  The pool is about 20 years old and has never been resurfaced.  It was in need of resurfacing 13 years ago when I bought the house and it never came to be.  Mostly because of the cost.

But over a long time, I’ve saved up enough money to afford the work and yesterday, I signed a contract to have it done.  That’s an immediate 11k drop in my account balances, which hurts tremendously.  But, that’s what the money was saved for, and the pool must be brought up to a usable state if anything is doing to be done with this house, whether selling or renting.

The pool does seem to have a leak somewhere, since the water level drops pretty quickly.  That has to be resolved first before they do any resurfacing.  Then they will blast out whatever soft surface is remaining in the pool, then put fresh marcite in.  I’m losing the tile borders around the steps, but they are being replaced with tile marker dots on each step.

The pool is being converted to salt-generated chlorine, which should be beneficial from a chemical purchasing standpoint.  But in a way, that’s sort of moot, since I am going to contract the pool maintenance out after the refinishing is done.  I know that I am a terrible maintenance person.  It’s a rare month that I can go without an algae bloom.  So, budgeting about $100/mo for pool service should seem reasonable.  And, if I get to the point of renting the house, it won’t be me paying for it anymore.

One unknown at this point is the pool light.  Because of a small fuckup when I was rewiring a switch, I blew out the light in the pool.  The contractor says the light is not a typical pool light, it may be a spa light.  I want to replace it with a color-changing LED light, but there’s a chance it may not fit in the opening.  That can only be determined after the pool is drained.  It may be an expensive addition to the bill, but hopefully, it will all work out ok.

The schedule is set to begin in about 2 weeks and the season is fast approaching.

Garage Phase 2 Complete

This is a late posting.  I’ve actually been done with the garage for a little while now, but it still took much much longer than planned.

Originally, the last thing to do was paint the walls.  That was going to be done during the downtime from hurricane Irma.  The paint was purchased and everything was cleared out and ready to go.  And it never happened.  And the weeks went by and it still never happened.

Finally, I got up the energy to strip the old paint off the electrical conduit to the electric box.  Immediately after that, I got the flu, so I had another setback.  After recovering, I made a few more half-hearted attempts at stripping the paint until I figured it was good enough.

The next half-hearted attempts involved priming, which was done over the span of weeks, with a final push in early December.  Then it was on to painting.

But before all of that, there was a bit of planning for the electrical outlets.  The outlets dropped from the ceiling had cheap, flimsy plastic outlet covers.  I wanted to replace them with metal.  Also, the light switches and wall outlets also needed upgraded to more ornate metal plates.  Finally, the doorbell transformer was mounted on a plate that needed swapped out to a metal plate.

wp_20170905_17_21_47_pro

This transformer plate.  Never before have I had such trouble finding a product.  This is simply a plate with a 7/8” round hole in the middle.  The transformer has a mount that fits into the hole and is secured with a set screw.  You would not believe how difficult it was to find a metal plate with a 7/8” hole in it.  I found one at exactly one place on the Internet – Kyle Switch Plates.  When I finally received the new plate, I had to drill an extra hole in it to route the doorbell wire.  After drilling the hole, I wondered why I just didn’t drill a 7/8” hole in a blank metal plate.  I’m not exactly the smartest handyman.

One other task I wanted to accomplish was rerouting the electrical supply for my FIOS box.  The way the box was originally set up, I had to run an extension cord from the outlet over to the breaker panel, where the power transformer for the inside portion of the ONT was mounted to the wall.  I took the FIOS boxes apart and saw that the power line was just simple cat5 cable between the wall unit and transformer.

wp_20170915_17_27_51_prowp_20170915_17_28_03_pro

I got a longer length of networking cable and routed it around the wall, just under the chair rail molding and relocated the power transformer just underneath the power outlet.

So, with all the plates installed and a future plan to change out the switches and outlets with fresh, clean ones, I’m considering this phase of the project complete.

wp_20171208_17_46_43_prowp_20171208_17_46_31_pro

The next step, Phase 3, is installing the garage door.

The Generator

I’ve mentioned elsewhere that when I first moved into this house, one of the first things I purchased was a generator.  And since I bought the thing, I’ve never had to use it.  Never.  The only time it was ever used was when the former homeowner, who is an electrician, offered to wire up a house feed, so I could power my whole house with the generator.  Actually, it would only power some of the house, but, I could turn circuit breakers on and off to direct the power where it was needed.

Anyway, the point is that I’ve only run the damn thing once.  And after that one time, I never drained out the gas.  And I have experience as to what that will do to an engine.  But we’re not talking about leaving gas sit for months or a year, we’re talking 12 years.  So, as hurricane Irma approached, I pulled out the generator and it failed to start, as expected.  I had a couple of days to fix this situation.  The fix would be similar to what was done to my motorcycle – remove and clean the carburetor.

I started by taking the gas tank off the top and doing a general cleaning of the unit.  Considering its disuse for 12 years, the generator was in good shape.  I sprayed seafoam and carb cleaner into the throttle body.  I somehow expected that would fix the issue.  The generator did not start after a bunch of tugs.  I rolled the sad unit back inside and let it go.

The next time, I actually disassembled the carb from the engine.  I sprayed more carb cleaner all over it.  But the one thing I couldn’t do is get the bowl off, which Youtube taught me is something that needs to be done.  The screws were seized and would not move at all.  I put the carb, twice cleaned, back on and tried to start it.  Many yanks later, it still has not made an improvement.  Back inside the pathetic unit went.

I gave a lot of thought of how to get those screws off.  I was beginning to strip the heads, so my options were becoming limited.  My next thought was to clamp the screw bit against the body so when I turned the driver, the bit would not come out from the head grooves.  So, on another day, I did just that – took the carb off, got a clamp and secured the bit to the head, then using a wrench, I turned the bit.  The end result was the clamp slipping and more head stripping.

In desperation, I grabbed a pair of vice-grip pliers and clamped them onto the screw head.  A careful turn and the bolt freed itself with a small “crack”.  With what was left of the head grooves, I was able to remove the screws and expose the carb bowl.  At last.  The liquid in the bowl was outrageous.  It was a dark brown, oily substance that resembled nothing like gasoline.

I went to work with the carb cleaner and got everything shiny clean.  Now to reassemble it.  And that’s where it all kind of fell apart.  The gasket, a complex-as-fuck o-ring that rested in grooves in the carb, didn’t fit in the grooves in the carb anymore.  I must’ve stretched the rubber when I pulled it apart.  And as far as know, there isn’t a way to unstretch the rubber.  After an extended attempt to fit it all back together, I decided I would just buy a new gasket.

The problem is, finding that gasket is no easy task.  I determined the engine was a Briggs and Stratton, which got me lots of replacement parts – way too many.  Then I found the part number of the carburetor and searched for that.  That’s when I found out a replacement carb was only $20 – shipped.  Why was I even bothering to try and clean this thing?  I mean, it’s not like a $300 used carb for my motorcycle.  In the end, it’s still the same fix I did with my motorcycle.

The part is ordered and I’ll be able to install it next week.  I could have done that right from the start if I’d known it was that cheap.  What a waste of time.

Garage Restore, Phase 2

The former house owners had converted the garage into a game room in 2003.  It is my plan to return the room to a garage.  The first step in getting to that point was to fix the ceiling.  The ceiling had damage from a period where the A/C unit in the attic was poorly sloped and leaking into the ceiling.  The drywall had sagged and eventually fell apart.  Phase 2 is painting and the final phase will be installation of the garage door.

With the total fiasco of the complete ceiling replacement, which also included removal of two HVAC ducts and a HVAC air return, now I was ready to depersonalize the walls.  The former owners had spent probably a significant amount on a mural artist to come in and paint the walls in a Tampa Bay Buccaneers theme.  Since sports are not my thing, I really have no interest in keeping it around.  Early on, I thought it would be a great selling point for the house, but to live with it until I’m ready to sell is just too much.  Anyway, things like murals are not selling points.

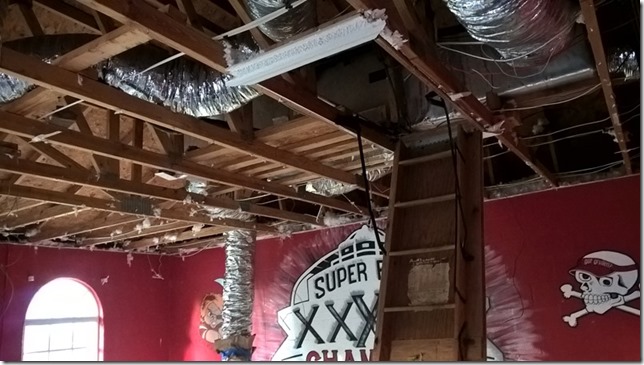
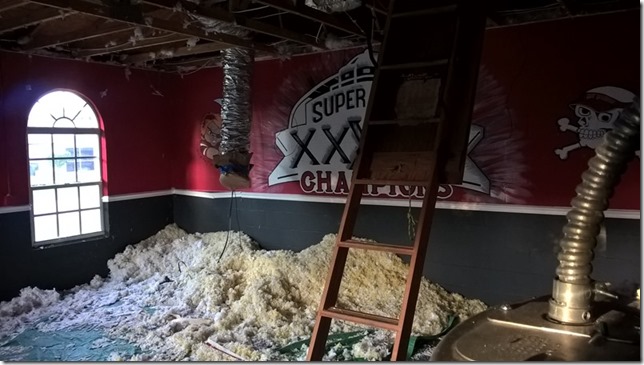
For reference, this is what the room looked like before any work was started.  The tube lights have since been replaced with LED flat lights and a lot of the furniture is gone as well.

wp_20160407_016wp_20160407_017wp_20160407_018

The color scheme is going to be two-tone grey with a blue hue.  Since the outside of the house is going to be a stormy color of blue, the garage will carry that color in.  The laundry room is a bright aqua blue.

I began priming the upper part of the walls, since I also had the paint for the upper part.  Eliminating the bright red walls and artwork was more satisfying than I expected.  In one particular section, the names of the former homeowners were painted, along with the date the mural was completed.  Painting over that section felt the best, for many reasons.

See, I’m still more or less friends with the old homeowner.  I do computer work for him.  Recently, he got divorced.  Sometime later, he stopped by my house with his new girlfriend and wanted to show her my house (his old house).  It’s kind of hard to explain, and I just chalk it up to some southern thing where you can just walk through anyone’s house when you’re friends with them.  But he showed off the game room and talked about “how it was”.

Now that I have wiped all that away, he doesn’t have anything to show off.  He doesn’t have anything to remind him of his ex-wife or make his new GF think of his ex-wife.  I don’t have to think about him or his ex-wife or his family anymore either, or my previous life for that matter.  It’s a clean slate and a fresh start.

Garage Work

Or future garage, anyway.  It took a little time to decompress from the contractor work I previously discussed.  I had to slowly get back into the idea of getting started on a project.  And I had a couple of projects that were prioritized.  First, I was not going to install blinds in the garage, nor curtains.  My choice instead was mirror window tint.  The tint supposedly blocks out something like 80% of the light, plus UV protection, plus privacy.

I found the film I wanted to use and later purchased it for half price at my warehouse store where I purchased a lot of my Adorne pieces.  I also purchased the installation kit which had a squeegee, contact spray and a trimmer.  Because I don’t really prep for anything, I later had to go back and buy razor blades, because I wanted to scrape the windows completely clean before filming them.

I’ve had my car windows tinted so I kind of understand the process.  You wet the surface, float the film into position, then squeegee it down into place.  Sounds easy; is not.  My first attempts have creases in them which make the window look cracked from the outside.  My later attempts were better looking.  I ran out of film doing only one window even though the package says it’s good for three windows.  I guess I was leaving too much border that got trimmed off.

After getting completely frustrated with one window, I decided to begin priming the walls.  I didn’t really consider just how large a garage really is.  I used up over a gallon of primer doing half of one wall.  But, progress!

On my list of things to find is a outlet cover plate that has a hole for a doorbell transformer.  I bought a simple metal cover plate, but it is very narrow and will not cover the outlet opening completely.  I have time.  I have a few days of work already queued.

Ceiling Replacements

In two rooms, I have some ceiling issues.  In the lanai, a part of the ceiling is sagging and in the garage/game room, the ceiling has sustained water damage from a time when the A/C leaked.  These are not projects I could manage on my own; I know my limitations.  So I called a few handymen for quotes.  Surprisingly, only one guy actually made it to the house to provide a quote.  He seemed friendly and knowledgeable and since he kind of won by default, that who got the job.

As we talked about the repair, I also said I wasn’t concerned about the texture – knockdown in the lanai and popcorn in the garage.  He said if I wanted to remove it, he could do it.  That led to the decision that it would be cheaper and less labor-intensive to tear down the whole ceiling instead of trying to sand down any texture.  Ok.  You’re the one that knows.  So I got a quote to replace two ceilings for $4k.

Day 1 – demo day.  I get home from work and the whole lanai ceiling is down.  Not bad.  The crew is getting ready to take down the garage ceiling.  Their plan is to climb in the attic and stomp it all down.  That’s fine, but guys, shouldn’t you take out the florescent bulbs from the light fixtures first?  Oh yeah, good call.

I leave them to their work and only a couple times heard “Whoa whoa whoa!”  After the dust mostly settled, I went back in to see how it was.  It was a mess.  But one thing very quickly caught my eye.  There were electrical runs from the breaker box to the far wall using unshielded wires, spliced together with wire nuts.  I’m no electrician, but I can tell when something is unsafe and not up to building code.  I grab my voltage tester and sure enough, the wires were live.  It’s lucky the demo didn’t cause any shocks or start a fire.  So that’s the first out of scope update that needs done.
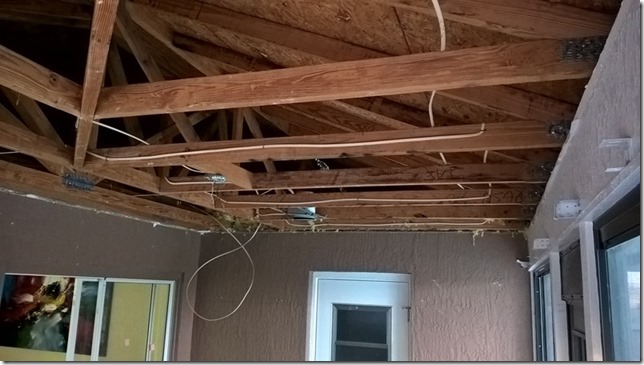
wp_20170808_19_31_18_prowp_20170808_19_38_48_prowp_20170808_19_38_56_pro

Day 2 – Cleanup, wiring, and ductwork.  While the ceiling was down, I made the decision to eliminate the a/c runs in the room in preparation of converting the room back to a garage.  I asked them to seal off those runs, which they did.  Now the room is hot, like a normal Florida garage in August.  The crew installed junction boxes for light fixtures and ran new wiring for the outlets.

Day 3 – Wiring and initial drywall.  The electrical boxes and conduit are installed and the wires are run for power.  A few sheets of drywall are up now.  The crew is gone by the time I get home today.  I’ll give them credit, they clean the workspace up before they leave each day.  And somehow, they fixed my door?  It used to stick badly and now it doesn’t.
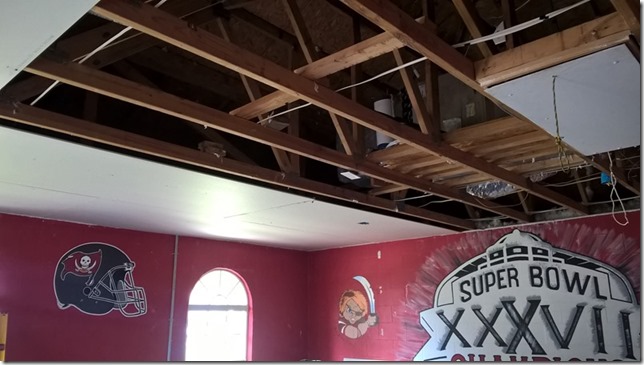
wp_20170810_16_53_21_pro

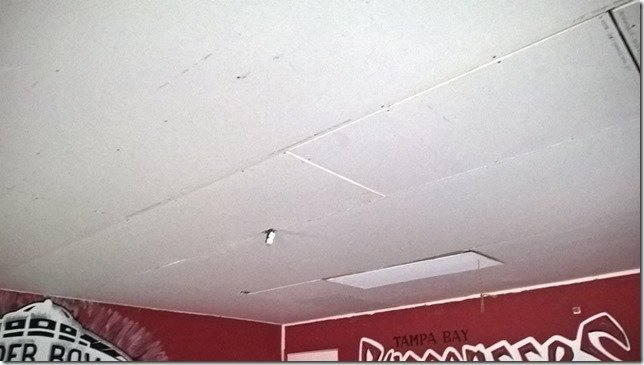
Day 15 – Everything is done and paid for.  There is still some drywall that needs to be picked up when it isn’t pouring rain, but in effect, the job is done.

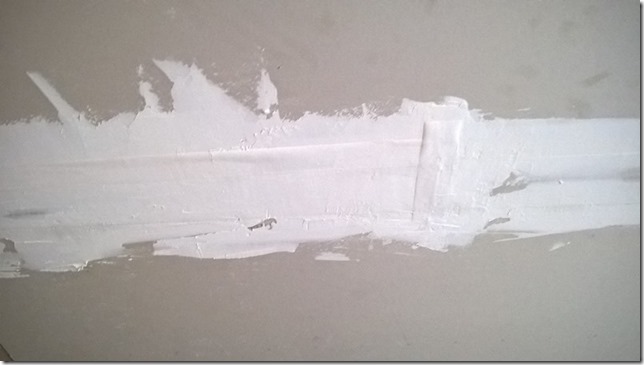
You can see I sort of blacked out between day 3 and 15.  The days just went on and on with no end in sight.  The boards would go up, then come down and be put up again.  Then they would get seamed and fail review, so they’d need redone again.  Then sanding and painting and fail and redo again.  I guess I need to be grateful that the project manager was a stickler for quality, but it really needed to be done quicker and done right the first time.  At the end, I didn’t care so much about how it looked, I just wanted them out of my house.
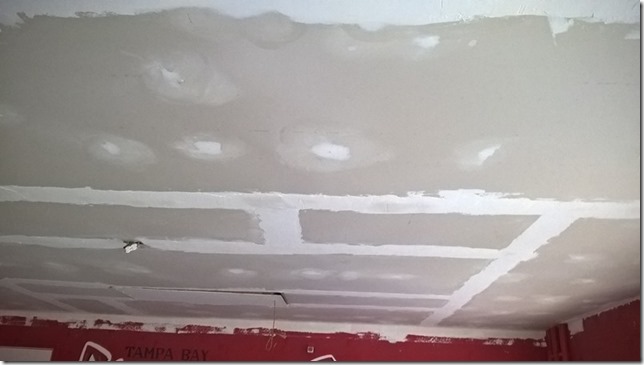
wp_20170818_18_36_37_prowp_20170816_19_36_35_prowp_20170816_19_37_45_pro

I say this project took 15 days.  That’s 15 work days.  It actually took 21 calendar days.  And in that time, I had over a dozen different people in and out of my house.  Because some crews sucked, they needed replaced, so more people came in to fix their mistakes.  I expected a crew of maybe 4 people to come in and knock it out in a week.  I got a different crew for demo, dry wall installation, seaming, finishing, and painting.

In the confusion, I am pretty sure I lost an electrical extension cord and some painting supplies.  On the other end, I think my neighbor took advantage of the piles of trash that were left outside and I gained a car tire.  I’m pretty sure he threw out a bunch of other construction waste in my piles, but that was hauled to the dump at the end of the project.  They didn’t take the florescent bulbs.

Because of the craziness and the weather, I haven’t even really had a chance to take in the changes.  I have to install lights and then begin cleaning and painting.  This project should have been done so long ago and it’s only partially complete.

The next day I was able to take stock.  I lost an extension cord, a push broom, paint tray, tray liners, the blower attachment for my air compressor, almost all my paint primer, and all 3 of my measuring tapes.  That’s not even the worst part.  The insulation they blew in is off-gassing an ammonia smell.  Research says that will go away in up to 4 days, some have said 3-4 weeks.  My garage has a ridiculous amount of water in the carpet and reeks of mildew.

The Big Art Project

One of the projects I have on my list is to create a large set of pictures featuring CD covers.  The collection of pictures can be swapped out for others to create different moods and maintain a fresh feel.  This project isn’t exactly cheap, just because of its scale.  The CD covers I plan to use are from the MCA Master Series.

The first expense is the frames.  I can’t exactly buy serious photo frames in the quantity I am working with, so I purchased MDF and acrylic poster frames from a business display store.  40 frames cost me almost $300.  The packaging of these frames was ridiculous.  I received two large boxes and a smaller box.  Inside each of the larger boxes was two of the smaller boxes, giving me five smaller boxes in total.  In each of these smaller boxes were two even smaller boxes.  Now 10 smaller boxes in total.  Each of these 10 boxes had four frames in them, giving 40 total frames.  Insane.

The next expense is the photo mats.  The frames are 15”x15” and have a small mat in them with an 11.5”x11.5” opening.  I was planning on printing my CD covers on 8.5”x11” paper, so that means they won’t fit in a 11.5” square opening.  To solve that issue, I bought mats that were 12”x12” and had an 7.5” opening.  Those numbers weren’t exactly arbitrary, they were based on the availability and convenience of 25 packs of those mats.  50 mats cost about $90.

Then, there’s the paper.  It’s standard size paper, but it’s awesome paper.  I found 50 sheets of 230gsm fine art paper for $25.  I don’t know much about it, and maybe someday I’ll use something different, something with a texture.  But this paper is nice, thick cotton and shows well.

Finally, the printer.  I chose a 6-color photo inkjet printer and fortunately got one in wide-format (so I can do 11”x17” in the future).  The quality seems pretty good, for as much as I am able to discern.  I’m not using a magnifying glass to inspect the print quality and I don’t expect anyone viewing these on the wall will do so either.  So with all the components now in my possession, it was time to start.

My very first test was printing the CD cover at its natural size, 4.5”.  The quality was good, so I mounted the paper on the mat, then mounted that mat in the frame’s mat.  The result was a little underwhelming.

wp_20170712_20_24_11_pro

The next attempt was filling the mat’s opening, so I printed one at 7”.  The result was a little overwhelming.

wp_20170713_18_50_13_pro

Then, I tried to find balance with something in between: 6”.

wp_20170713_20_52_47_pro

I thought it was balanced, but the GF made an excellent point that there were too many borders.  The outer mat, the inner mat, then the border around the CD cover.  Considering that for a bit, I could see the layout put more focus on the layers and kind of gave a tunneling effect.  So it was decided to fill the inner mat with the CD cover, printing it at 7.5”.  Even though that’s bigger than the 7” version that I thought was too large, eliminating the inner border somehow doesn’t make you question the size.

wp_20170719_18_22_08_pro

A/C Issues

Over the last couple months, my A/C unit has cost me almost $1000.  To be fair, I haven’t had to bite the bullet and drop $7000 on a whole new system, but that time is probably coming soon.  I’m hoping to get through the killer summer months.

A couple months ago, I mentioned how I was going to clean the A/C unit while it was down.  What happens is that the thermal switch in the compressor overheats and shuts the compressor down.  This shutdown signal isn’t sent back to the thermostat, so the thermostat thinks things are still running just fine.  The blower keeps blowing and the thermostat says the system is cooling and the fan is running.  To reset this condition, I have to pull the thermostat off the wall and replace it, which then makes it read the current status of the compressor and starts everything back up again.

Well, after multiple resets, I had to call the repair company.  I felt a bit foolish afterwards because the problem was just a bad cooling fan motor.  Like, I’m so oblivious that I couldn’t troubleshoot that the cooling fan on the compressor wasn’t turning.  That part was replaced for a little over $300 and I was back in business.

Last weekend, the house went up to 84 degrees again.  I instructed the GF how to reset the thermostat until I got home.  When I did get home, things were a little better but not much.  That’s when I noticed the strange noise, like ocean waves.  It was the blower in the attic ramping up and shutting off, over and over again.  So this time, the compressor was running fine, the thermostat was saying everything was fine, but the blower was unable to supply enough cold air to the house to lower the temperature.

I put the house into emergency cooling mode.  I closed all the blinds and pulled the curtains in all the rooms, closed the doors to all the rooms, closed off the vents and return in the game room, and turned on a window A/C unit on the lanai.  I redirected the cool air into the house with a desk fan.  You may think that’s funny, but the window A/C unit was able to keep the main part of my house (and sometimes the open master bedroom) at 78 degrees.  And it did it for four days straight.  That A/C unit hasn’t been run in years and stepped up to the task of cooling a whole house on a moment’s notice.  Bravo, Kenmore.

I called the A/C tech in on Saturday and he identified that the blower motor needed changed, but he didn’t have one.  It was a variable speed motor and they are specific to the exact make and model of A/C unit.  They are also really expensive.  So, repair was put off until Monday.  On Monday, the repair company tried to contact the manufacturer for pricing and availability to no response.  So at the end of the day it was decided to swap out the motor with a single-speed version.  Monday night, I did a lot of research on variable speed motors and learned they have some significant benefits with regard to humidity control.  But, since the whole system is in its final days, running a single-speed blower will do for now.

The tech came out Tuesday afternoon and quickly swapped out the motor.  Looks like something I could have done myself, but, let the pros handle that mess.  $600 for the motor and installation, and I was back in the cool life.  The window A/C unit earned itself a nice long vacation, too.

Referencing my electric company’s usage graph, you can kind of see what happened on Saturday the 15th.  The A/C compressor was running non-stop because the thermostat said to.  Midday on Sunday the 16th, I was worried about burning the compressor out, so I shut off the central air and just left the window A/C unit on.  The 17th, the house was only cooled by the window A/C.  Midday on the 18th, the central air was restored.

image

Laundry Room Storage

I had been stressing for a long time about installing cabinets in the laundry room.  They are expensive and even more so with the modern style that I wanted.  Every week I would do laundry and have to juggle the baskets, cleaning rags, detergent, and dryer sheets, all of which sat on top of the washer and dryer.  I also folded clothes on top of the dryer, so even more juggling.

While watching an excellent video series called The Weekender, Monica, the host, suggested installing cube dividers on the wall in a laundry room.  It was just what I needed.

While you can get cube dividers just about everywhere, I was sort of fixed on Ikea’s Kallax line, with their big thick frames.  However, Ikea specifically says you cannot install a 2×4 Kallax on the wall.  To read between the lines, they say you can’t mount it on the wall using the stock mounting hardware.

Monica from The Weekender wasn’t using a Kallax, but she did mount the storage unit to the wall with reinforced L brackets, which is what I did as well.  About $30 for four heavy-duty brackets (500 lbs load each) and lag bolts, plus $65 for the Kallax and it was a go.  I originally expected to spend about $500 on cabinets.

wp_20170705_18_50_09_pro

First, I used a stud finder and marked the edges of all the studs in the wall.  I would need to screw into the studs with the weight I’m working with (2×4 Kallax is about 75 lbs).  I measured where on the wall I wanted to mount the unit vertically, then marked a straight line for the brackets using a straight edge and level.  Then I marked the screw holes while holding a bracket at the straight line and between the stud edges, also using a level to ensure it was completely vertical.

Lag bolts are thick, so pilot holes need to be drilled to prevent cracking.  When I drilled the pilot holes, I was concerned that I wasn’t getting any wood chips back out.  I test mounted a bracket with one screw and put some pressure on the bracket.  It ripped right out of the wall.  So I made the assumption my lag bolts were WAY too short.  I purchased 1.5” and I probably should have purchased 2.5” or 3”.

After getting longer screws, I drove one in to see when I would hit the stud.  It never happened.  Huh?  I grabbed the stud finder and ran it over the holes I had made.  The stud was not there; it was about 2 inches to the right, which did not line up with the stud edges I marked about 6 inches above.  What a bunch of shit.

So I drilled new holes where the stud really was and got wood in the drill bit.  Then I patched up the old holes and left them to dry for the night.

wp_20170705_18_49_11_pro

The Kallax is just short of 58” wide, which means mounting four brackets on four studs gives 48” of brackets for support.  The unit also has some standard mounting brackets for the top, which provide not much more than tip-prevention.  Those will be well-suited for the top of the unit.

wp_20170706_19_14_04_pro

With some help from my neighbor, I got it hoisted up and mounted

wp_20170707_18_42_19_prowp_20170707_19_00_17_pro

Next will be baskets and doors.