Guest Bedroom Redux

The actual title is “Guest Bedroom“.

Since this isn’t the blog for personal ruminations (look elsewhere for that story), this will just focus on the effects of the changes to the house.  And to sum up the changes, I’m getting rid of my guest bedroom.

So, the future plan is to make it another music room.  I have my music room right now, which I term, “the listening room”.  This new room is going to be a studio room for my music equipment and recording.  So maybe I need to rename these rooms “recording” and “playback”.  And with the bathroom situated between them, that should be called “pause”.

Now, on to the plans.  First of all, old furniture needs to go and new furniture needs to come in.  I called a donation center and was told they don’t take mattresses, so I planned on taking the mattress to the dump.  While searching for a moving bag for the mattress, I saw a vacuum bag, which gave me the idea to just compress the mattress and store it.  Maybe at some point in the future I’ll need a guest mattress.  If it’s compressed, no big deal.

But I will need to dispose of the bed frame, which is not good enough to donate, and the dresser and night stand, which can be donated.  They can go with the old TV stand from the living room.  All the other storage units in the room can stay.  And then, it’s time to get new stuff.

I will have my keyboard stand, guitar, and a monitor stand that also holds the recording computer.  That’s what I’m starting with.  What I’m looking forward to is not using a mini keyboard/trackpad on the computer and not having to stand or sit on a hard barstool.  I will get a nice table top where I can have a full keyboard and mouse and room for the mixer and other peripherals.  I’ll get a nice comfortable chair where I can spend an extended period working over song mixes instead of giving up after 30 minutes from body aches.  And I’ll have room to move instead of being crammed into a corner.

Tentative budget:

  • Table: $150
  • Chair: $300 (not going to skimp on this)
  • New studio monitors: $300

The timeframe is two months, tops.  Lotsa pieces coming together right now.  New TV stand arrives tomorrow.  Mattress bag over the weekend.  I can schedule a pickup of the furniture next week, chop up the bed frame for the garbage.  If things work out, I’ll have a small windfall of cash within a month to finance this and much more.

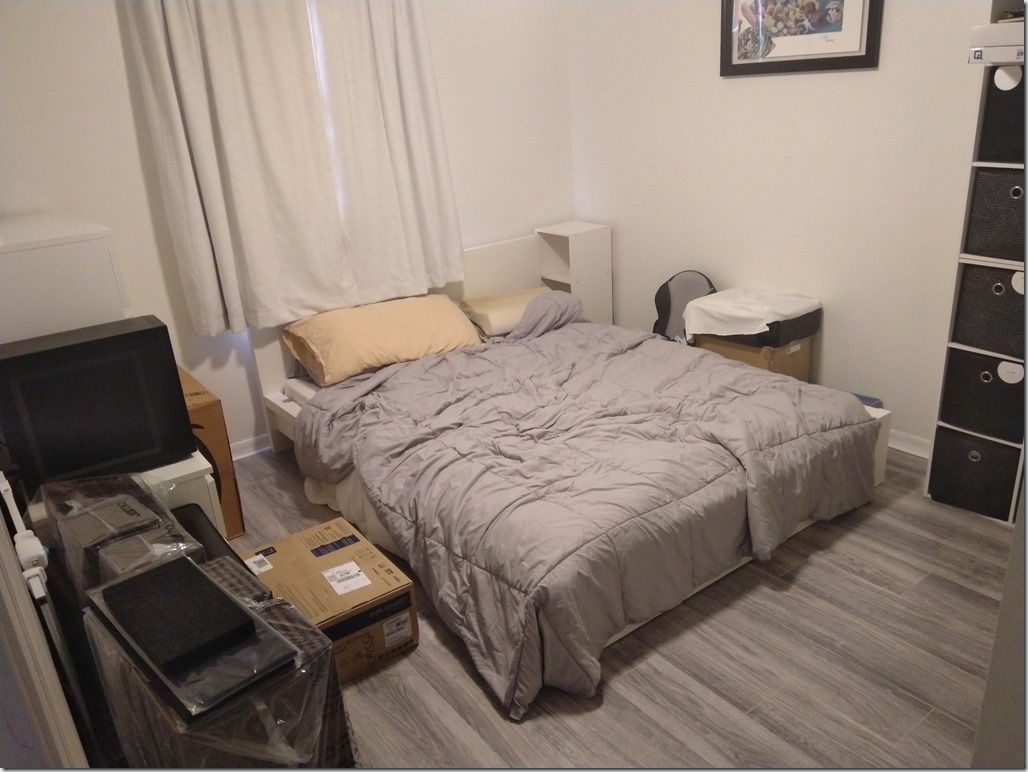
Say goodbye to this mess.

IMG_20210707_193953

The speakers in the lower-left will be out in a couple days.  The box on the floor is the new stereo for the living room.  The PC on the left has to stay.  We’ll make that work.  But anyway – progress!

I told myself: The house is yours, you should use all of it.  I listened.

Living Room Progress

The most recent thing I’ve been “working” on is redoing the living room.  The plan I developed had a few stages:

  • Replace shelving units
  • Replace couch
  • Replace AV system
  • Replace TV/AV cabinet

This list is pretty much in reverse order of execution.  Although the couch is ordered, by virtue of the current state of manufacturing and also the general practice of that manufacturer means I won’t see my couch for 20 weeks.  So in the meantime, I can work on the remainder of the items.  First up: the TV cabinet.

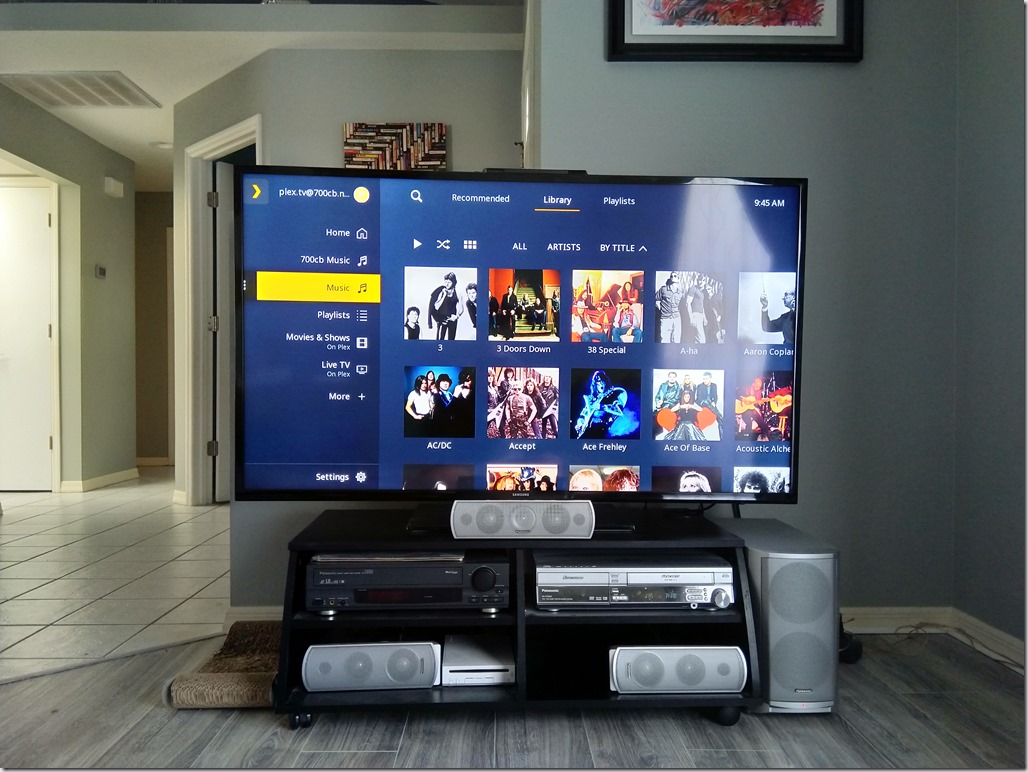
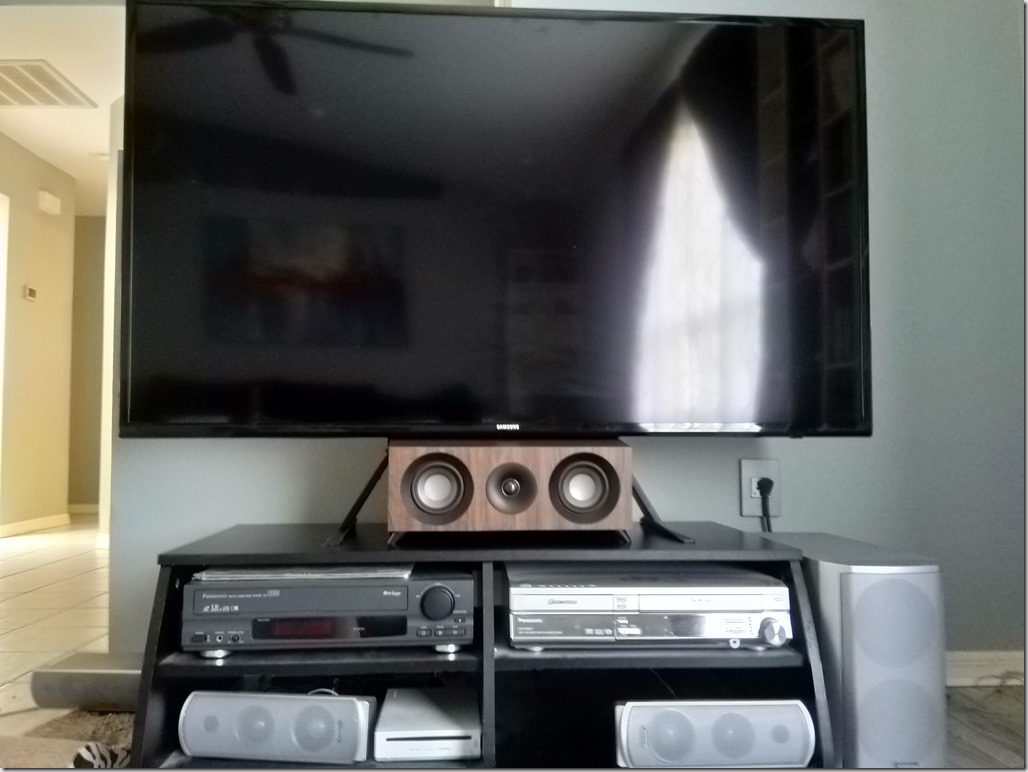
This is what I’m starting with:

IMG_20210612_094528

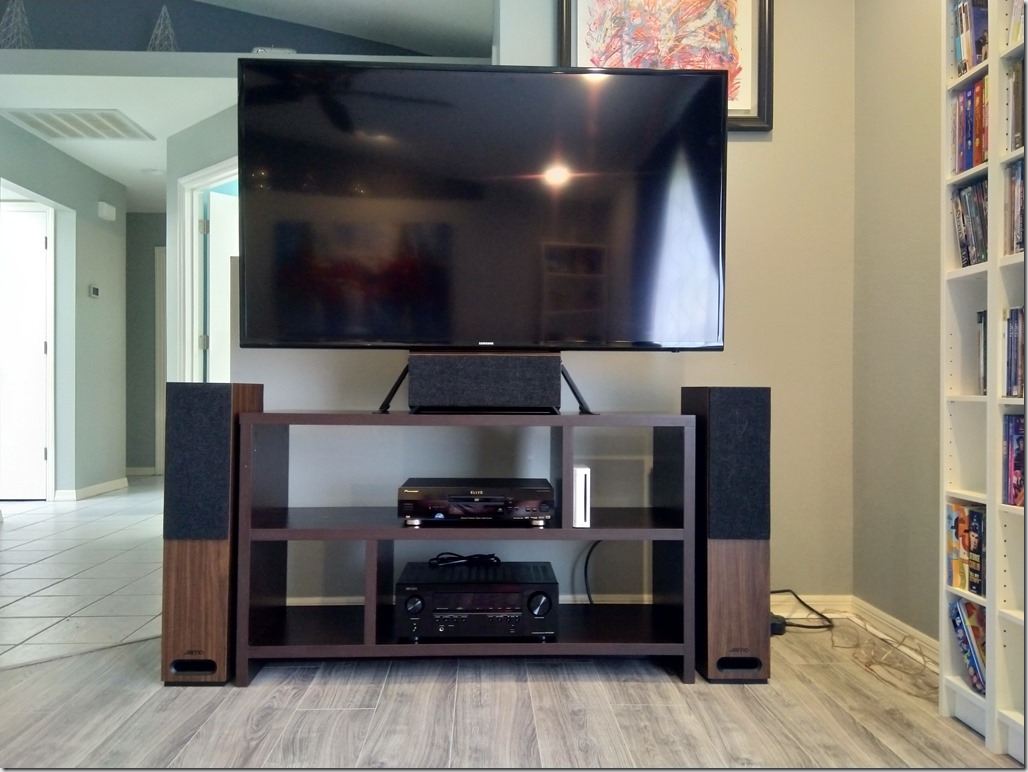
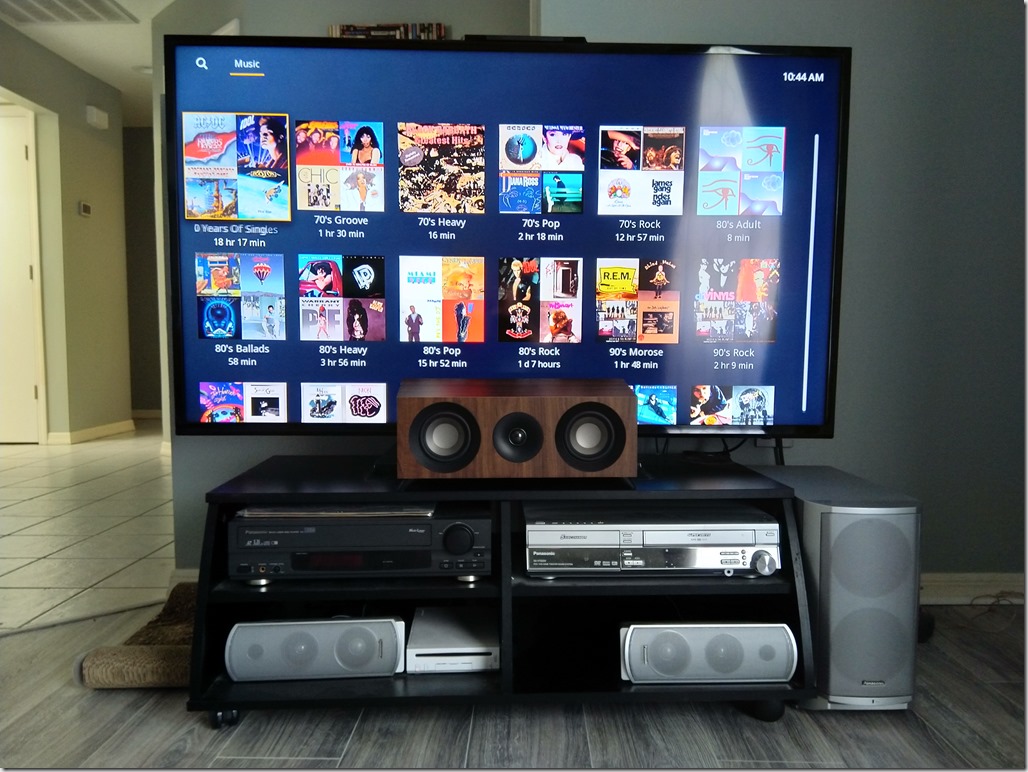
The plan is to replace the AV unit with actual tower speakers instead of little speakers.  This means I need to raise the TV to be higher than the speakers.  This is accomplished with the new planned TV cabinet.  However, the new speaker set has a center speaker that, when placed in front of the TV, blocks the screen.  I need to raise the TV even higher to compensate for the speaker.

IMG_20210612_104442

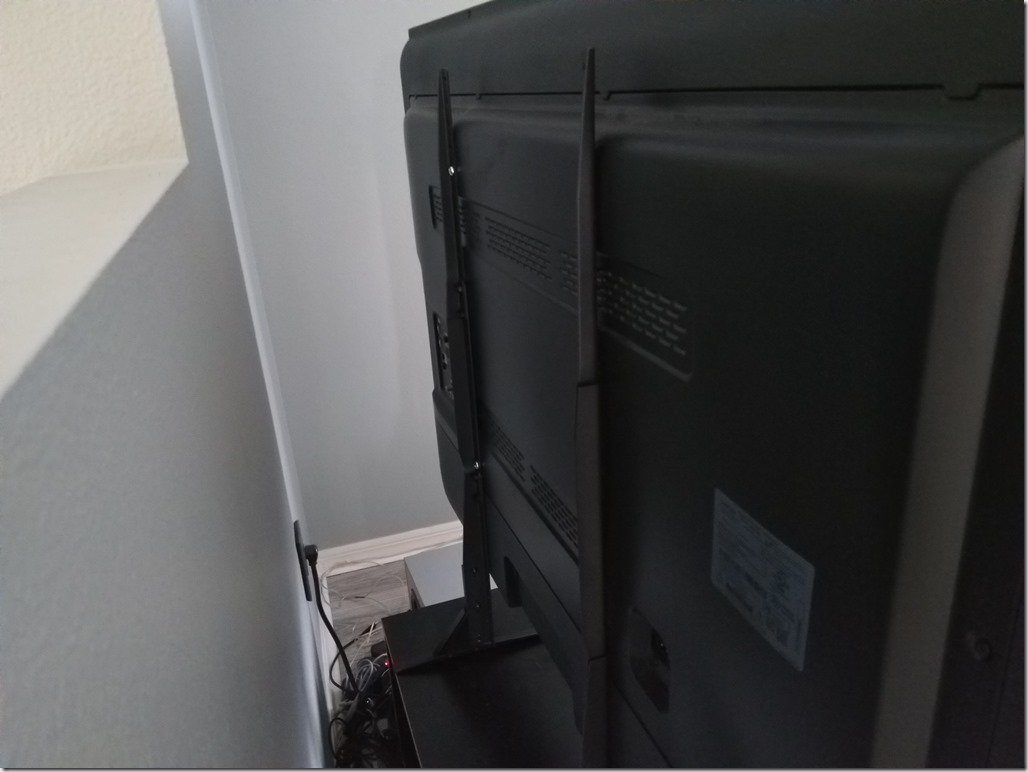
The problem with the TV is that the base is just a massive flat platform.  There’s no way to really raise it up or put something under it that’s going to be aesthetic or even functional.  In a moment of inspiration, I remembered the wall-mounting holes in the back of the TV and with a quick search, I discovered that you can buy replacement TV stands that utilize these mounting brackets.  And they’re cheap, too.

IMG_20210615_180033

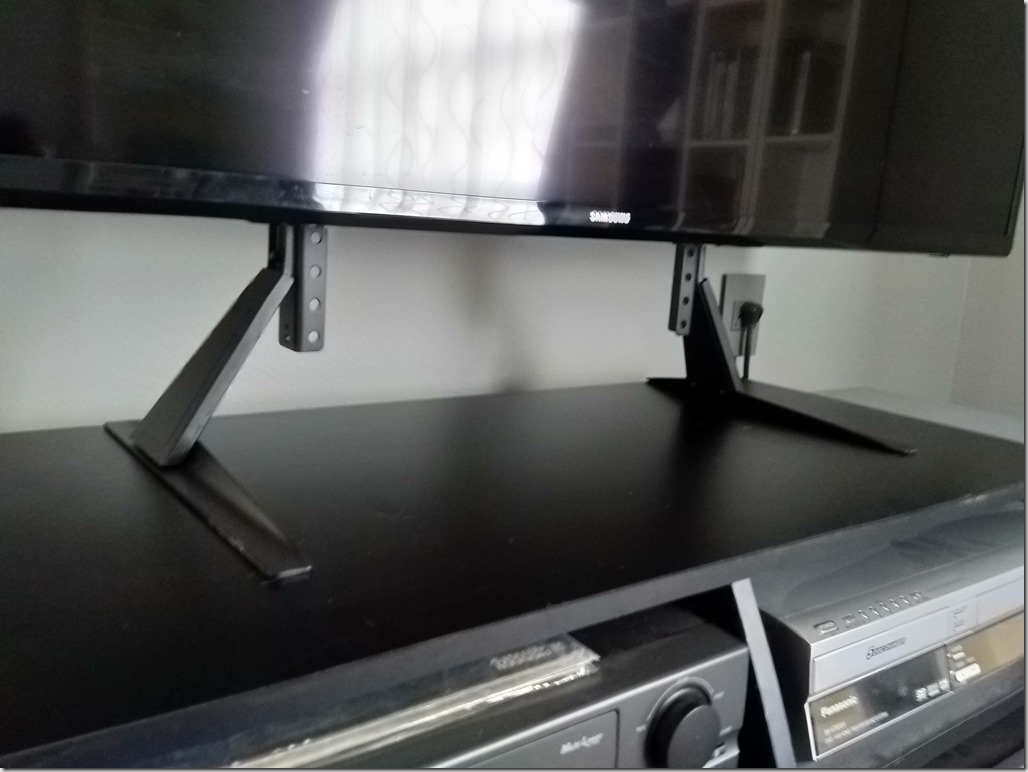
So I quickly bought a stand that was compatible with my TV size.  When it arrived, I assembled it with little problem, removed the TV’s base, and attached the new stand, which is really just a couple of legs.  Unfortunately, I did not do any measuring in advance, so while the stand did fit my TV, it did not provide any additional vertical clearance over what the original base provided.  The whole point was to elevate it over the center speaker.  So back online to order a bigger stand.  At least these things are cheap.

The new stand arrived and after assembly and installation, I found it was more than adequate to raise the TV over the speaker.  With a little experimentation, I found that it resulted in a perfect fit, where the TV would sit right at the speaker’s top.  So that step is now complete.

IMG_20210615_180012

IMG_20210615_175508

As far as the AV system goes, I have received the speakers (obviously, since I’ve been testing out the fitment) and I’ve also acquired the new receiver/amplifier.  I decided on the Denon AVR-S540BT because it had the most flexibility in connections and also 2 subwoofer outputs in case I wanted to have stereo subs.  Using a gift card earned from credit card rewards, it only cost me $70.  I can’t complain.

Reconsidered Living Room

Since most of my remodeling work is done now (next mid-range project is bathroom tile redo), I’ll have a small set of posts on my plans for the living room.

One of the more fulfilling projects was the completion of my music listening room.  There wasn’t much to it, just the purchase of equipment and a little furniture.  Well, the building of the CD shelving, also.  The room has been a great place to listen to music in excellent quality and I do it fairly regularly, whenever I purchase new CDs, to give each a fair listen in their entirety.

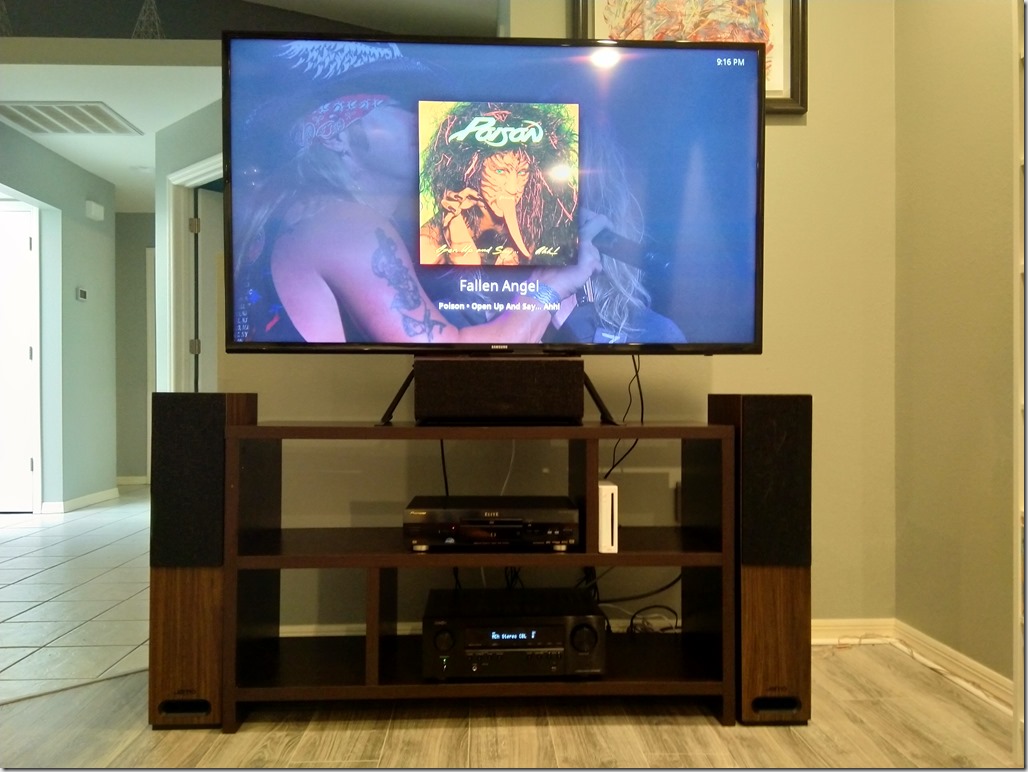
One day, while picking up some CDs, the store also had a season boxset of Futurama, and I picked that up as well.  I don’t watch a lot of TV at all.  Prior to having the listening room, I used to listen to music using Plex on my TV through my home theater system in the living room.  This was “wind-down time” each night and the cats would always happily accompany me, winding down their night before we all went to bed.

While I was working though the Futurama DVDs, I noticed that the cats were joining me and seemed very relaxed and happy.  This was something they did not do often in the music room.  For one, there is a cat tree in there, so if they’re in the room at all, they’re climbing and playing and not really chilling out.  So, I sort of got the idea in my head that “wind-down time” needs to come back, for everyone’s benefit.

The system on which I watch TV and listen to Plex is a Panasonic HT-in-a-box bought new in 2005.  A 5-disc DVD changer, 5 speakers and a subwoofer.  It plays sound, but I figure it’s geared more to movie playback than audio playback.  So I think I’m going to swap it out.  I have a spare high-quality DVD player that will play all the CD formats, the Pioneer Elite DV-47ai.  I just need a few other things.

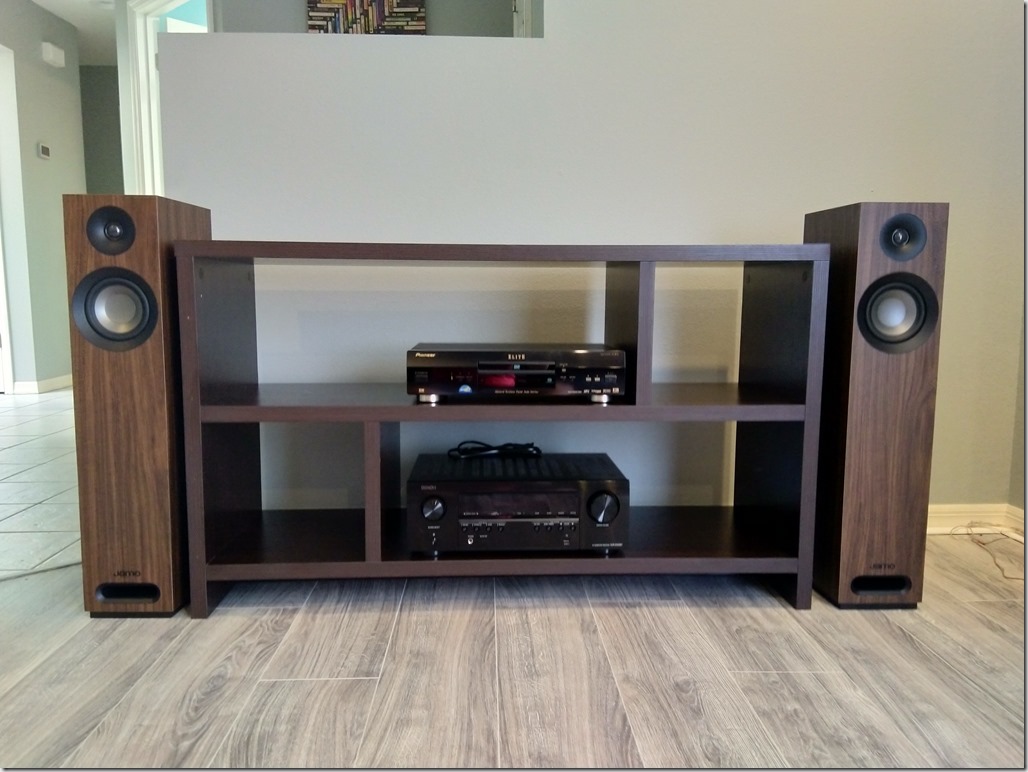
Speakers – on a quick online search, I see that Woot is selling a 5pc speaker set from Jamo.  Jamo is the maker of the subwoofers in my listening room and I have no complaints with them.  They’re pretty stylish, too.  The kit price is $50 more than buying just the tower speakers alone, so that’s not a bad deal.

image

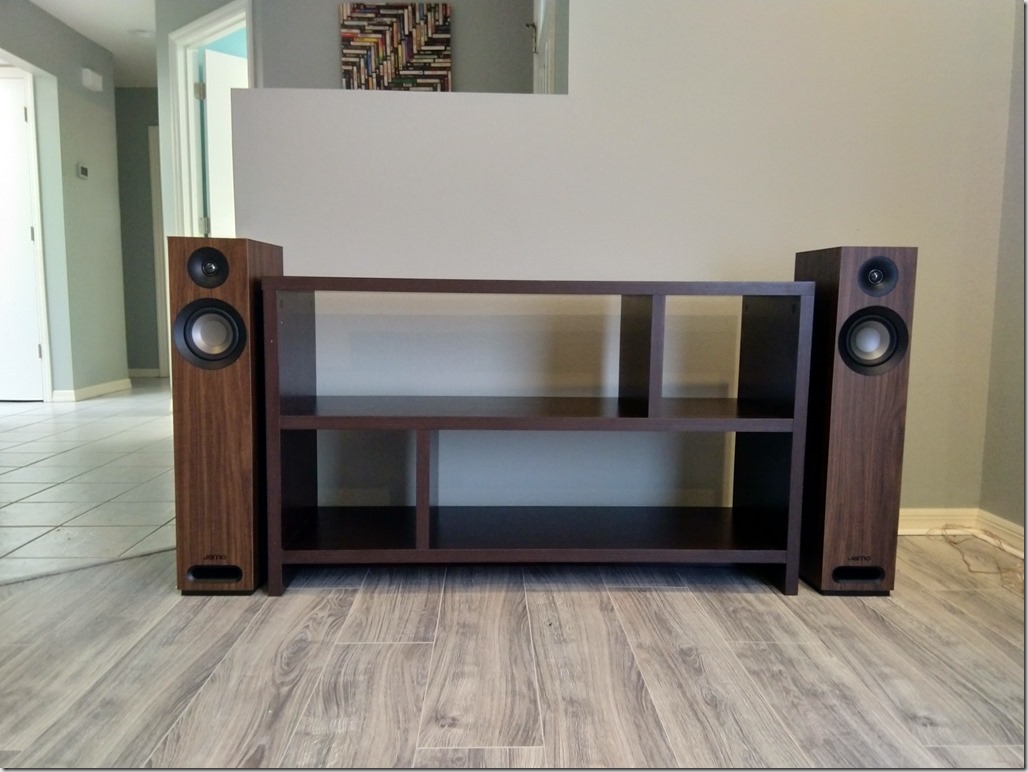
To fit the speakers and also to provide a better environment for the audio components, I’m going to have to replace the TV stand.  The one I have now is very low to the ground.  It’s always seemed a little too low.  I can get an Ikea stand that just about perfectly matches up with the height of speakers – the Besta.

image

Now, the receiver/amplifier.  I could get away with using one of the ones I already have, but there’s couple functional differences between how I want to operate in the living room vs. a listening room.  For one, I do want everything to be remote controlled, where I don’t really want that in my listening room.  So, I’m going to have to buy a new device.  And not only that, I’ll be working with more modern devices, like the Roku, so I’ll want HDMI connectivity.  Two of the front-runners are a Denon.and a Yamaha.

image

image

While the choice of receiver is still up in the air, I do know I’m going to use CC rewards to pay for the majority of it.  I can get a $250 gift card from Best Buy to offset the cost.  I can’t do it today, but soon.  Maybe in 2-3 months I’ll have enough points.  There’s a lot of considerations I have to make based on the inputs and outputs, more than a normal person would put into the purchase.

So this plan can’t be knocked out right away, but can be worked on in stages, and I’ve discovered that’s a really good thing for me.  In fact, the speakers are already purchased and are on the way.  They’ll sit in boxes for a couple of months, but it will be a good feeling to have them ready when I am ready.  The TV stand I can pick up this week and actually put it in place right away.  The receiver, like I said, is a couple months away, and that’s the final piece. Or is it?

A while ago, I extended the lifespan of my living room couch by changing its color with fabric paint.  To be completely honest, it was acceptable, but in no way was it durable.  Any section that took any amount of usage wore the paint right off.  I do have an extra can of paint I could add more layers and maybe make it more durable, but it’s not worth the effort.  I think it’s time to replace this couch.  I mean the couch is from 2005 as well.

And that might be 2 months of effort just to find the right one for me.  My standards are exceedingly high (which will be exceeded even further by the cost).  Obviously, I plan on making this the last couch I ever buy.  To be fair, I feel I’m at a point in my life where many of the things I do will be the last time I ever do them, if I do them right.

A quick search for leather couches returns hundreds of options.  That’s about as far as I can go at once.  It’s going to take many more attempts at dipping my foot into the pool to actually commit.  And then, I have to determine if the savings of buying online will be worth the risk of not passing a butt test.  My suspicion is that I will probably buy from a physical store for the additional reason that they may haul away the old couch.

Anyway, that’s the long-winded plan for the living room.  Details will be coming in future posts.
Guest Bed Improvements

This blog has been pretty quiet.  It doesn’t seem like there’s a lot I have been doing with the house.  I took on a small project today for something that was a small annoyance.

The guest bed, which used to be my primary bed for many years, is a simple Ikea frame.  At one point, the mattress was upgraded to a Tempurpedic and as part of that upgrade, the frame needed improvement.

Those memory foam mattresses don’t like to be on open slats.  There should be a solid platform for them to site on, or at least minimal space between the slats.  To solve that deficiency, I purchased additional slats from Ikea and doubled them up, making a solid base.  Problem solved.  Somewhat.

At some point, it began to be an issue where the slats would slide out of place and fall down.  At the time, this was resolved by placing a piece of old garden hose between the slats to hold them flush wit the outer frame and keep them from sliding.  Problem solved again.

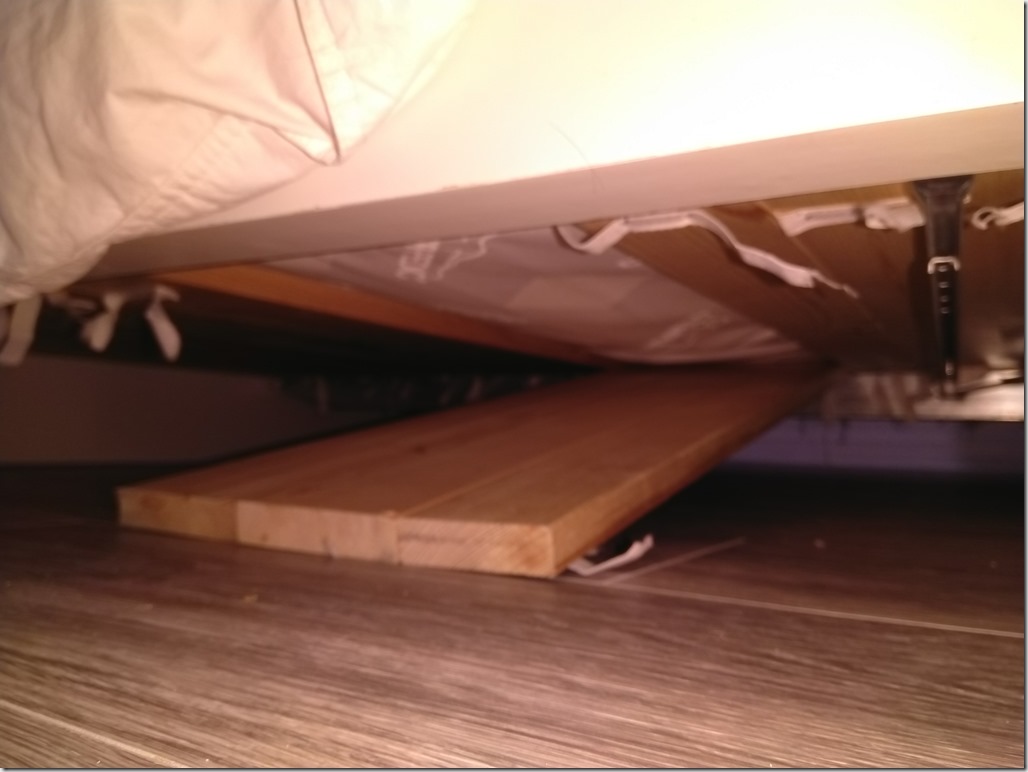
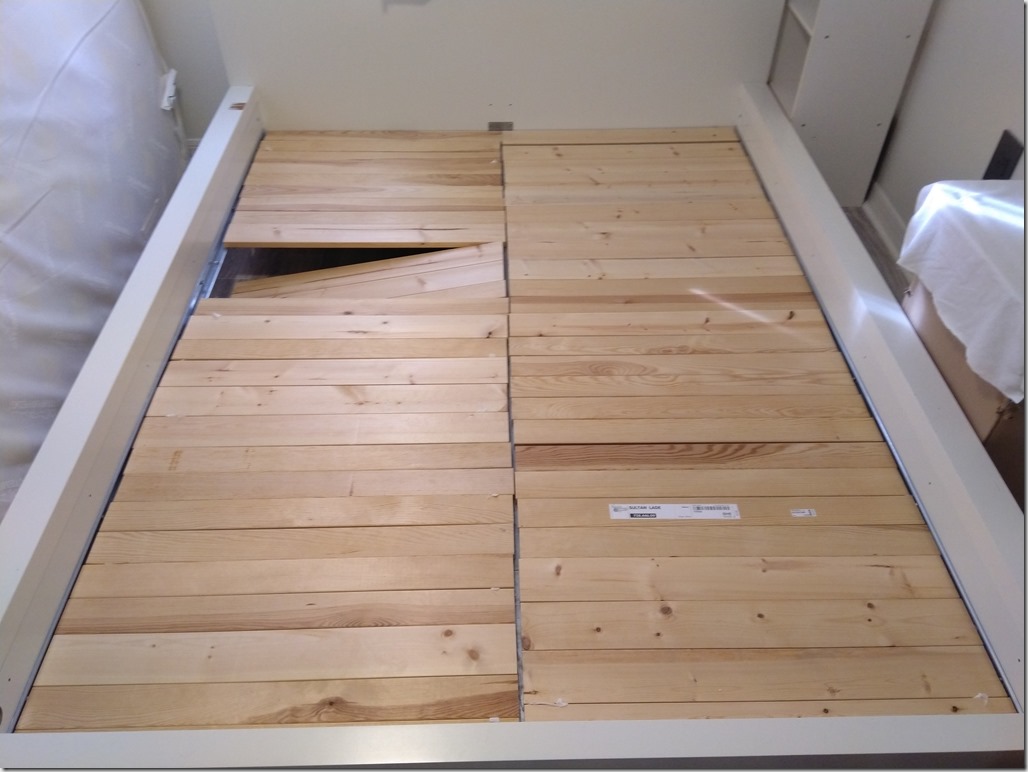
At some even later point, the bed was disassembled and moved around and the center hose piece was discarded.  At the time, it wasn’t a big deal because there was a nice new bed to use (with its own problems, fixed and documented here)..  But sometimes, I will use use the guest bed for napping and once in a blue moon, someone else may use the bed.  And in these instances, slats will fall.

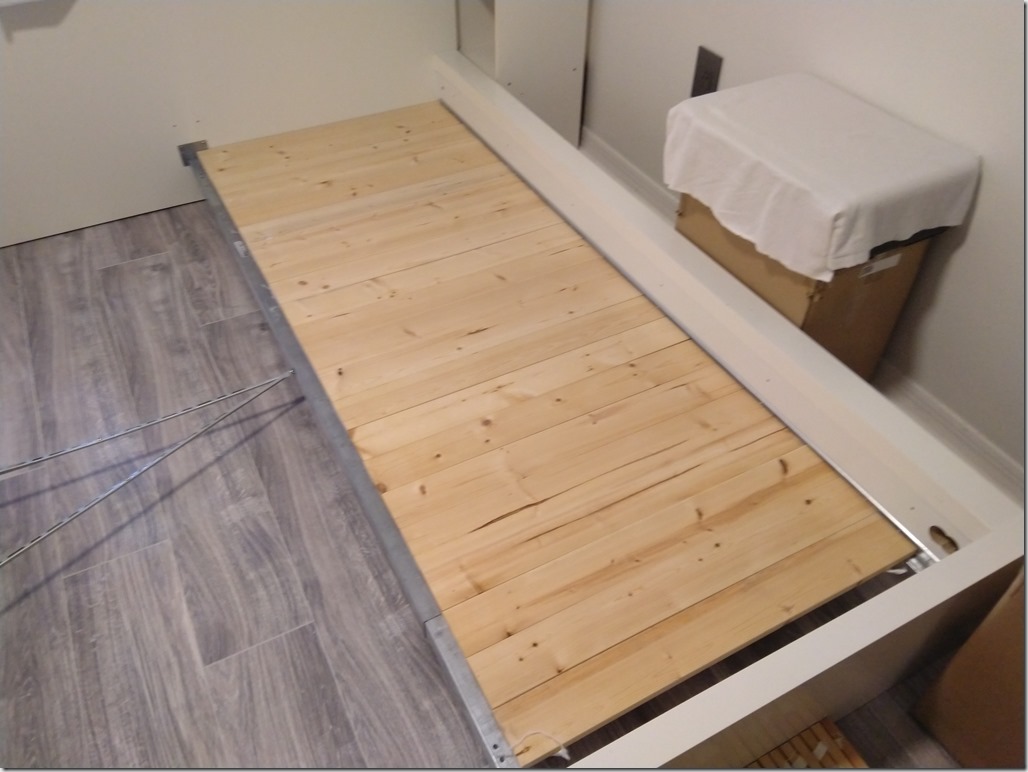
IMG_20201219_150354

IMG_20201219_150654

A few days ago, I set my mind to thinking about how I was going to fix the problem.  I didn’t have the hose anymore.  I didn’t want to buy a hose to replace it because that was a hack solution anyway.  The better solution would be to have a wood strip between the two slats to seal the gap.  But I didn’t have wood like that and the idea of me cutting a long thin strip of wood was sure to end in disappointment, especially when the gaps between the slats weren’t uniform.

IMG_20201219_150701

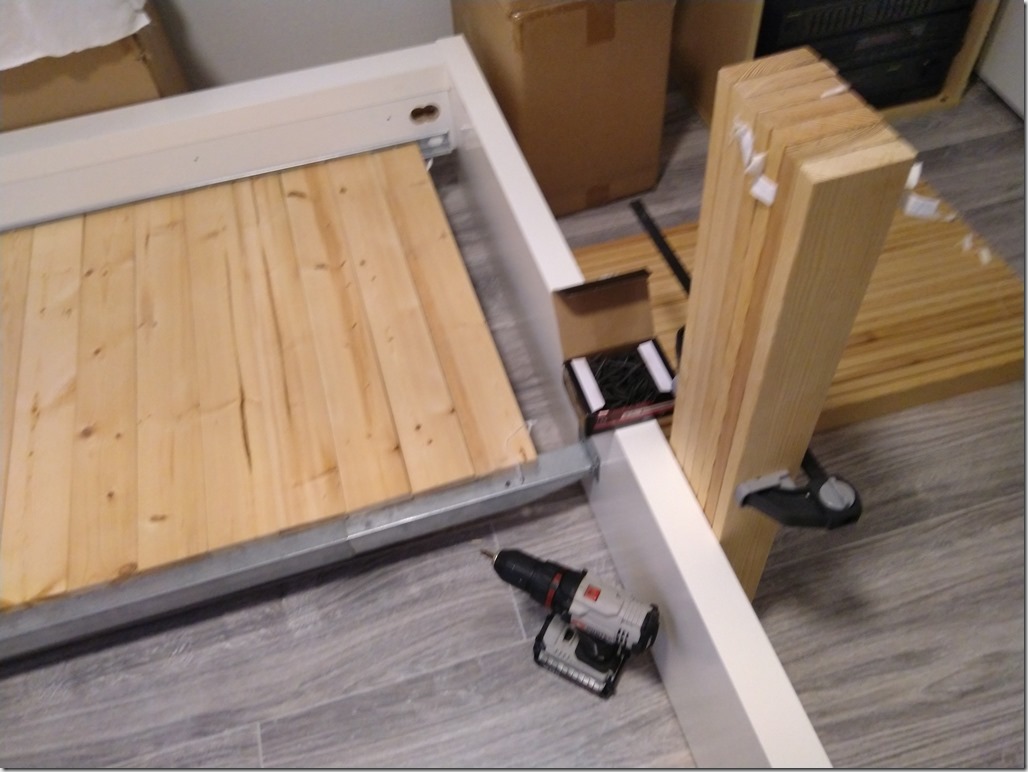
As I was disassembling the bed, I found I had two different versions of slats, each with different widths.  Additionally, I found some of the frame rail screws had worked a bit loose.  So I tightened up all the screws and put all the slats of one type on one side.

IMG_20201219_152324

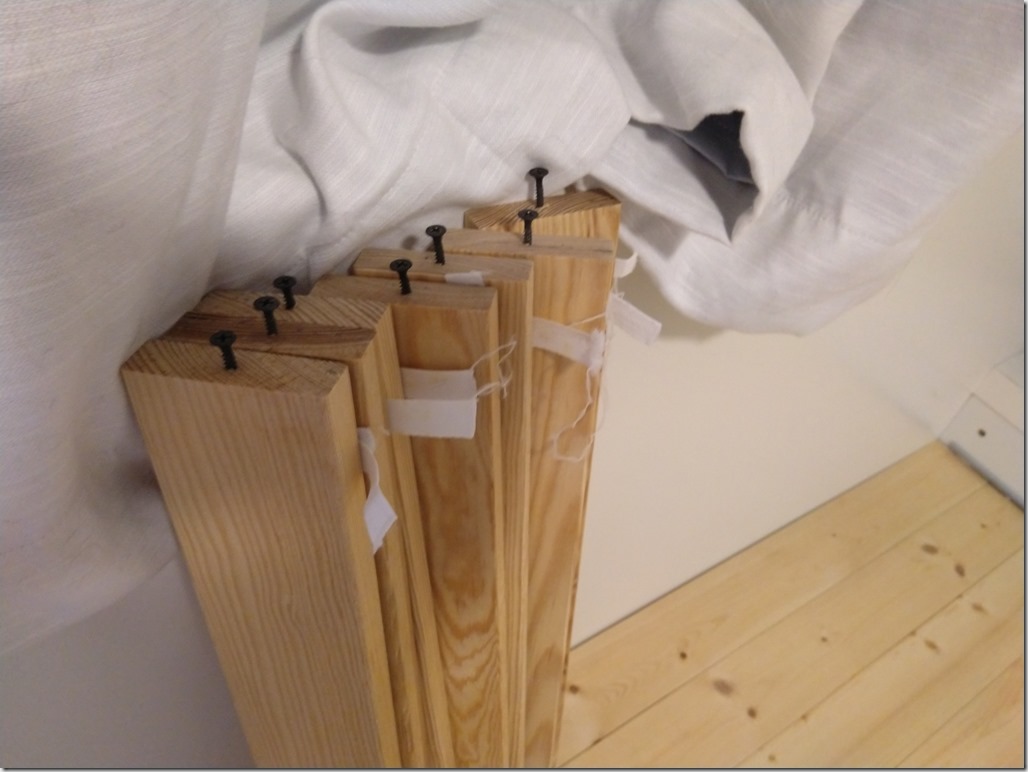
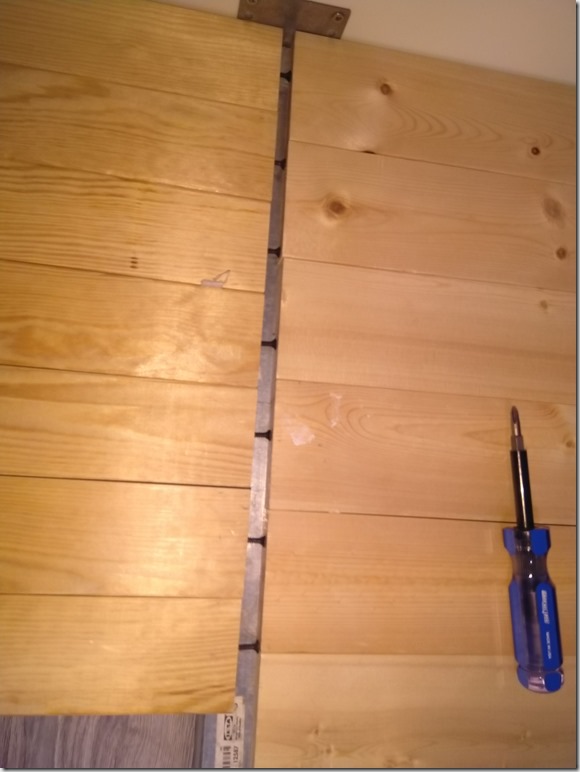
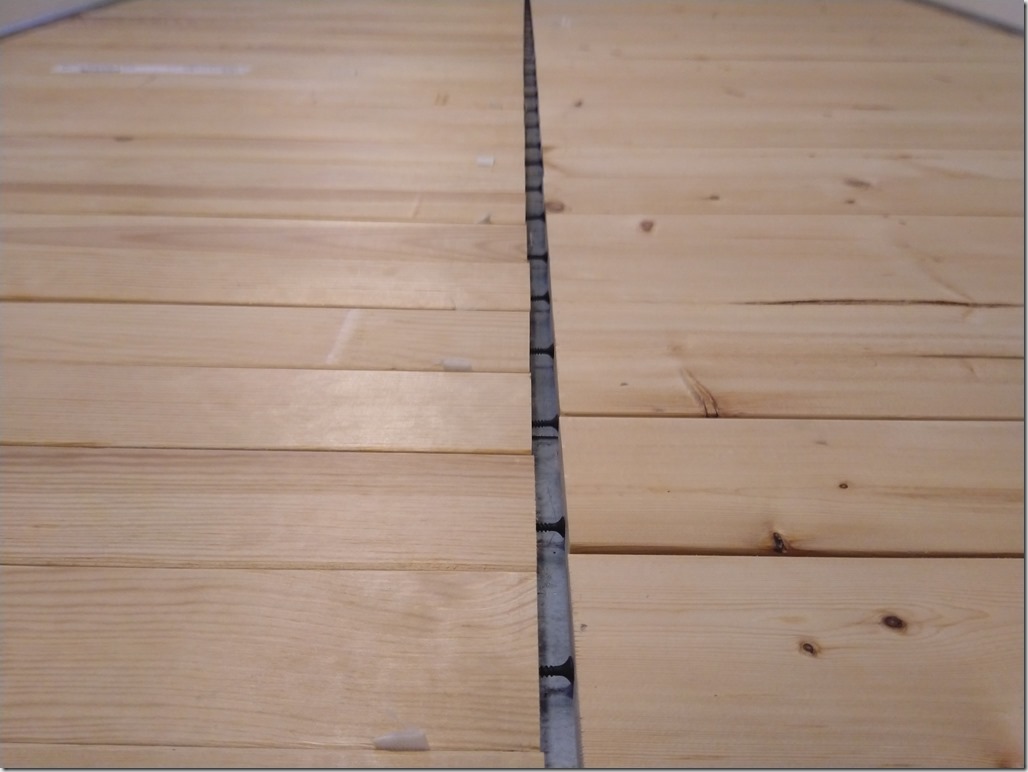
Then, my solution was to “extend” the other slats to fill in the gap between them and the other side.  The method I chose for this extension was: screws.  Cheap drywall screws, of which I had plenty sitting around.  I bundled up a bunch of slats, got some screws and a power driver and drove one screw in the the end of each slat.

IMG_20201219_152931

The screws effectively lengthened the slats by an adjustable amount.

IMG_20201219_153207

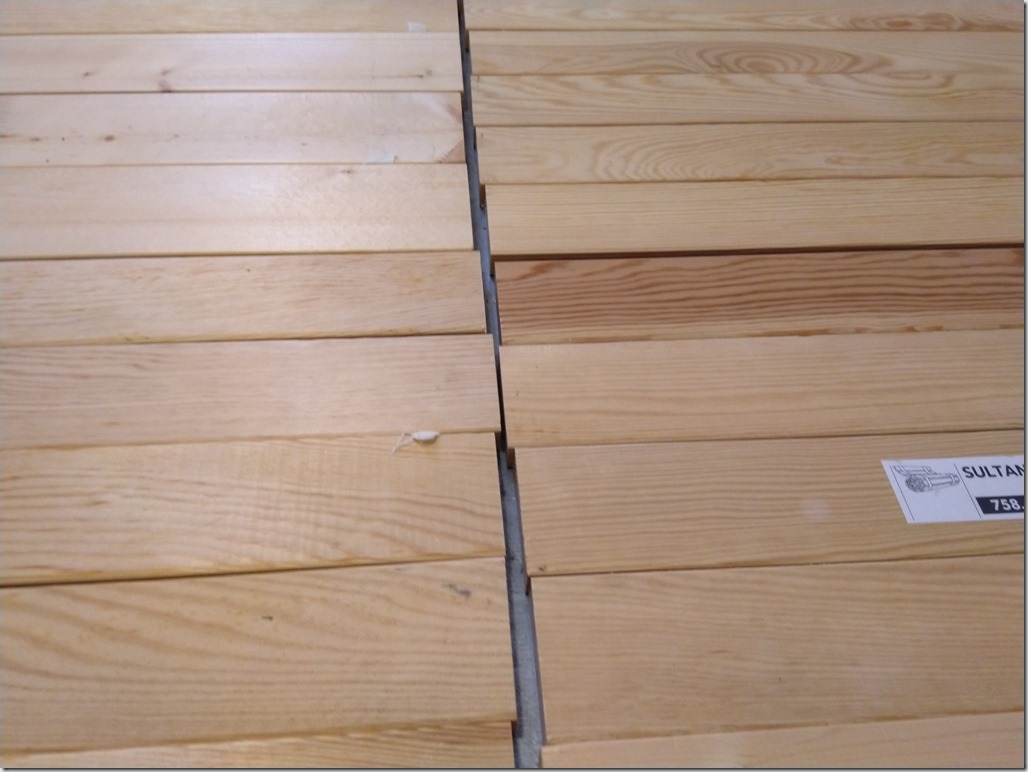
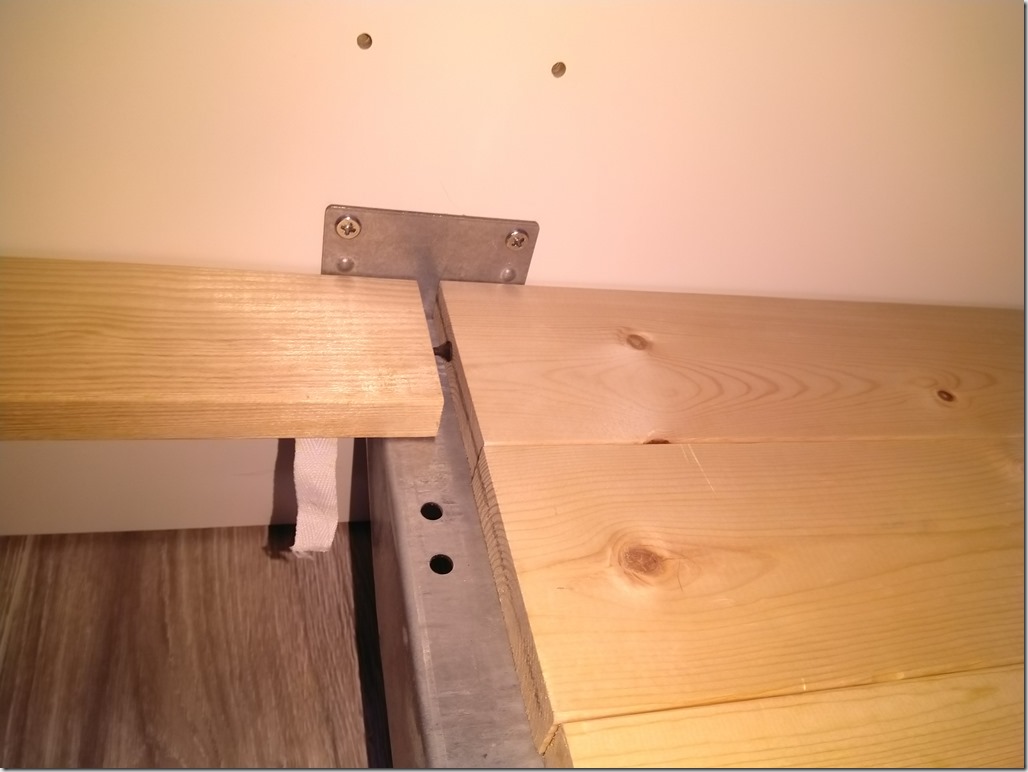
Further, each screw could be individually adjusted to compensate for any difference in gap width, which was caused when a frame screw jutted out too far from the rail.

IMG_20201219_153311

You can see the slight difference between some of the slats.  There was also a difference towards the center.  Apparently, the frame is bowing out wider in the middle from age and use.

IMG_20201219_153557

With all the slats in and adjusted to prevent any horizontal sliding, the bed is once again rock solid and all set for a nap.  Which is exactly what I did right away.

IMG_20201219_155128

The Numbers

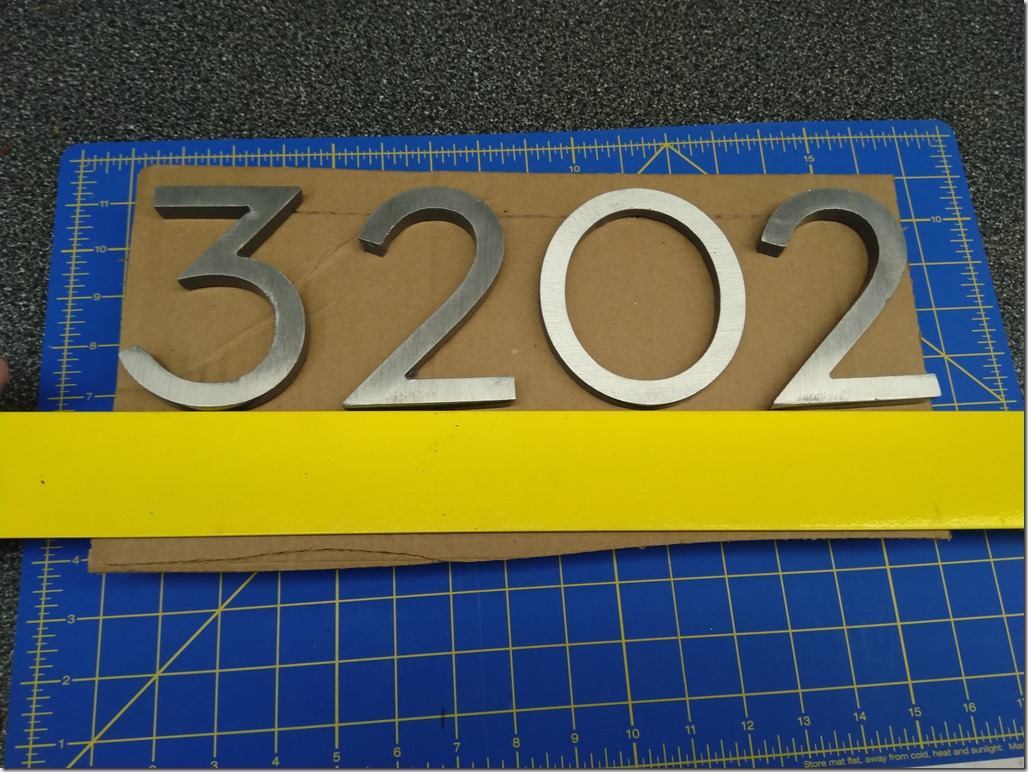
I’ve waited two months to get these house numbers.  And I have to say, I’m disappointed in the end result.  Not because of the product, but because of my installation.  I took so much care and preparation and still, it didn’t work out.

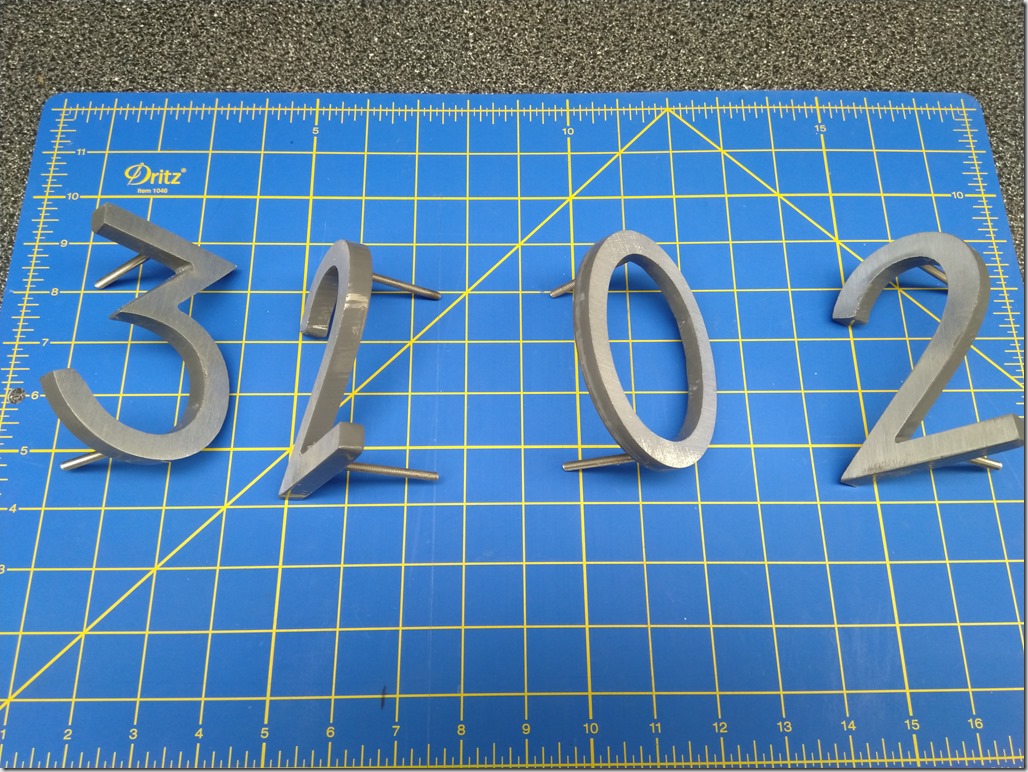
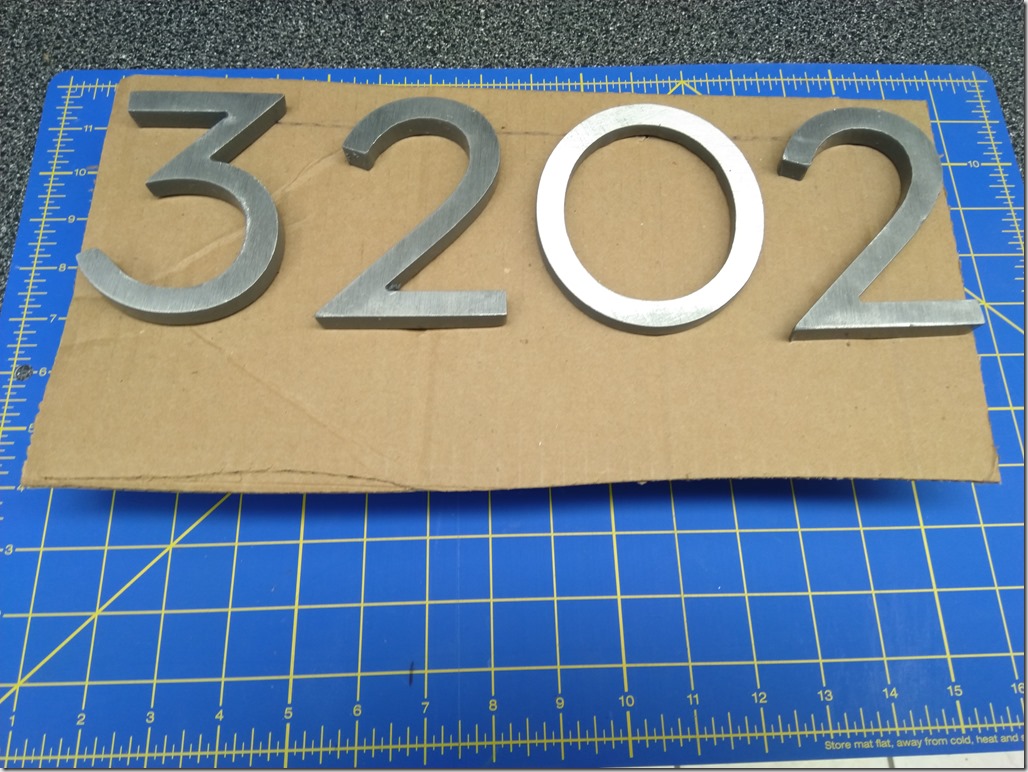
When I first got the numbers, I installed their posts and used a piece of cardboard to make a drilling hole template.  I pushed the numbers’ posts through the cardboard to identify the hole placement.

IMG_20200711_141948

IMG_20200711_142016

I even used a straight edge to ensure they were lined up.

IMG_20200711_142027

After a few adjustments, I had a template ready to go.  I taped it to the wall and drilled small pilot holes.  I did that because the masonry bit I had to use has no precision at all and I didn’t want the bit to slide and begin boring a hole off of my exact placement.

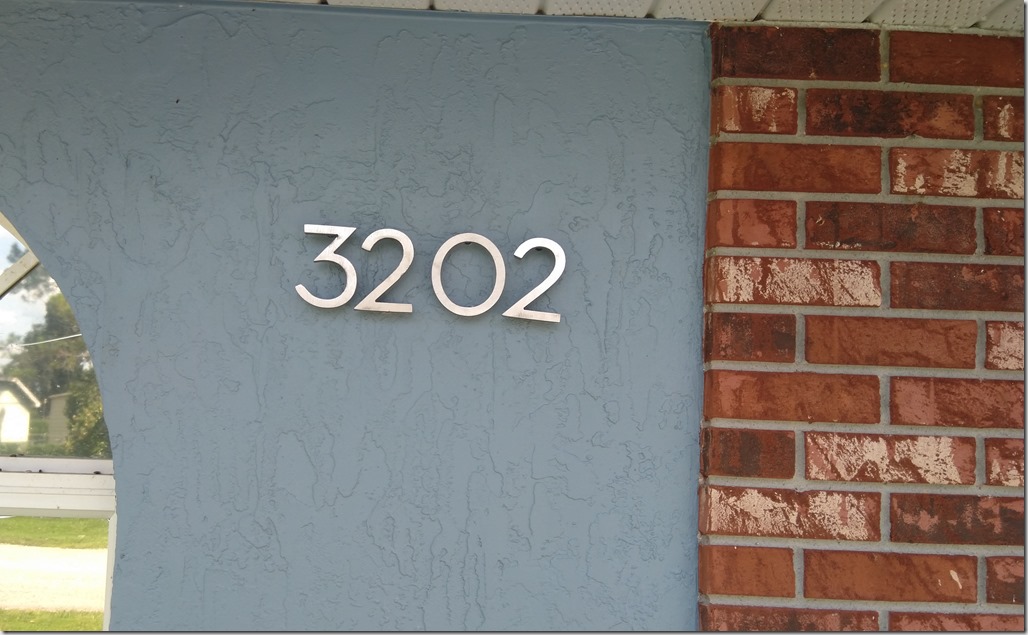
And despite my best efforts to accomplish that, that is exactly what happened.  And once you have multiple holes in the wall, there’s no adjustment you can make.  I actually didn’t see the end result until I had put in the last number.  And this is the end result:

IMG_20200714_160202

If that last 2’s lower post was only slightly more to the right, it would be perfect.  I’ll have to see if I can come up with a way to offset that post somehow.

In fact, now comparing the end result to the pictures of my template, there was a lot of variance in the placement of the first 2 as well.  I suppose maybe it will come down to pulling them all out, patching the holes, repainting the area, then repositioning them elsewhere.  To my credit, these numbers are only held in place with plastic anchors and no silicone sealant.  They are more than secure this way.

Not my finest work.

New Roof

And now, one of the biggest expenses in my house fixup.  The pool was probably the biggest, but this one is right up there.  It’s the replacement of the roof.  I eventually settled on a quote for $9600 from the same contractor that has been doing my other work.

The roof was last replaced in 2005, right after the rash of hurricanes.  Things have changed in those 15 years.  I got dropped from one insurance carrier because of the age of my roof.  Not specifically because of the age, but because of the age and the fact the roof is 3-tab shingles.  No one uses 3-tag shingles anymore.  Everything is now Architectural shingles.

The workers showed up around 8 in the morning and immediately got to work.  I was not prepared for how loud the whole removal process would be.  Then rain was threatening in the area, but the foreman explained that as long as they got the moisture barrier in place, things would be fine.  There were some rotted panels and other wood that needed replaced.  Who would have figured?  I didn’t know.

There were storms around and when i went to lunch, there were showers just  little ways down the road.  In my area, that means nothing though.  When I got back from lunch, there hadn’t been any rain at the house and the foreman told me they were finishing up the “dry-in” barrier and after that, it didn’t matter if it rained or not.  The crew worked late, almost 12 hours, and they got quite a bit done.

IMG_20200709_190915

The next morning they came back and finished up with more noise. 

After it was all done, how was the result?  Well, most noticeably, the attic doesn’t pop anymore at night when it’s cooling down.  That must be a telling sign that there is less heat buildup.  I did climb up on the roof a couple days after and put my face near one of the new vents.  I could feel the hot attic air streaming out of it.  I gained two additional vents on my roof, so there must be some benefit to that as well.  The vents are a different design and they seem like they’re designed to not allow storm wind and rain to blow into the vent – important for hurricane country.

So, with the thicker tiles, the modern, improved barriers, the additional vents, and the light color tile, this must all be adding up to a much cooler house.  Time will tell if my electric bill goes down.  I recently changed the standard house temp from 72 to 75, so that will also help things.

This is the one last major item to be fixed to make the house reasonably marketable, should it come to that.

Wiring – Exploration 2

The attempts to succeed at wiring drop #1 have not been going well.  I took some time to try and remove a can light from the ceiling so I could hopefully access the pole from above.  Those attempts were futile.  I could not figure out how to get the light trim down.

As I was considering buying some firmer fishing poles, so I could push the pole up through the the insulation batt, I realized, I had a really firm pole already – the 10′ drill bit.  And it’s been up there already once.  So my next attempt to get anything up there will be using the drill bit as a push pole.

In the meantime, I figured maybe I would try and see how difficult it would be to pull the other run in the back bedroom.  The general plan was to cut a hole in the wall, push the drill bit up and drill through the header, then push the rod up into the attic and see if I could find it.

After cutting the opening, I found that I didn’t even have enough depth available to install the outlet plate, I had to trim it down with the Dremel.  Once the ring was mounted to protect the drywall, I pushed the pole up the wall with the camera attached.  Surprisingly, it seemed like I made it into the attic unobstructed.  Yup, according to my tape marking on the pole, 8 inches past the ceiling. So… I never needed a drill bit, for either run?  I could have used the money for stiffer poles for run #1.  Unless… the pole was bending behind the wall, but it didn’t  appear to be from the video.

Anyway, that seems promising, but the real test will be when I get in the attic and see if I can find the pole.  The plan is to push the drill bit up #1 and the fiberglass pole up #2, each with pull cords.  I’ll grab what I can then.

Insurance

Boy, this year is going to be a lot of fun for insurance.  It was early in the year when I got a notice from my loan servicer that they got a cancellation notice on my insurance policy.  Of course, I was like, what the hell?  I logged on the insurance company’s portal and saw I had a notification that they were cancelling my insurance, like soon.

I don’t remember what made me search, but I did and found a news article that the insurance company was just eliminating entire territories from its coverage area.  As it turned out, I was in one.being eliminated.  The news story that informed me of this actually gave me more information than the insurance company did.  It additionally explained that there was another insurance company that was willing to pick up the remainder of any policies being cancelled early, of which I was one.  That gave me a few months to breathe and figure out what to do.

As the weeks went on, I did get confirmation and more information from the old and the new insurance company.  I would be covered until the end of my policy term, but the new company would not be renewing the policy.  So, as the policy end date closed in, my insurance agency started contacting me more and more frequently and urgently to find a new insurer.

I got two quotes for a new policy and made my choice.  I paid in full and sent the documentation proof to my loan company.  Ok, I’m good for the year.  Well, no.  Less than a month into my new policy, I get two letters in the mail from the new insurer.  The first is a notice of policy cancellation.  The second is a confirmation of policy cancellation.  The policy is going to be cancelled at the end of the month, less than 3 weeks away.  Again, what the hell?

The reason given for the cancellation is my roof.  It appears the agent submitted my information with the wrong shingle type and when they found out what it really is, they determined the age of the roof is too old for them to insure.  So, goodbye.

So, now, I am wondering if the other quote I got, which will be my fallback for now, is even valid if that was submitted with the wrong shingle type.  If it is, I might be looking at getting a re-roofing done ASAP to qualify for any insurance.  I guess I should start getting quotes for roofing.

The Septic System

One thing that’s been on my list for a very long time has been to have the septic tank checked out.  I don’t know anything about it – where it is, how big it is, what its condition is.  I’ve owned the house for 15 years and never done anything with it.  The old owner did an enzyme treatment on it, but never said anything about pumping it out or having service done on it.  Obviously, the best time to have this stuff checked out is when there isn’t a problem, so, I guess the time is right.

I called a nearby place and ended up in voicemail.  I left a message and never got a call back.  Oh well.  I called another place and got on their schedule for te next week.  The tech showed up on schedule and without any formalities, just started into the work.

The first step was to locate the tank.  He had a probing rod he stuck in the ground at various places and found the borders of teh tank quickly.  I guess when this is your life you know all about these things.  So he knew just where to dig to uncover the lid.  He went back to the truck and got a pry bar to lift the lid off and pop, we had an open tank.

The first thing I noticed is that it didn’t stink.  I expected the most foul smell imaginable out of a septic tank, but that’s not the case.  The tech’s quick evaluation is that things are actually really good.  The water level is correct, meaning the drain field is working well, and there’s no buildup of solids, so whatever enzymes are in the system are doing their job just fine.

So with that $150 quick check complete, I just started getting random information.  I learned the boundaries of the tank so I determined I could get a truck onto the property as long as it stuck close to the fence.  The drain field probably extended to the end of the pool patio and there was a small concern about the neighbors tree roots eventually causing issues with it.  The septic tank is concrete, so there’s not going to be any root penetration there.  The tank is 1050 gallons, which is pretty standard for a house of this size.  If the house was smaller, it would likely be a 950 gal, and if bigger, or if a 1050 gal isn’t available at build time, sometimes a 1500 gal is installed.  The area of the tank is about the size of the MX-5.

He estimated that I could go a couple more years before needing any pump out service and shared a bunch of stories about people who have had critical situations with their systems.  We talked about enzymes and he pointed out the enzymes actually working in the tank right there.  They move and everything.  Fascinating and gross.  Before the days of Rid-X and active enzymes, he said the company’s founder used to throw roadkill into his tank to generate the bacteria for breaking down the waste.  Another customer who had a fresh pumpout christened her tank by throwing a whole supermarket chicken in the tank.

As far as enzyme treatments go, I guess they’re legit.  I never thought they were effective, but I’ve seen them in action now.  On top of my disbelief of their effectiveness, my understanding of their application was off as well.  It’s not a one-time application, or even a yearly thing.  You’re supposed to add them once a month.  And maybe my situation is different being alone in the house vs having 4-5-6 people in the house.

So, that was a good peace-of-mind expense to know I’m not going to have any shitty emergencies for a while.  As long as I don’t drain grease into the sink (guilty), flush wipes (nope), or use powdered detergent (nope), I should be plenty safe and the tank should outlive me.  Most likely, I’ll end up pumping it out as a pre-sale list item.

Wiring Project – Attempt 2

In the last post, I said I was going to go and fish that wire “tomorrow”, Sunday.  That didn’t happen.  It waited until Wednesday after work, when a rain shower was coming in.  It seemed like that would make it cool enough.

Step 1: Push the pole and camera and pull cord up the wall.  No big deal.  Step 2, dress up and gather everything I may want up there.  Jeans, long sleeve shirt, head covering, mouth covering, magnet tip for poles, kayak paddles, phone for camera and in case of emergency.  Wouldn’t that be fun.  Hi, 911?  I’m injured and in my attic.

Let’s go, then.

Up the attic with my supplies.  This is path I’ve taken enough to hate.  Ok, crawl under here.

IMG_20200603_172400

Then turn right and head to the end down there.

IMG_20200603_172551

Then turn left and go down there.  On your stomach.

IMG_20200603_172747

Don’t mind the broken and rotting beams.  We’ll see if that needs attention later.

IMG_20200603_172859  IMG_20200603_174256

Once next to the vent, which is my guide point, I assembled the kayak paddle and sent it down to move the insulation.  Once I got working it, I discovered something terrible.  It wasn’t blown insulation stuffed down there.  It was a batt, kind of like a big solid pillow of fiberglass.  So it had to be moved as a whole unit.  And pushing it around at the end of a 7ft pole was not doing it.

I worked at the insulation for probably about 15 minutes, exhausting myself.  The best I could accomplish was compressing it down, but I still couldn’t see the tip of the pole coming up from below.  And if the tip of the pole is stuck in the batt, there’s no way any magnet is going to pull a tiny metal ring through that.

I left the kayak pole up there, and the extra fiberglass poles stayed up there, too.  If I never get back to this, the next homeowner is going to be mightily confused.

What’s the next option?  Well, to get more aggressive, the next thing I could attempt is pulling down the canister light near where I am working and try to reach in that way.  Maybe I can move the batt some from there?  The problem is, I don’t know how to remove the can lights.  Theoretically, I do, but I don’t know for sure how they are fastened up there.

Rest and regroup.  There’s no rush on this.